...
| Multiexcerpt | ||
|---|---|---|
| ||
|
This guide will show you how to:
- Enable enable Ribbon Maintenance on your BPD siteAssign
- maintain Ribbon Flags, including creating and uploading your own
- assign a Ribbon to a ProductUpload your own Ribbon image.
Step-by-step guides
1.
...
Enable Ribbon
...
Flag maintenance
Ribbon flags are a feature added over a product image. To maintain and add ribbon flags, Product Maintenance must be enabled.
- In the CMS, navigate to Settings → Feature Management → Product Maintenance.
- Toggle on Product Maintenance, then click Configure.
- In the 'Product Maintenance Settings' screen, scroll down 'Feature Options' and tick Enable Maintenance of Ribbon Flag' is ticked.
Verify that the
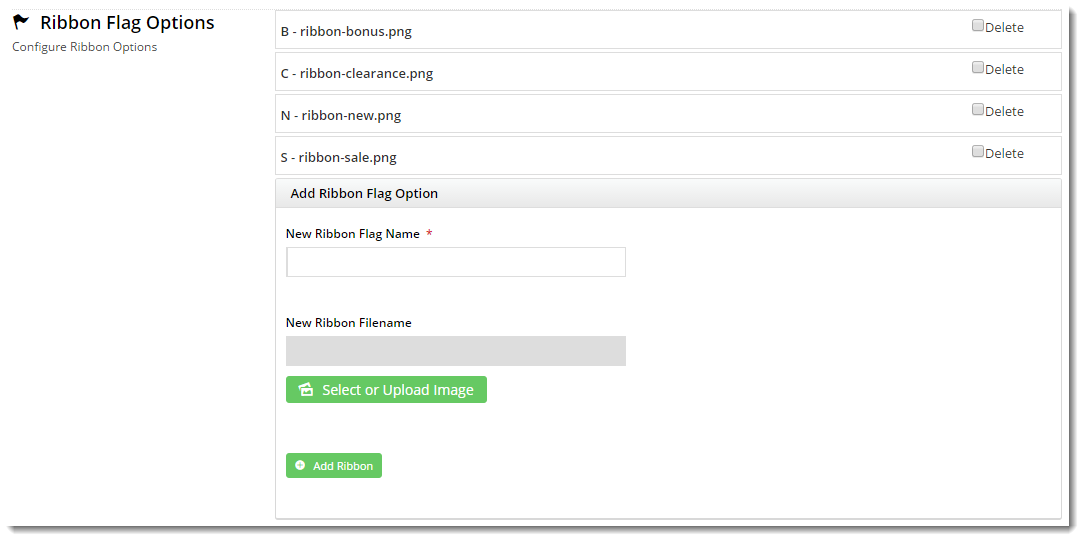
The Ribbon Flag Options section now appears on in the pagescreen, with the default BPD ribbons loaded.
Click 'Save'.
...
- To save your settings, click Save or Save & Exit. If you want to maintain ribbon flags, proceed to Step 2.
2. Maintain Ribbon Flags
Once the Ribbon Flag feature is enabled, you can add and delete the set of flags available for selection when maintaining individual products in Product Maintenance.
| Tip | ||||||||||||
|---|---|---|---|---|---|---|---|---|---|---|---|---|
| ||||||||||||
Any custom ribbon flags you want to add need to have been created first. The following sample ribbon image (*.psd) and font can be downloaded to ensure your ribbon flags have a consistent look-and-feel with BPD ones:
|
To add a ribbon flag,
- Go to the Add Ribbon Flag Option section.
- In New Ribbon Flag Name, enter a meaningful name for the new Ribbon Flag.
- In New Ribbon Alt Description, enter a meaningful description for the flag.
- In New Ribbon Filename, click Select or Upload Image.
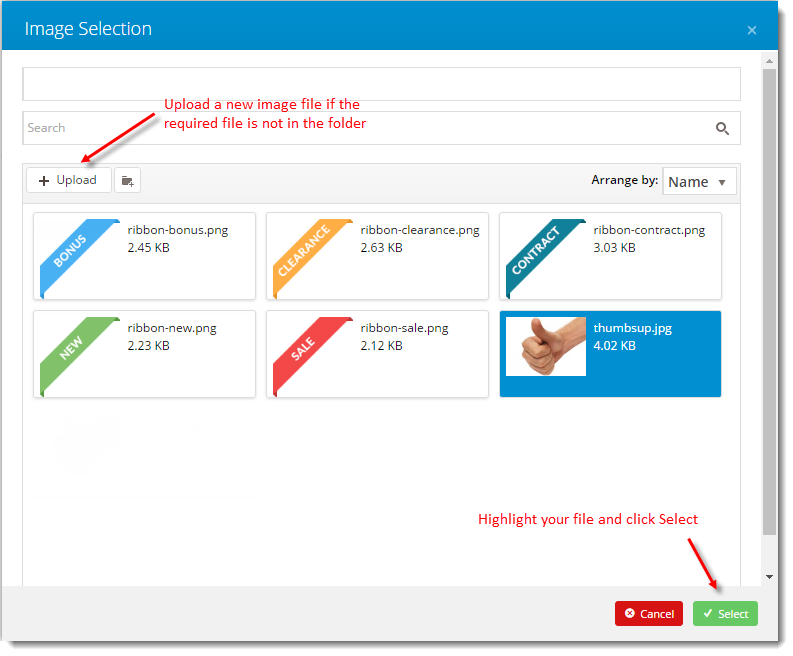
- Click Upload to add a new image from your device.
- Click Insert to complete the upload. The selected ribbon image and file name are now displayed.
- Remember to click Save at the top of the page to save your newly added ribbon.
The new ribbon will now appear in the Product Maintenance screen, ready to assign to product images.
| Tip | ||
|---|---|---|
| ||
To delete a ribbon flag, just tick Delete next to the flag. When you next click 'Save', it will be removed. |
3. Assign a Ribbon to a Product
- In the CMS, navigate to Products & Categories --> → Product Maintenance.
- Search for the required product and click 'Edit'.
- In the Product Information section, locate the Ribbon Flag dropdown selector.
- Select the required ribbon for the product.
- Set a Ribbon Expiry Date, if required. On this date, the ribbon will be cleared from the product. (from version 3.84+)
- Click 'Save'.
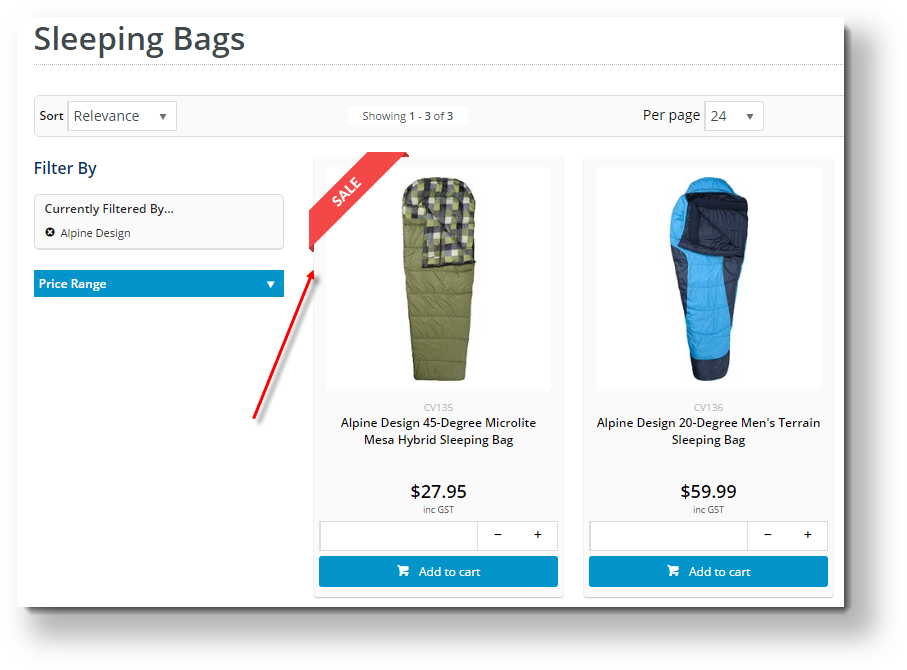
- View the product on your website in another browser (or incognito window) to verify the ribbon appears correctly.
3. To Upload a New Ribbon image:
- In the CMS, navigate to Settings --> Feature Management.
- Configure the Online Product Maintenance feature.
- In the Ribbon Flag Options section, enter a name for the new Ribbon.
- Click 'Select or Upload Image'.
- Select the required image file from the folder, or click '+Upload' to add a new one.
- Highlight the required file and click 'Select'.
- The selected ribbon image should now be displayed, along with the name you entered.
- Click the 'Add Ribbon' button.
- The new ribbon should appear in the list, with the ribbon name and image file name displayed.
- Click 'Save' at the top of the page to save your newly added ribbon.
...
Additional Information
| Multiexcerpt | ||
|---|---|---|
| ||
-- |
...


