...
| Multiexcerpt |
|---|
| MultiExcerptName | Feature Overview |
|---|
|
| Excerpt |
|---|
Product Compare functionality gives your customers the ability to compare the features of every product on your website. The user selects up to 3 products to be compared, and the features are presented side-by-side in a pop-up popup window. The user can add the products to their cart here here (assuming the product is available for purchase), or they can close the window and browse for further products further products to compare. |
|
The comparison data is drawn from metadata (stored online or in the ERP), as well as any product features maintained in the CMS.
...
To Enable Product Compare:
- Login to In the CMS.Navigate , navigate to Content → Theme Layout.
- Scroll to 'Zone: Content After' and and click 'Add Widget'.
- Search for 'Product Compare' and and click 'Add'.
Click '
- Click Edit' on the widget to configure options. Tick the options you wish to display in the comparison window*.
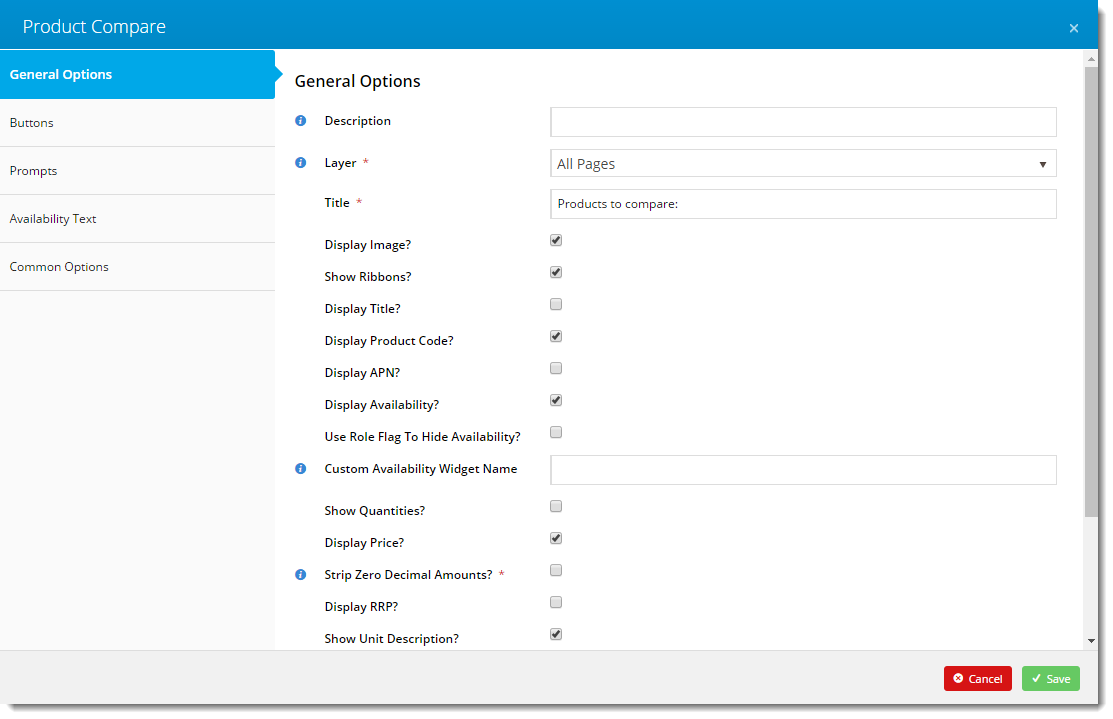
- Click 'Save' to exit and Click Save save changes and exit.
- Navigate to Content → Standard Pages.
- Select the Product List Item Zoned template.
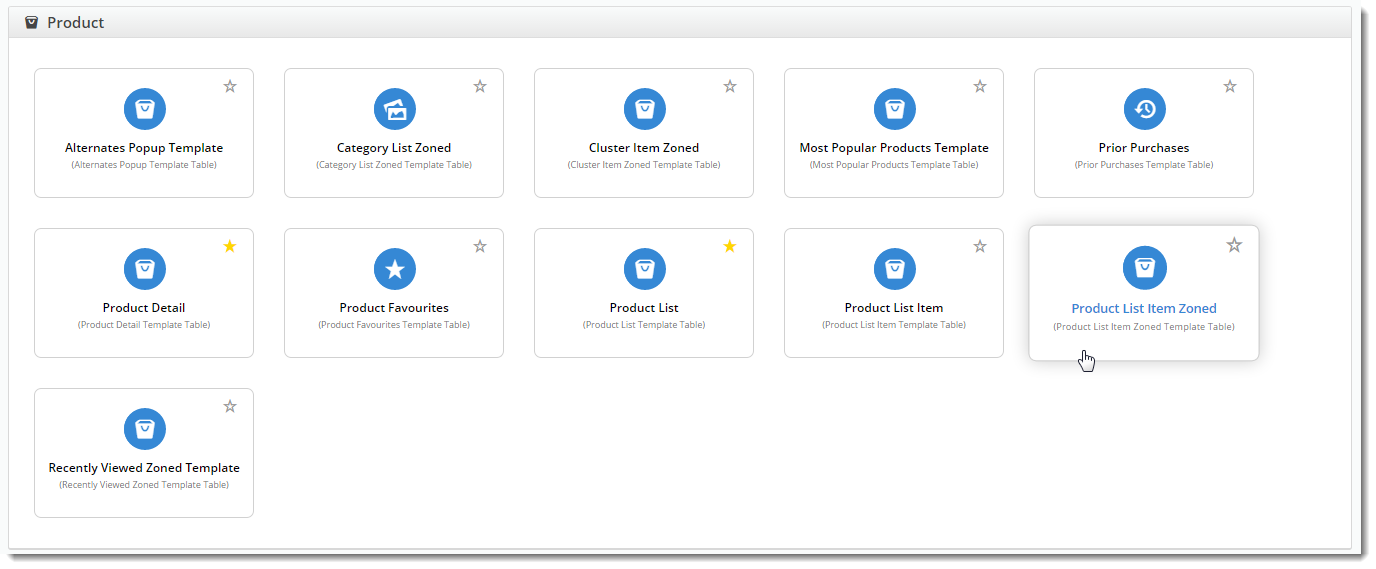
- Scroll to 'Zone Footer' and and click 'Add Widget'.
- Search for 'Product List Compare' and and click 'Add'.

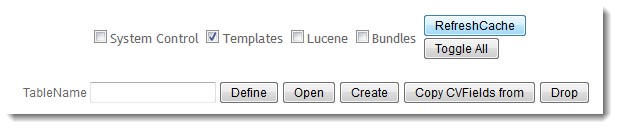
- Refresh the Template cache by navigating to the site's Dictionary (Dictionary.aspx).
- Tick the 'Templates' option option and click 'Refresh Cache'.
The Product Compare feature is now enabled on the website.
| Tip |
|---|
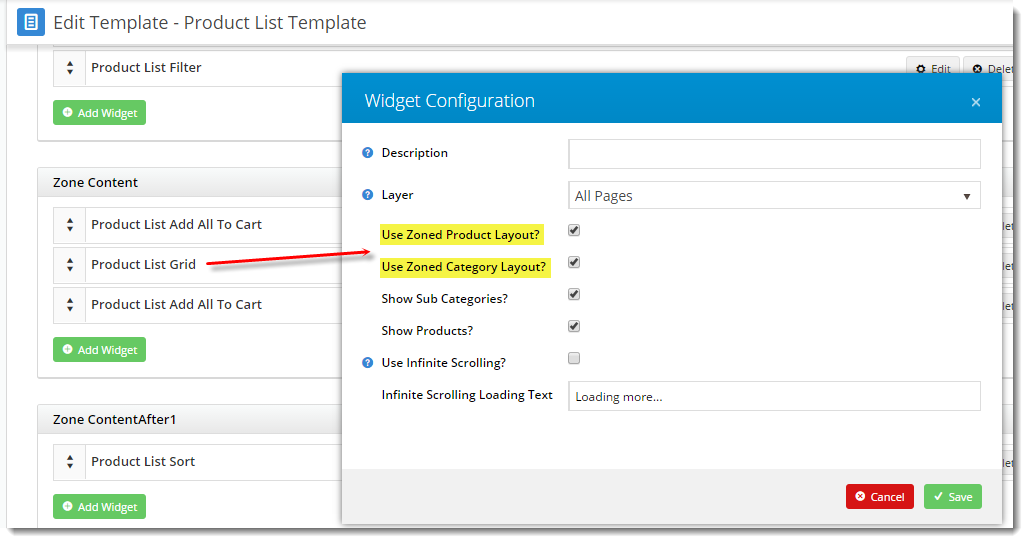
TIP: If If both the dictionary and browser have been refreshed and the feature is still not displaying, check that the site is using Zoned Product Layout (most sites are configured this way by default). 1. Navigate to Content → Standard Pages and select the Product List template. Edit the 'Product List Grid' widget and ensure 'Use Zoned Product Layout' & 'Use Zoned Category Layout' are ticked. If not, tick and click 'click Save'.
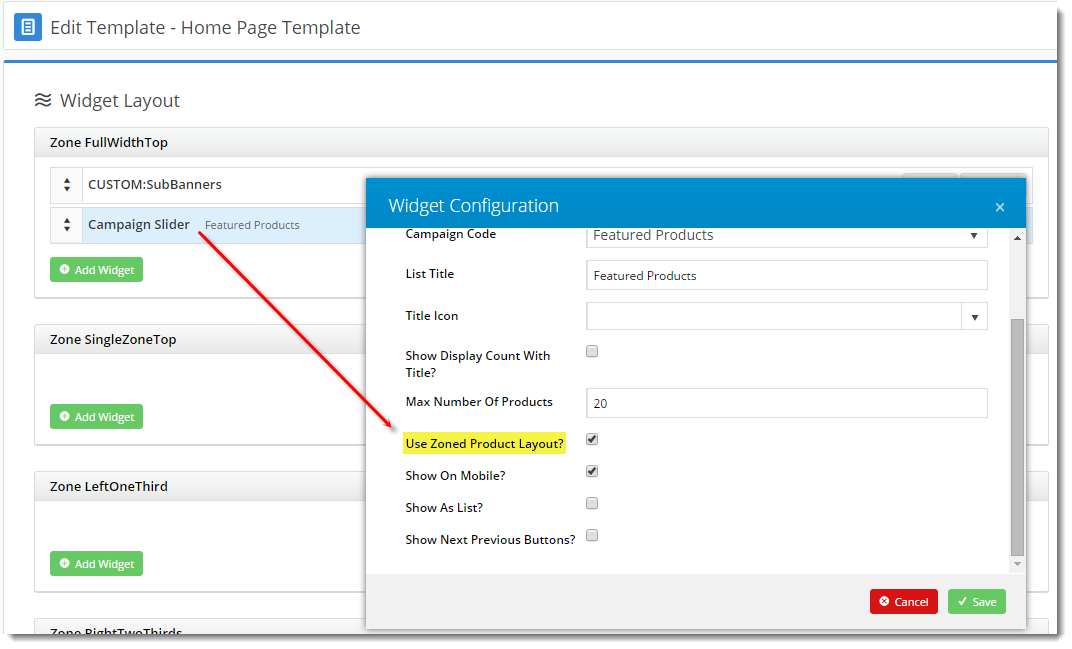
 2. Check Campaign products if applicable: Navigate to Content → Standard Pages and select the Home Page template. Edit the 'Campaign Slider' widget and ensure 'Use Zoned Product Layout' is is ticked. If not, tick and click 'Save'.
 |
Additional Information
| Multiexcerpt |
|---|
| MultiExcerptName | Additional Info |
|---|
|
Custom product fields can also be added to the Product Compare grid if required. This can be done by contacting Commerce Vision. |
...
| Minimum Version Requirements |
| Multiexcerpt |
|---|
| MultiExcerptName | Minimum Version Requirements |
|---|
| 03.75.00 |
|
|---|
| Prerequisites | |
|---|
| Self Configurable |
| Multiexcerpt |
|---|
| MultiExcerptName | Self Configurable |
|---|
| Yes |
|
|---|
| Business Function |
| Multiexcerpt |
|---|
| MultiExcerptName | Business Function |
|---|
| Marketing |
|
|---|
| BPD Only? | |
|---|
| B2B/B2C/Both |
| Multiexcerpt |
|---|
| MultiExcerptName | B2B/B2C/Both |
|---|
| Both |
|
|---|
| Ballpark Hours From CV (if opting for CV to complete self config component) |
| Multiexcerpt |
|---|
| MultiExcerptName | Ballpark Hours From CV (if opting for CV to complete self config component) |
|---|
| Contact CV SupportCommerce Vision |
|
|---|
| Ballpark Hours From CV (in addition to any self config required) |
| Multiexcerpt |
|---|
| MultiExcerptName | Ballpark Hours From CV (in addition to any self config required) |
|---|
| Contact CV SupportCommerce Vision |
|
|---|
| Third Party Costs |
| Multiexcerpt |
|---|
| MultiExcerptName | Third Party Costs |
|---|
| n/a |
|
|---|
| CMS Category |
| Multiexcerpt |
|---|
| MultiExcerptName | CMS Category |
|---|
|
|
|
|---|
...