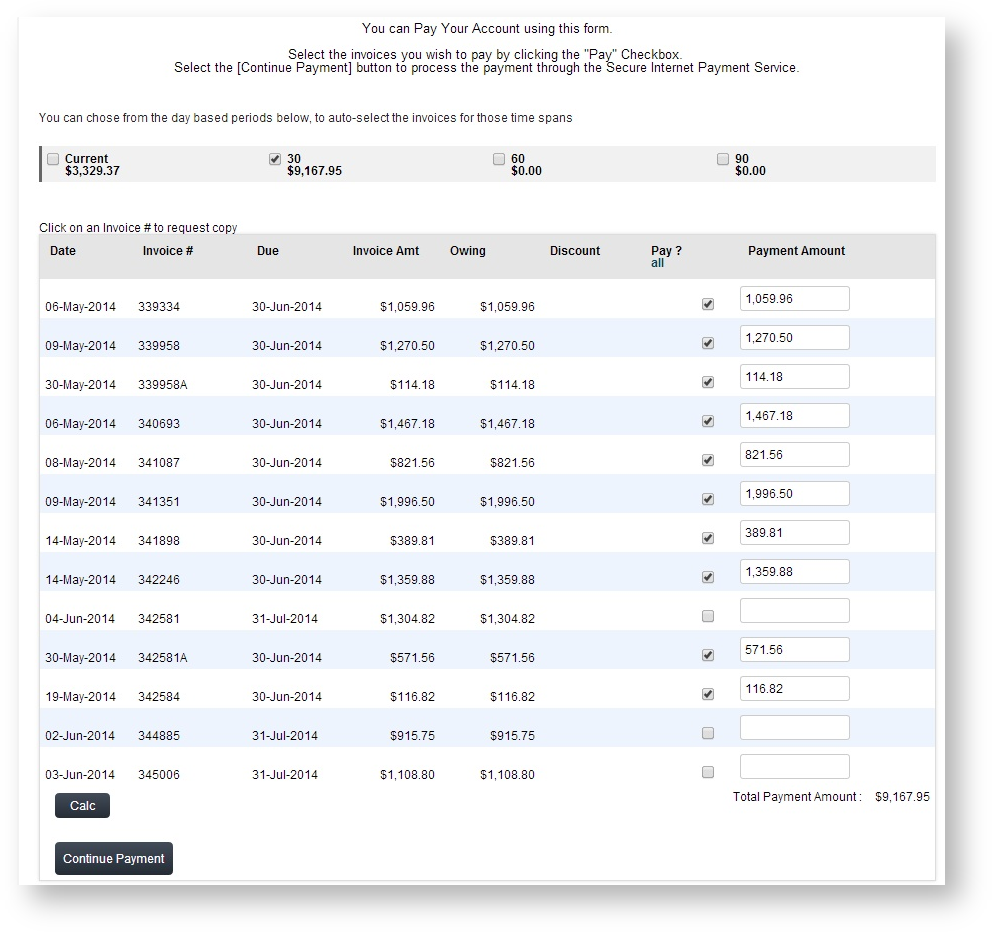
Customer Self Service features a 'Pay Your Account' functionality which allows customers to pay outstanding invoices by credit card.
Customers can select from pre-defined time periods, part-pay invoices, and request invoice reprints via the Account Payment page.

Prior to enabling Account Payment functionality, the site must have an online payment facility in place with either DPS, eWay, or TNS (formerly Dialect). |
Account Payment is enabled at the Role level, by adding the relevant page to the role's menu structure.
To Enable Account Payment:
- Login as an Administrator.
- Navigate to 'Accounts' --> 'Role Management' (/zRoles.aspx).
- Select the required Role via radio button. The Role Details page will load.
- Note the 'Menu Code' assigned to the role.
- Navigate to 'Content' --> 'Menu Editor' (/zMenus.aspx).
- Select the required 'Menu Code' via radio button.
- Click 'Parent Items'.
- Identify the Parent menu item to which the Account Payment page will be added.
- Select the record via radio button.
- Click 'Menu Items'.
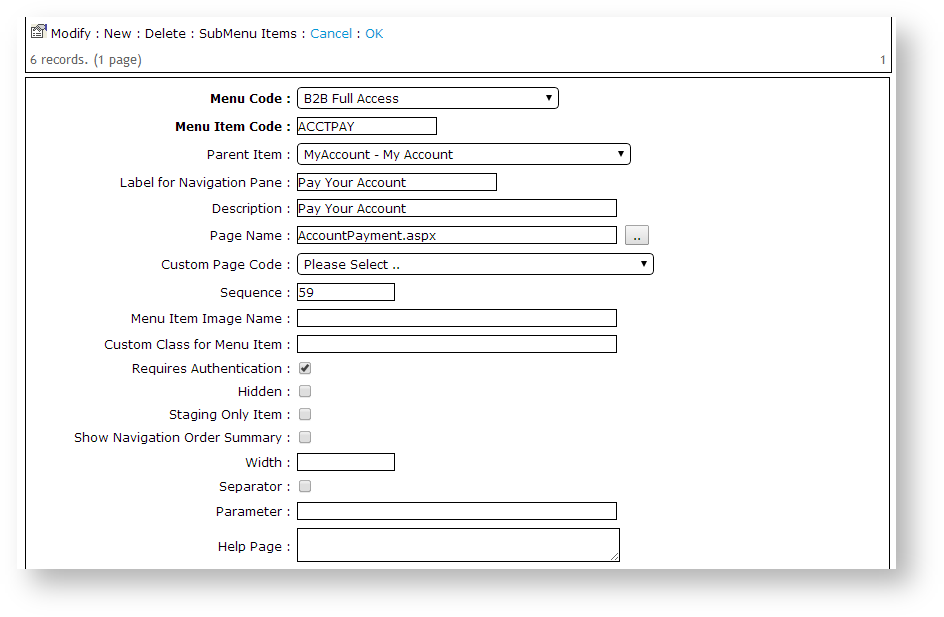
- Click 'New'.
- Create a new item - Page Name = 'AccountPayment.aspx'. See Adding a new menu item for further detail.
- Repeat Steps 2-12 for other roles as required.

There are further flags available at the Role and System levels, which can be customised, or left at their default values. A summary of these is provided below.
'Disallow Account Payment Adjustments' - when ticked, locks the 'Total Payment Amount' from editing. Users can edit payment amounts against individual invoices only.
- 'Show Transact Details Column in Account Pay Page' - when ticked, adds a new column to display Transaction Details from the 'CustomerTrans' database table.
- 'Display Branch Account Invoices in Account Payment' - when ticked, will include invoices for Bill-To accounts on the Account Payment page.
NOTE: The 'Disallow Account Payment Adjustments' flag can be set at both the Role and Customer levels. |
- 'Account Payment Current Display Option':
- Default - The amount shown for the 'Current' period will include just this month's transactions.
- Current Includes Last Month - The amount shown for the 'Current' period will include last month's transactions as well as this month's.
- 'Enable User & Non-Web Order Filters in AccountPay' - when ticked, enables filters on the Account Payment page which allow the user to 'Show Web Orders Only' and/or 'Show My Orders Only'.
Related articles appear here based on the labels you select. Click to edit the macro and add or change labels.