...
1. Once your campaign is created, it will appear as the latest tile on the Campaigns page (the most recently edited campaign appears first).
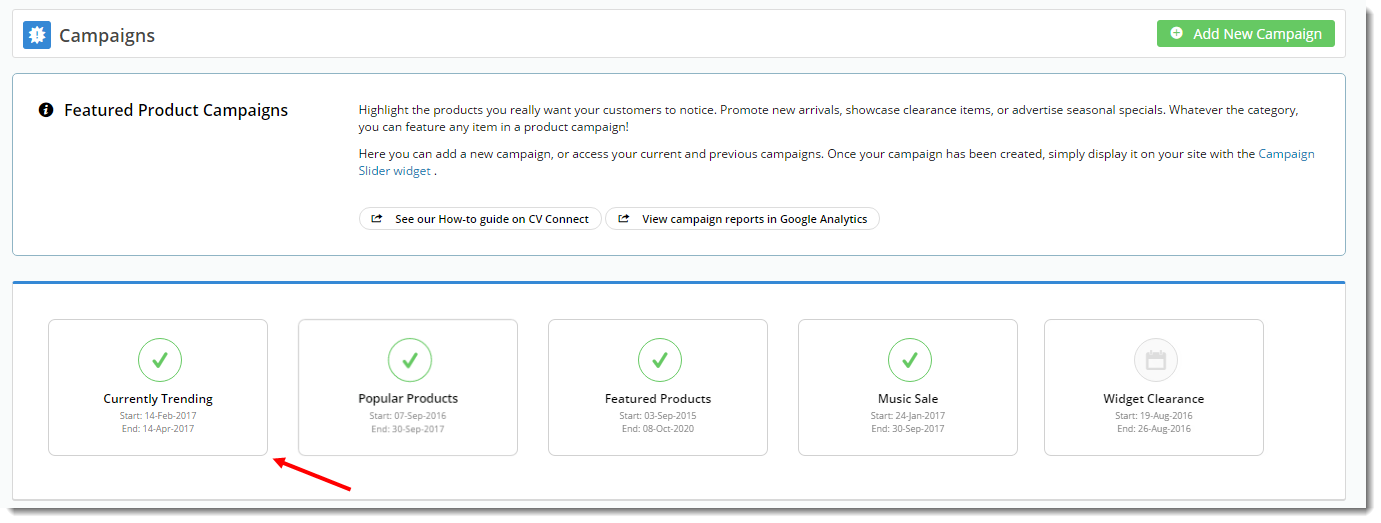
2. Select the tile to view the campaign details.
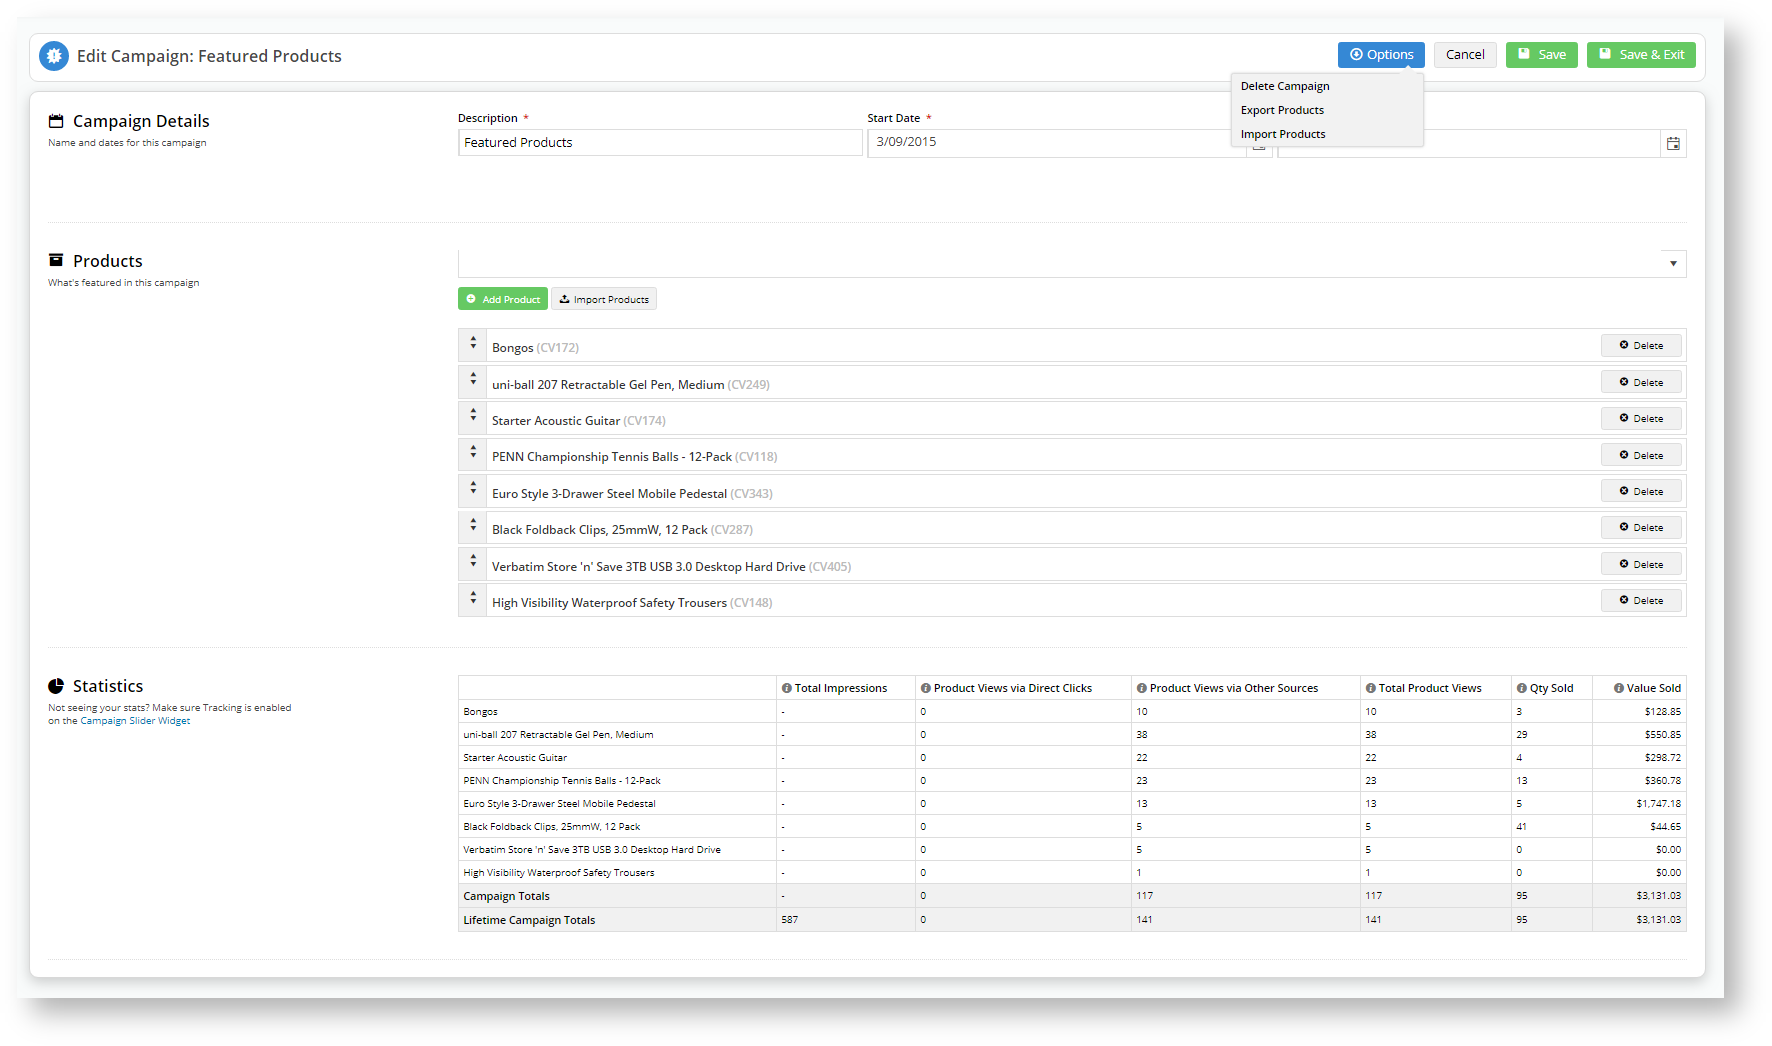
3. On this page you can:
• Edit the Description, Start, and End Dates.
• Add / Remove /
• View Campaign Statistics (as long as tracking is enabled on the Campaign Slider Widget)
• Delete Campaign.
• Export and Import Products to the Campaign.
4. Save your changes.
| Excerpt |
|---|
Export/Import Products to the Campaign
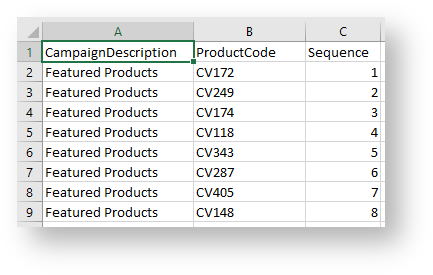
You can add products individually by clicking the +Add Product button, or you can import products in bulk. 1. Create a CSV file listing the Campaign Name; ProductCode; Sequence (the product display order).
2. Click Options, then select Import Products 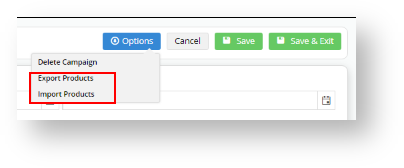
3. Or select Import Products next to the +Add Product prompt 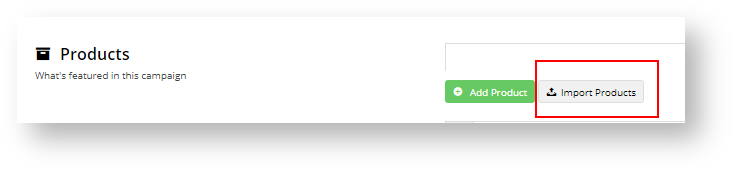
4. As the instructions state, you can import products append to those currently in the campaign, or you can overwrite existing products (the order in which they appear). 5. Select your Import Type (Append/Overwrite) 6. Click Select Files... 7. Navigate through Windows Explorer to locate the CSV file you created earlier. 8. The import will start as soon as you press Open in Windows Explorer. 9. If you select Append, and the product already exists, the system will let you know the reason it didn't import any product. 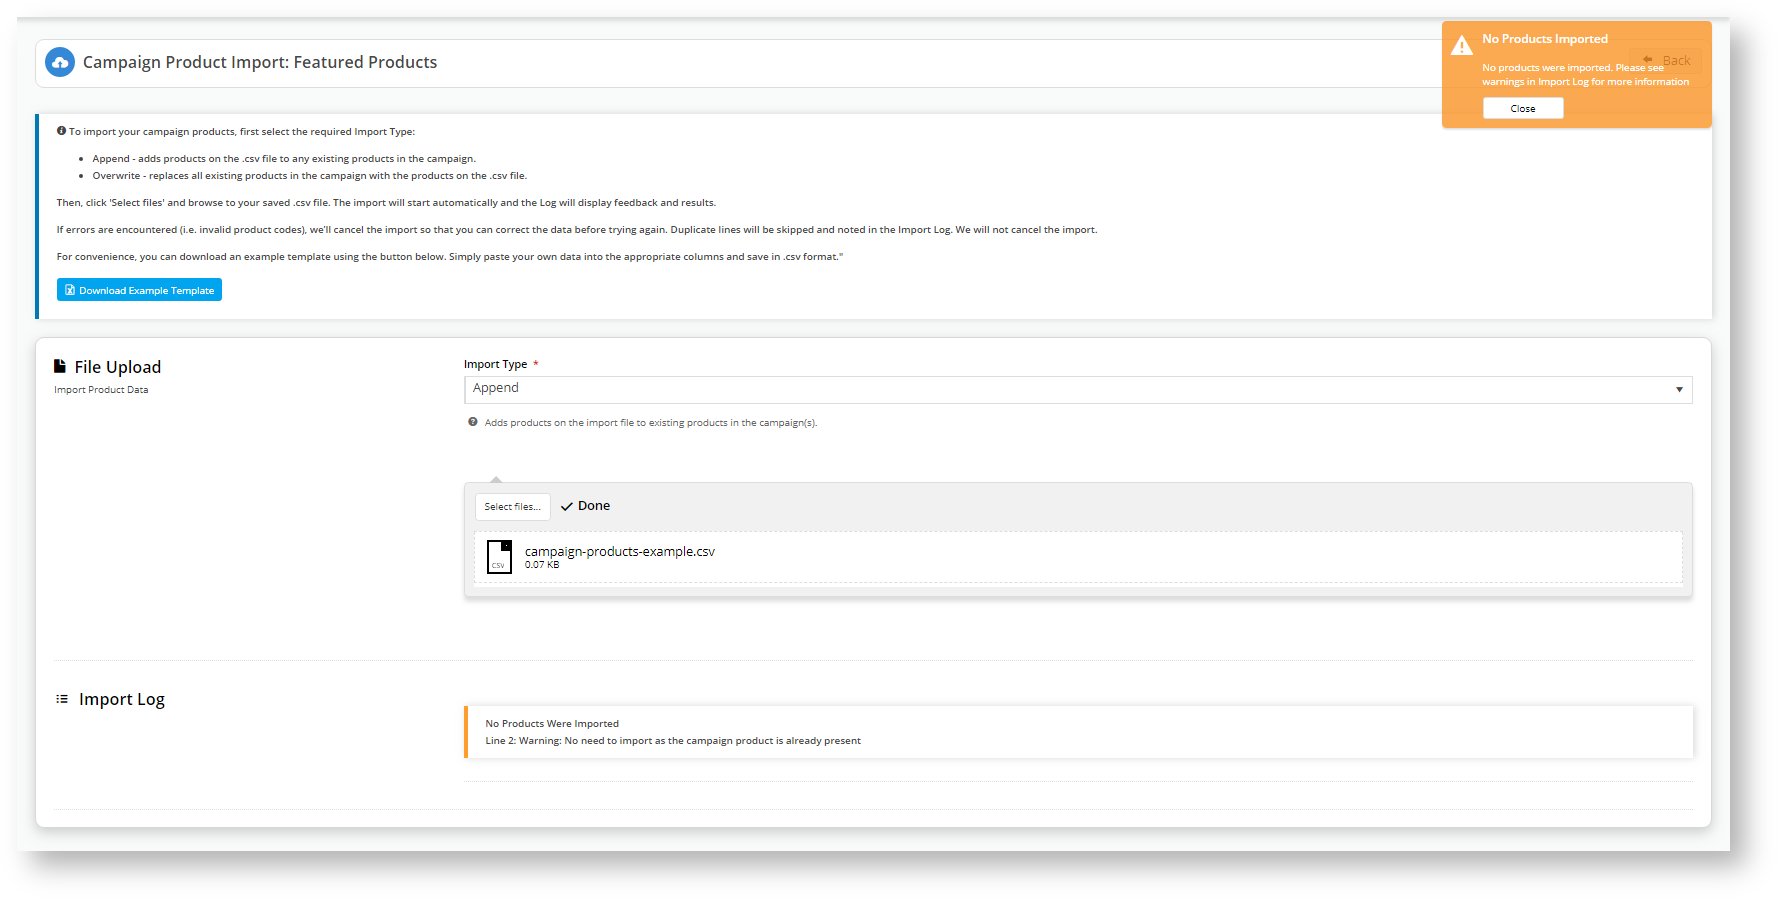
10. If you want to change the order of the existing products, then alter the sequence number in your CSV file. For instance, we have changed CV148 to display at the top (1) and all other products move down in the list. As you can see, it's the Sequence # that controls the display order, not the position the product sits in the CSV file. 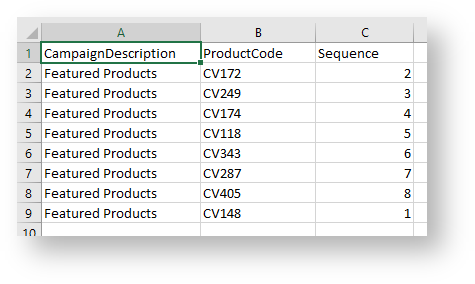
11. Select Import Type Overwrite and click Select file...
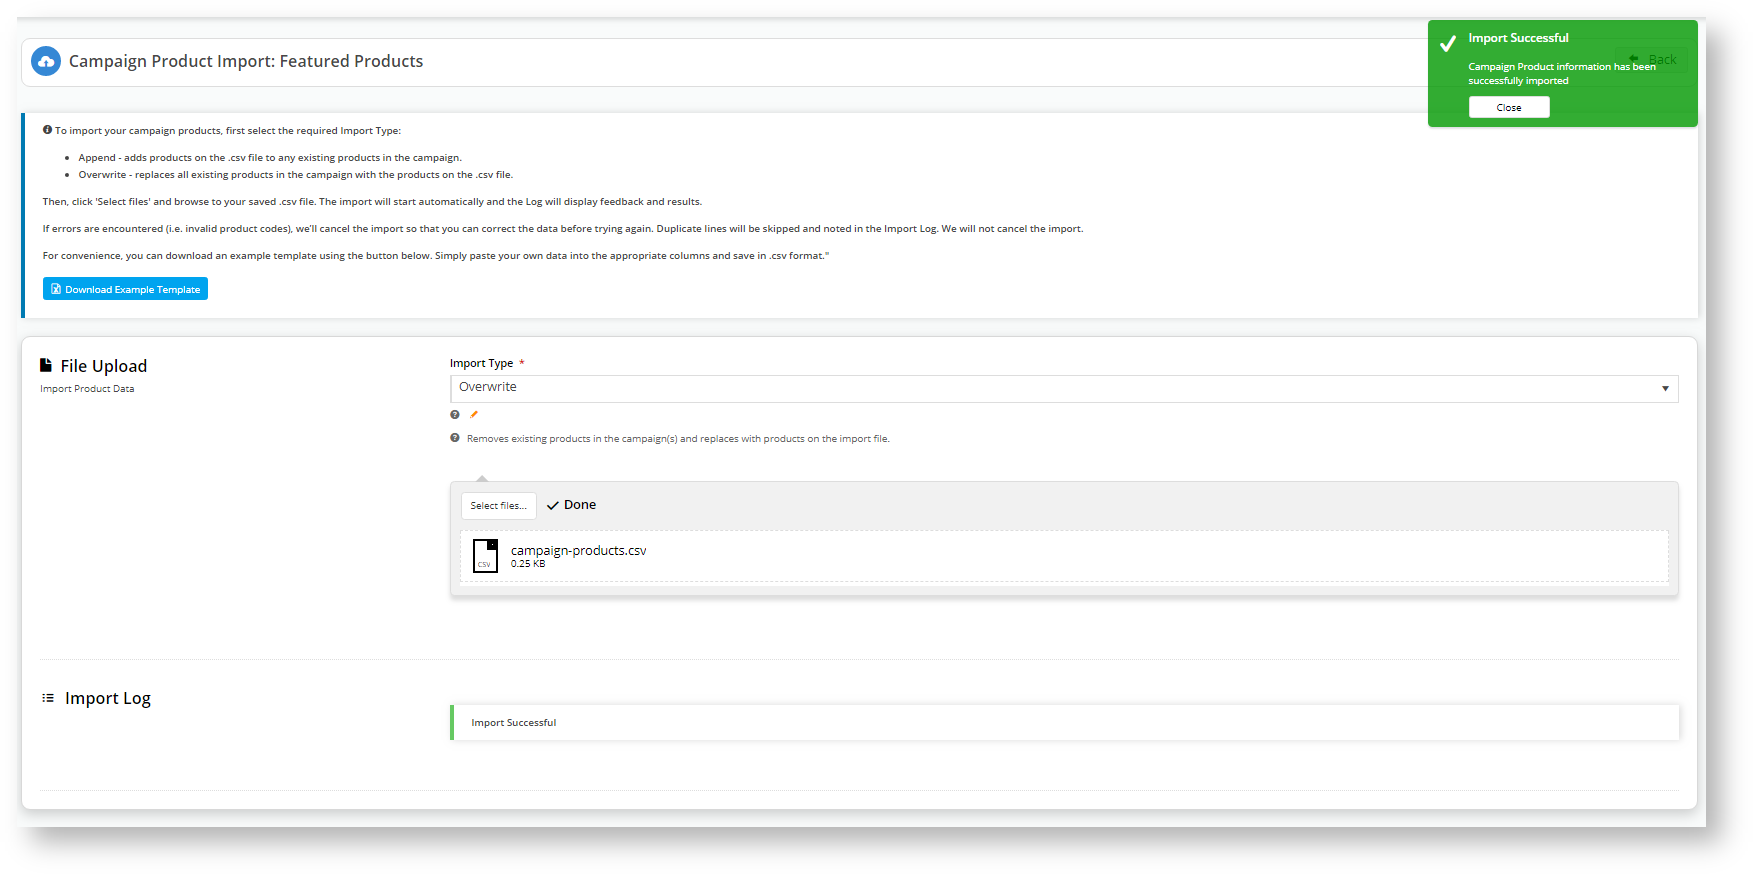 12. The product order now reflects the sequence in the CSV file. 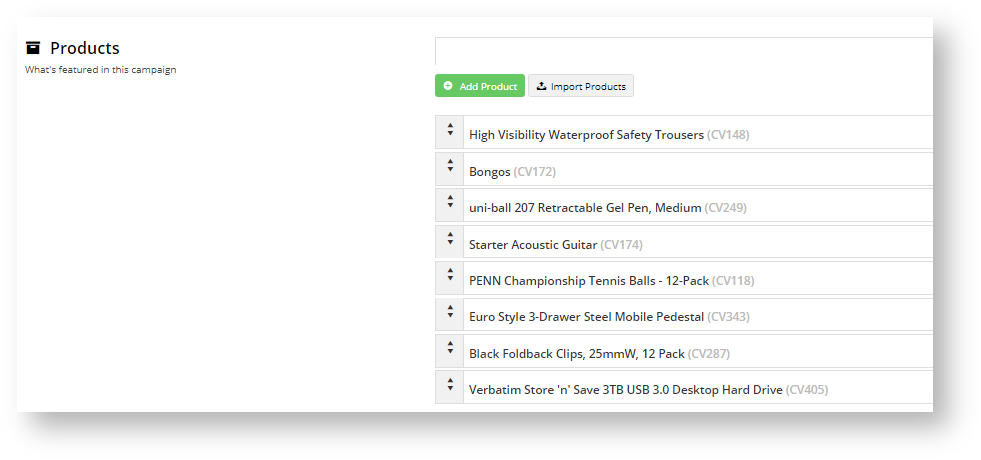
13. If you want to add a new product and re-sequence existing products, then select Import Type Overwrite. 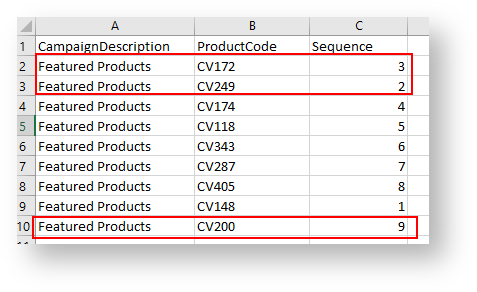
14. Review the products in your campaign to confirm they match your CSV sequence. 
|
...
| Tip |
|---|
Want to try something trickier? Check out our guide on Splitting Campaigns. |
| Minimum Version Requirements |
| Multiexcerpt |
|---|
| MultiExcerptName | Minimum Version Requirements |
|---|
| **.**.** |
|
|---|
| Prerequisites | |
|---|
| Self Configurable |
| Multiexcerpt |
|---|
| MultiExcerptName | Self Configurable |
|---|
| Yes |
|
|---|
| Business Function |
| Multiexcerpt |
|---|
| MultiExcerptName | Business Function |
|---|
| Products & Categories |
|
|---|
| BPD Only? | |
|---|
| B2B/B2C/Both |
| Multiexcerpt |
|---|
| MultiExcerptName | B2B/B2C/Both |
|---|
| Both |
|
|---|
| Ballpark Hours From CV (if opting for CV to complete self config component) |
| Multiexcerpt |
|---|
| MultiExcerptName | Ballpark Hours From CV (if opting for CV to complete self config component) |
|---|
| Contact CV Support |
|
|---|
| Ballpark Hours From CV (in addition to any self config required) |
| Multiexcerpt |
|---|
| MultiExcerptName | Ballpark Hours From CV (in addition to any self config required) |
|---|
| Contact CV Support |
|
|---|
| Third Party Costs |
| Multiexcerpt |
|---|
| MultiExcerptName | Third Party Costs |
|---|
| n/a
|
|
|---|
| CMS Category |
| Multiexcerpt |
|---|
| MultiExcerptName | CMS Category |
|---|
| Promotions |
|
|---|
Related articles
| Content by Label |
|---|
| showLabels | false |
|---|
| max | 5 |
|---|
| spaces | KB |
|---|
| showSpace | false |
|---|
| sort | modified |
|---|
| reverse | true |
|---|
| type | page |
|---|
| cql | label in ("campaigns","how-to","cms","product") and type = "page" and space = "KB" |
|---|
| labels | campaigns |
|---|
|
...