| Note |
|---|
The Table Maintenance feature is available only to websites on versions from 4.29. As As a Table Maintenance solution is always custom, consultation with Commerce Vision is required to implement this feature. |
...
What the user can see and do in both the Search List and each record's page are set by the Administrators in Table Maintenance.
| Search List page | Record page |
|---|---|
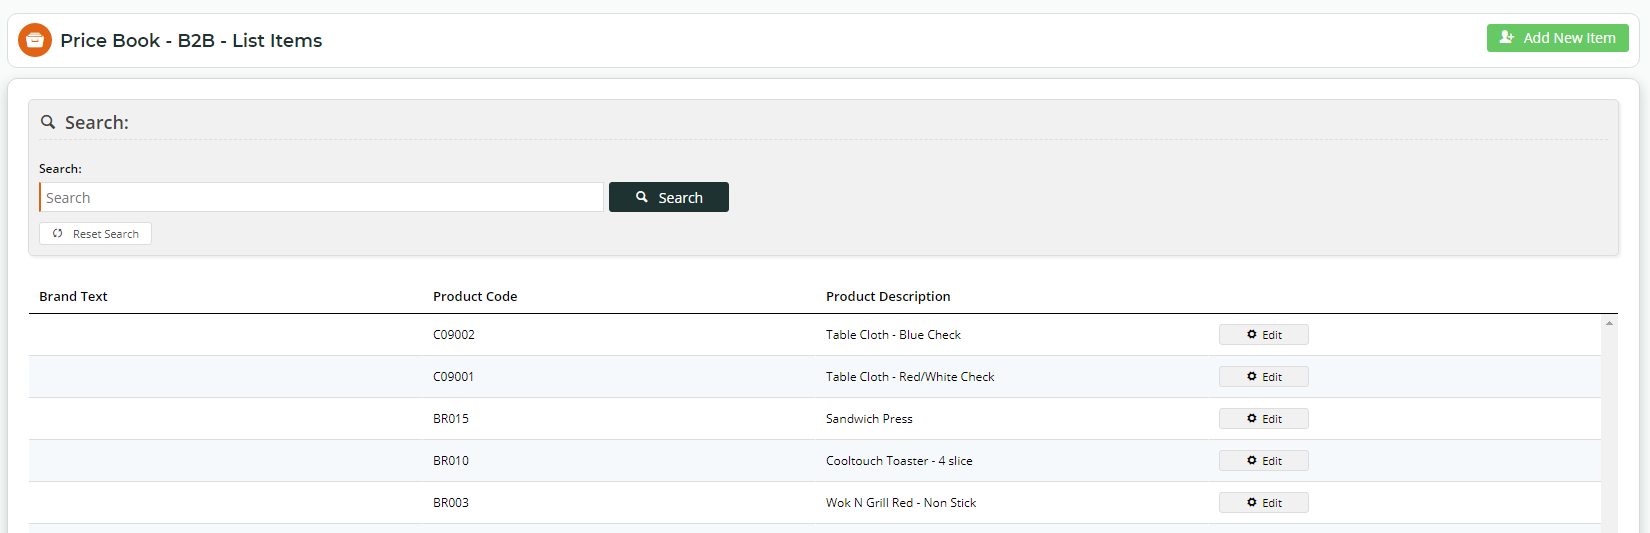
This is an example of the Search List page. When the custom table was set up, permission to add records was enabled.
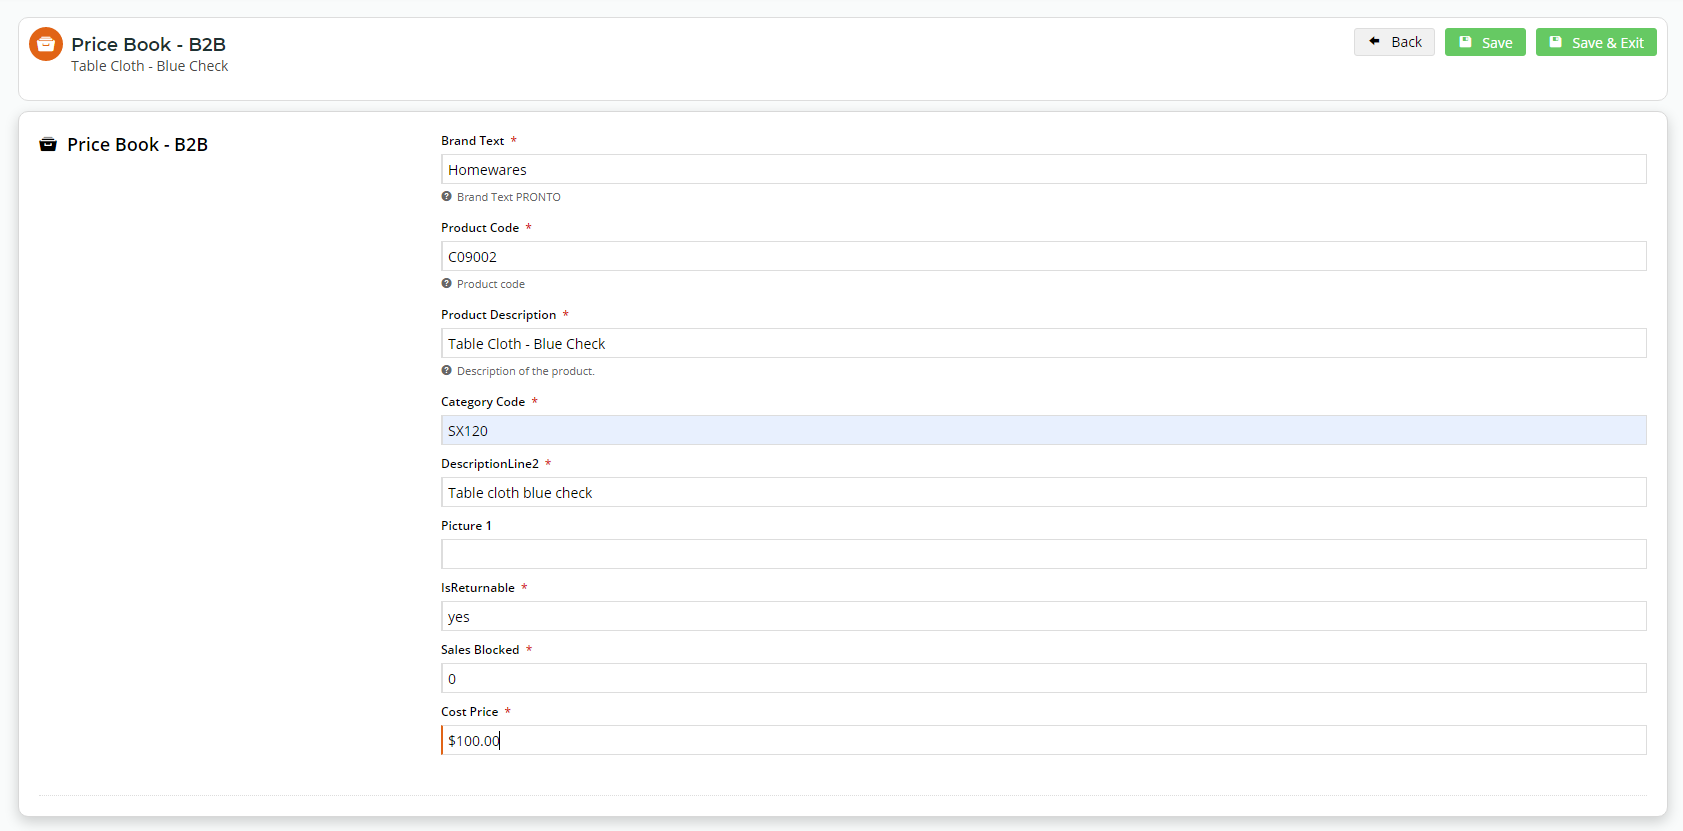
| This example is a record from our price book. Users with access can edit all fields since the Administrator has set them to editable. * indicates mandatory fields.
|
Configure Table Maintenance Settings
...
In the Tables panel of the Table Maintenance Features Settings screen, any custom tables already set up are listed and can be edited or deleted. Each line represents an added table.
To edit a table, click its Edit button. Since we are adding a new table, click Add Table.
With pre-existing tables With no pre-existing tables
- The first step is to select a table. Scroll down to the bottom of the page and select a table from Table available for maintenance. Here will select the 'Product Table'.
- Toggle Is Active ON or OFF. When active, the table's page is included in the CMS navigation bar, and its Search and Edit pages are visible. If inactive, the table page cannot be accessed in the CMS.
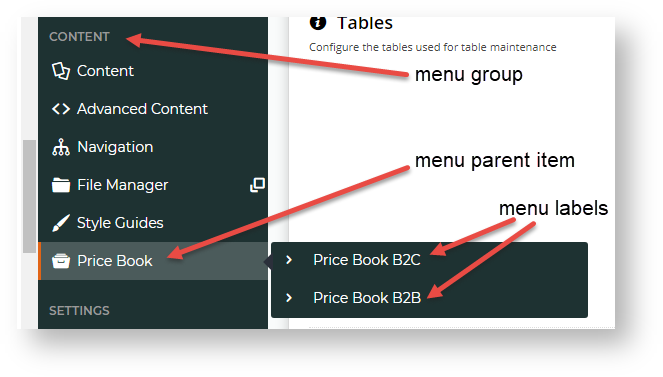
Configure the location of access to the table on the CMS navigation menu. It can be placed anywhere under any existing parent menu.
Expand
title Click here to view an example...
- In Sequence, add a number. This is the order of the table as an item on the parent menu when there are more than one menu items.
- In Page Icon, select an icon to display next to the menu item name.
- In Menu Group, select the CMS parent menu under which this table will be grouped.
- In Menu Parent Item, enter the name of parent menu item.
- In Menu Label, enter the name of table as menu item.
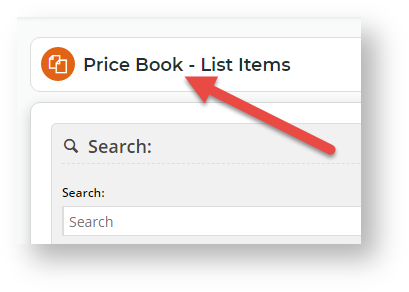
- Add the page title name for the table. In Page Title, enter the heading name that will appears for the List Items and Records pages.
- In Page Title Suffix, enter the description that is appended to the page title in the record details page. Default: the placeholder: {Description}. This retrieves the existing description of the table.
- Click Save.
- Configure fields for the Search and Edit record pages. In Table Maintenance Tables, click Edit for a table. (Or just continue after step 7 if creating a new table)
In Search and Edit Fields, any existing configurations for the fields will be displayed. (If no fields have been configured, the panel is blank.)
Fields configured No fields configured
Click the Configure Search & Edit Fields button.
To edit the fields, click the Configure Search & Edit Fields button. The Select Fields window, displaying all fields, now appears. You can do the following:
change the field name (Prompt) displayed to users (by editing each Prompt) NOTE - Field Names in the first column cannot be changed.
- select which fields will be viewable and searchable on the Search List (by toggling ON/OFF each setting)
- select which fields will be viewable, can be edited (or Read Only), and must not be blank (Mandatory) (by toggling ON/OFF each setting).
- To save your settings, click OK.
- When you have finished configuring the table, click Save or Save & Exit to save any changes.


...