When copying your Live PRONTO data over to your Test company, there are additional steps you need to complete to ensure your stage website accurately reflects all that fresh new data. |
Use case
Your local PRONTO administrator has performed a Live-to-Stage copy of all your customer, product, and order data in PRONTO.
You're keen to begin testing on your stage site, knowing that all the information on the web should be up-to-date.
You fire up the website and scratch your head, wondering why it's still displaying the old data...
The reason
Your integrator has not yet sent all the new records across. Integration of data is triggered by PRONTO time stamps whenever something is created or changed. Copying live data to a test PRONTO company doesn't create any time stamps, it just copies over whatever exists in Live.
Therefore, you need to consciously push ALL that new data across to the web.
Please note that refreshing your PRONTO data (and integrating it) will not update everything on your stage site. Web content such as users, images, banners, and static content pages are not stored in PRONTO, and therefore will not be automatically updated to match Live. If you require a Live-to-Stage web copy, please contact our friendly Support Team. |
How to
You can update all the ERP data on your stage site by running the Integrator (deep down, you already knew that, didn't you!).
But you must follow these steps:
- Open the Integrator client and select the correct site (e.g. Stage / Live / Dev).
- Select the Settings gear icon.

- Select the Local Cache tab.

- You want to clear the cached records for tables that have automatic timing set up on the main screen. This ensures your new data is integrated, rather than skipped due to caching.
Tick the boxes for the following tables (you may wish to clear additional tables based on the kind of data you integrate):
- BonusStock
- CategoryProduct
- CategoryProduct_AlternativeCategoryNotes
- ContractProducts
- Customer
- Customer_DeliveryAddress (tick all variations of this if multiple are present)
- DeliveryAddress
- Product
- ProductAlternatives
- ProductSubstitutions
- ProntoBillOfMaterials
- ProntoCustomPricing
- ProntoDiscount
- ProntoSpecialPrice
- ProntoStockPrice
- StockSecurity
- Click 'Empty Selected Tables'.

- Click 'Apply', then 'OK'.
- Stop and re-start integration to the site.
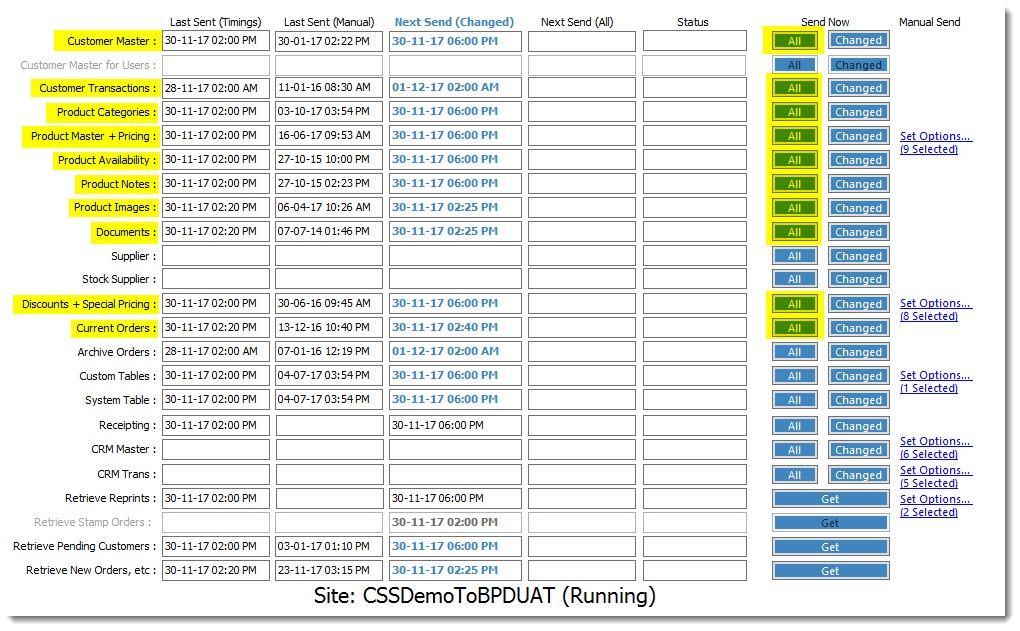
- Once the site has successfully re-started, click the 'All' button against those tables you want to integrate fresh data for excluding 'Archive Orders' (we'll talk about integrating a customer's order history shortly).

- Go grab a coffee, because integrating this much data could take some time.
In order to test specific functions such as the Order History page, or Pay Account for B2B, you'll want some historical data. Instead of integrating this data for every customer (which is a massive overhead), you can send it for a specific customer (or several) that you're testing against. Here's how - Customer Activation. |


