Overview
The Online Discounts promotion is used to create campaigns that encourage or reward volume purchases of selected products under the concept of a promotion group. A promotion group consists of targeted products and discount tiers based on quantities. If your business uses marketing flags against specific Customers or Customer groups in your ERP, these can be specified and discount tiers varied for different Customers. The entire promotion group is configured in the CMS.
Online Discounts is easy to use. There is no need for users to enter a promo code. Any applicable discount is calculated and displayed automatically in the cart.
Your site sells bed linen. To encourage the purchase of multiple sets of certain brands of sheet sets, a 'linen promotion group' is created. All eligible product codes are added and the following discount tiers are set up for quantities purchased: 1 - no discount; 2-4 - 10% off; 4+ - 25% off. A user adds two eligible items into their cart. In the cart, the discount is automatically calculated and displayed to customer is alerted. No need to enter a promo code! 
|
Online Discounts run volume-based promotions where the discounted price or percentage off is automatically calculated when a valid quantity of eligible products is added to cart. No promotion code is required at checkout. |
Step-by-step
1. Enable Online Discounts
NOTE - This feature must first be enabled on your site by Commerce Vision.
- In the CMS, navigate to Settings → Feature Management → Payment & Checkout.
- If this feature is switched on, the Discount Maintenance toggle will be ON.

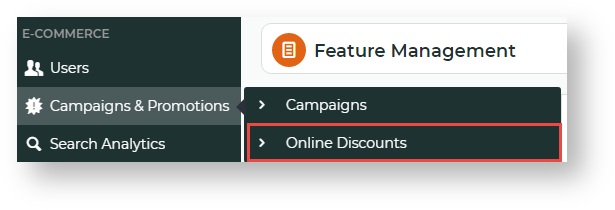
- Online Discounts will now be available from the Campaigns & Promotions menu.

2. Create an Online Discount Promotion Group
Each online discount created is called a 'Promotion Group'. A promotion group contains details about the online discount. To help you work out the details required for a promotion group, go through this checklist:
- Are there start and end dates and times for this promotion group?
- Will the promotion group have different discount price breaks based on specific minimum and maximum quantities?
- Will the discount be given as a 'special price' or 'percentage off' each eligible product?
- Will the discount levels change (either in min/max quantities or discount amounts) depending on customer type, e.g., B2B, B2C, or specific Customer accounts? If yes, Marketing Flags need to be set up if they don't currently exist. Please consult with Commerce Vision to implement this.
Once you have these details at hand, you can configure the online promotion group.
To create a promotion group,
- Navigate to Campaigns & Promotions → Online Discounts.
- Click the Add Promotion Group button in the top right corner.
- In the 'Promotion Group Details' section, enter identifying details for this promotion group and its start/end dates.

Group Code: a unique code that identifies this promotion group.
Description: a meaningful description or name for this promotion code.
Start Date: date and time this promotion group becomes active on your site.
End Date: date and time this promotion group expires on your site.
In the Price Breaks section, set price breaks based on quantity levels. For every Level used, Minimum and Maximum quantities of eligible products determine whether the discount level applies.
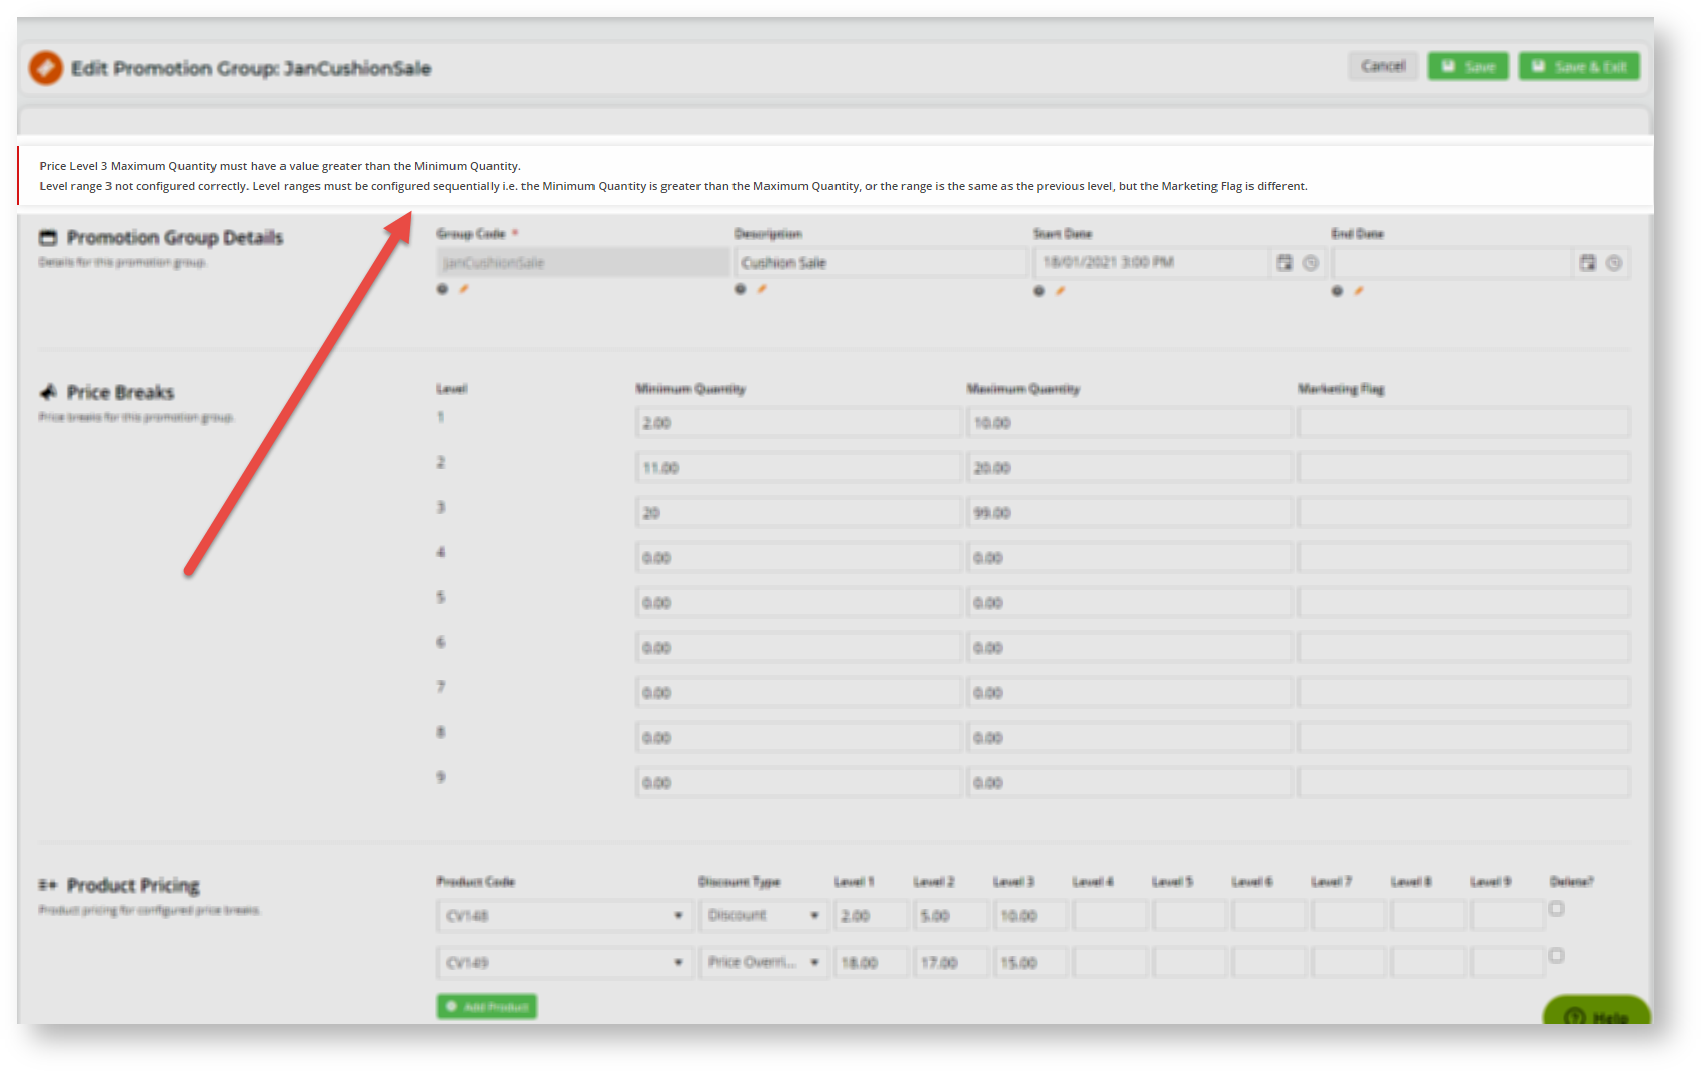
- For levels used after Level 1, the Minimum Quantity must be higher than the Maximum Quantity of the previous level, unless differentiated by Marketing Flags.
- Unused levels must be left with the default '0' for both Minimum and Maximum quantities.
- Leave the Marketing Flag field blank for a level to apply to all buyers.
|
Example: We want to create a promotion group with 3 levels that apply to all users. If a user adds a quantity of eligible items above or below applicable quantities, e.g., '1' or '31', no discount is triggered. If they enter a valid quantity, e.g., '21', the discount at Level 3 will automatically be calculated.

- Marketing Flag: (optional) If marketing flags are used for Customers (set up in the ERP), you can limit or vary discounts for different customer types. (See Step 3 below for specific guidance on using this promotion with Marketing Flags.) Otherwise, leave this field blank.
- In the Product Pricing section, add Product Codes of all eligible items and discount levels for each active level.

- For each Product Code, click Add Product.
- In Product Code, type in the product code of the eligible product and select from the dropdown list. Note - a product code can be added once only.
- In Discount Type, select either 'Discount' - percentage off original price, or 'Price Override' - special price.
- In Level ..., for each active level used, enter the percentage off or discounted price.
- Repeat steps 1-d for each Product Code as needed.
When you have finished creating or editing the promotion code, click Save or Save & Exit.
If you cannot save your changes, check for any errors. 
|
3. Use Marketing Flags (optional)
The Marketing Flag feature can be used to limit a promotion group or certain promotion levels to particular customer groups. Marketing Flag codes must have been added and associated with certain Customer categories, e.g., Customer accounts, in the ERP. When marketing flags are used, a blank field = 'all other users'.
Please consult with Commerce Vision to implement Marketing Flags.
The system checks that the Minimum Quantity of a level is higher than the Maximum Quantity of the previous level when two levels are in sequential order and have the same marketing flag (or blank). Example: Suppose we want to create an online promotion where the discount given is not only controlled by quantity levels but also if a user is associated with a particular marketing flag. Discount levels for two marketing flags as well as 'blank' (for all other buyers) have been set up. Notice that levels have been grouped in accordance with marketing flags: - levels 1 and 2 with 'RM'
- levels 3 and 4 with 'WM',
- levels 5 and 6 for all other buyers

This allows the system to check that min/max quantities for each Marketing Flag are unique. |
Edit Online Discount Messages
When a buyer adds an eligible product into their cart, the discount will be calculated automatically. On the Cart and Checkout screens, notification messages are displayed to alert the buyer they are receiving the online discount price or when it has been removed or recalculated. These messages can be edited in the Order Lines Widget and the Cart Buttons Widget.
Order Lines Widget
The Order Lines Widget may have been placed in various templates. Changes made to Online Discount messages in one widget will display in all other Order Lines Widgets in use.
To edit the messages:
- Navigate to Content → Pages & Templates → Cart.
- Find the Order Lines Widget and click Edit.
- Click the Notifications tab.
Scroll down to the Online Discount fields and edit the default messages as you require.

Online Discount Message
In the Shopping Cart, a message automatically appears in the Order Line to inform the buyer of the discounted price and discount rate.

Default message: 'Price reduced from {0} to {1}. Discount rate {2}.' Notes: Placeholders: {0} = original price; {1} = new price; {2} = calculated discount rate
Online Discount Found Message / Online Discount Not Found Message
In the Shopping Cart, the buyer can edit the quantity of a product they have added. If their cart contains products eligible for a promotion group and quantities are changed, clicking the Update button will trigger one of two pop up messages:
(i) Online Discount Found Message: informs the buyer to check the newly recalculated discount. Default: 'Your order has been edited. Please review the individual discounts.'
(ii) Online Discount Not Found Message: informs the buyer that no Online Discount has been applied. Default: 'No discounts found.'

NOTE - (ii) and (iii) can also be edited in the Cart Buttons Widget.
Cart Buttons WidgetTo edit the Online Discount Found/Not Found messages in the Cart Buttons Widget, - Go to Content → Pages & Templates → Checkout → Cart
- Click Edit for the Cart template.
- Find the Cart Buttons widget.
 - Edit the messages as required.
Online Discount Found Message: triggered when the buyer updates the quantity of any eligible product in the Shopping Cart and discount is recalculated.
Online Discount Not Found Message: triggered when the buyer updates the quantity of any eligible product in the Shopping Cart and results in no discount.
|
Cart Checkout Button Widget
When the buyer clicks the Continue to Checkout button in the Shopping Cart, a popup message asks them to review the discounts before continuing to Checkout. This message can be changed or removed as you require in the Cart Checkout Button Widget.

To edit the message:
- Go to Content → Pages & Templates → Cart
- Find the Cart Checkout Button Widget and click Edit.
- Under the General Options tab, find Online Discount Found Message and change the message as you require. If you do not want this popup to appear, leave the field blank. Default: Discounts have been calculated on your order, please review and proceed.'
- To save any changes, click Save.
Additional Information
Minimum Version Requirements |
4.31.00 
|
|
|---|
| Prerequisites |
This feature must be enabled by Commerce Vision. |
|
|---|
| Self Configurable | |
|---|
| Business Function | |
|---|
| BPD Only? | |
|---|
| B2B/B2C/Both | |
|---|
| Ballpark Hours From CV (if opting for CV to complete self config component) | |
|---|
| Ballpark Hours From CV (in addition to any self config required) | |
|---|
| Third Party Costs | |
|---|
| CMS Category | |
|---|
Related help


