...
| Multiexcerpt | ||||
|---|---|---|---|---|
| ||||
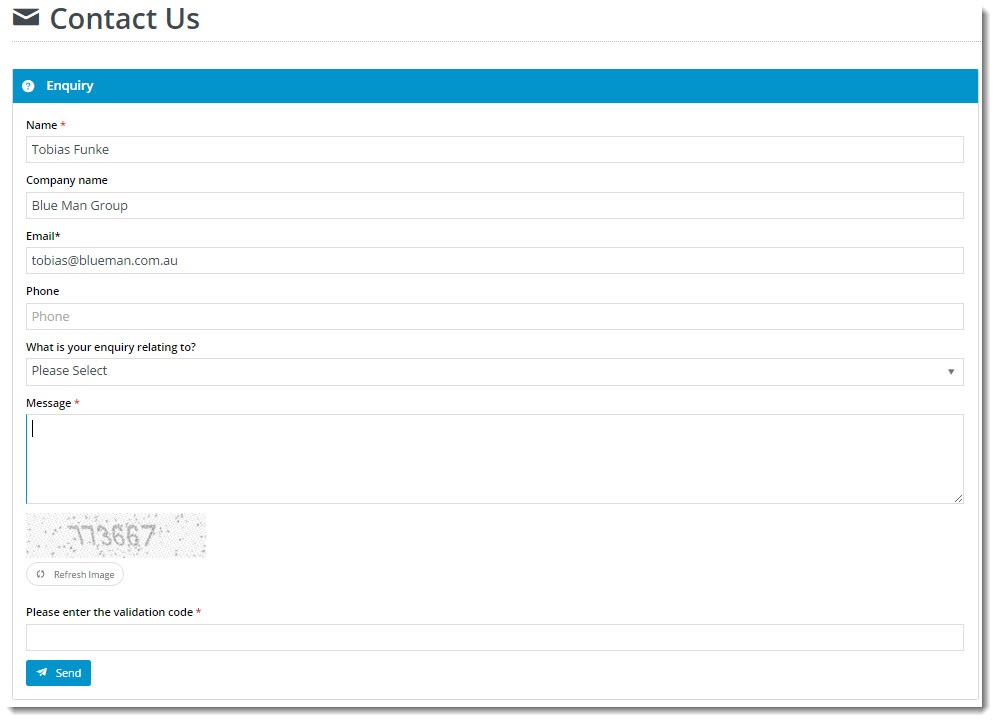
Widget-based questionaire and form system that is easy to configure. Add captcha for validation or require a digital signature (4.36+). |
| Multiexcerpt | ||||
|---|---|---|---|---|
| ||||
This guide will cover how to create and implement a Questionnaire in BPD sites on version 3.78+.
...
1. Create the Questionnaire
- In CMS, navigate go to Advanced Content → Questionnaire Group Maintenance (/QuestionnaireMaintenance.aspx).
- Click New.
- Set the values as follows (fields not listed here may be left blank):
- Questionnaire Code - a unique identifying code
- Questionnaire Description - a brief description of the questionnaire
- Spam Validation - tick this box to enable Captcha functionality for anti-spam
- Attachment Upload - tick this box to allow the user to attach files on submit (file types will be specified in the widget)
- Click OK to save your changesTo save, click OK.

2. Add Questions
- In the relevant the Questionnaire selected, click Questions.
- Click New.
- Select a question from the Question Code drop-down.
Assign a- numeric sequenceAssign a number for ordering of questions on the page.
- Click OK to add.

- Repeat as needed until all question fields have been added to the questionnaire.
- Click Refresh Dictionary.
Tip If the Question you require does not appear in the Question Code drop-down, new questions can be added by following these steps:
- Navigate Go to Advanced Content → Questionnaire Field Maintenance (/QuestionMaintenance.aspx).
- Click New.
- Set the values as follows:
- Question Code - a unique code to easily identify this question for selection later on
- Question Text - the question prompt which will be displayed to the user
- Sequence - determines the order in which the question appears in the maintenance screen. This will default to the next available sequence number, but can be overwritten
- Answer Format - the required format for responses to this question (e.g. Short Text, Number, Tickbox, etc)
- Length - the number of characters the field is to be restricted to (if applicable)
- Required - tick this box if this question is to be mandatory
- Help - enter tooltip text here - either a further explanation or example; anything which might assist the user in completing the questionnaire
- Hidden - tick this box if the question should NOT appear on the questionnaire (used to render hidden HTML elements on a questionnaire page)
- Click OK to save.
Questions created here will are now be available for use in any Questionnaire.
3. Add the Questionnaire Widget and
...
configure settings
This example uses an existing custom page.
- Navigate to Go to Content → Custom Pages.
- Click Design on on the required selected Custom Page. (Note - if there is no NOTE - If the 'Design' button is not there, your page is not widget-based and . It will need to be converted via page Options.)
- Click Add Widget.
- Add the Questionnaire widget.
- Click Edit for the widget.
- Configure options as required. See the : Questionnaire Widget help for assistance.

- Click Save.
- Navigate to the custom page and view your new questionnaire!

...
| Tip | ||||||||||
|---|---|---|---|---|---|---|---|---|---|---|
| ||||||||||
Make your customers' lives easier by prefilling some of the questionnaire fields for them! From version 3.92+, you have the ability to can pre-populate fields based on customer/user data, or page parameters. For example, Examples: Name and Company Name (for logged in users), or Product Code (if the form is in a stock enquiry form on a product detail page). Here's a quick how-to:
If you don't see the token you're after, contact our friendly Support team for assistanceCommerce Vision. |
Additional Information
| Multiexcerpt | ||
|---|---|---|
| ||
Uses Create forms include Contact Us, Returns, Warranties and Feedback. |
...
| Minimum Version Requirements |
| |||||
|---|---|---|---|---|---|---|
| Prerequisites |
| |||||
| Self Configurable |
| |||||
| Business Function |
| |||||
| BPD Only? |
| |||||
| B2B/B2C/Both |
| |||||
| Third Party Costs |
|
...