...
- In the CMS, navigate to Content → Custom Pages & Templates.
- A list of existing custom pages will be displayed. Click 'Add Page' to create a new one.

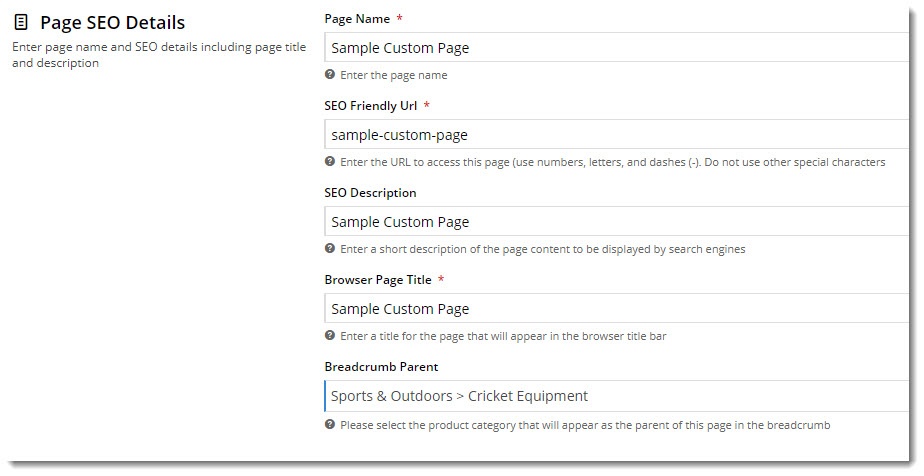
- Enter your Page Name and other SEO information. Once you enter the Page Name, the fields below it will auto-populate. Edit any of them as required.
Next, click 'Add Menu' to
- SEO Friendly URL - the page's user- and search engine-friendly URL.
- SEO Description - the blurb that displays under the Title and URL on a search engine's results listing.
- Browser Page Title - the page title that will display at the top of the browser window (or on the browser tab).
- Breadcrumb Parent - if you'd like a product category to appear in the breadcrumb for this page, select it from the dropdown here.
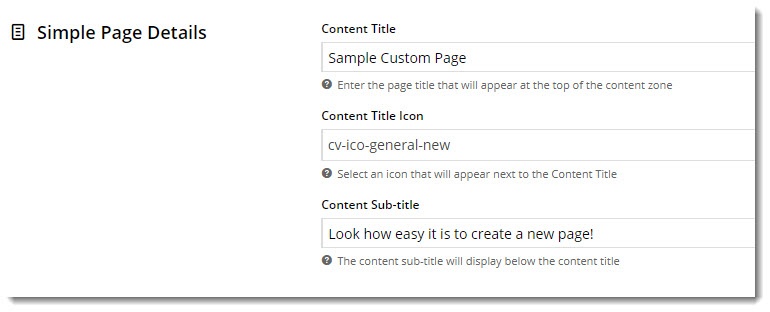
- If this will be a Simple page (i.e. no widgets used), enter the Title, Icon, and Subtitle to be displayed at the top of the page content area.
Skip this if you're creating a Widget-based page.- Next, 'Add to a Menu'. This will allow users access to this page, depending on their role.
- Select the required menu from the dropdown list. The top level menu code will be listed in brackets after the menu name.
Tick 'Authentication Required' if you want users to be logged in before they can access the page via this menu. Otherwise, leave blank.
Tick 'Hidden' Use the radio buttons to filter Section menus or Navigation menus.- Toggle the 'Hidden' option if you don't want the page to appear as a link on the menu (say, for example you want the page to be accessed via a promotional email link only). Otherwise, leave blank.
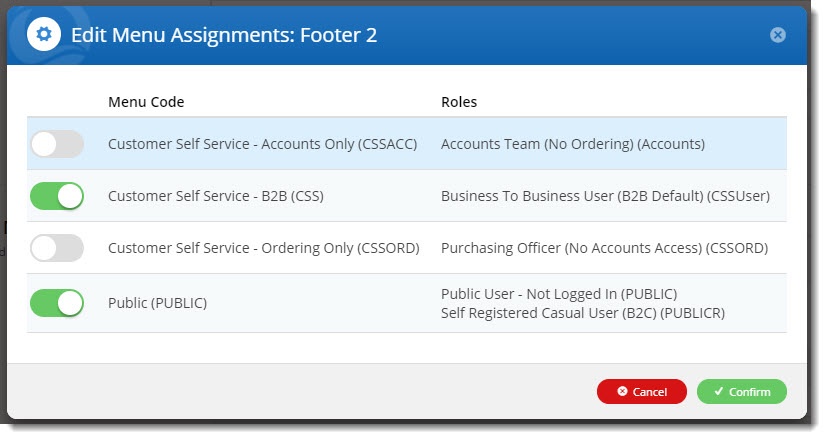
Repeat steps 4-7- If you need to further restrict which roles can access this page on the chosen menu, hover over 'Options' and select 'Menu Associations'.
Here you can toggle access on and off as required:- Repeat steps 6 - 8 for any additional menus the this page should be on.

- Select the page content type you require:
- Simple - all page content is added via the WYSIWYG (What You See Is What You Get) content editor you see here.
The editor allows you to format text, add links, images, and other html.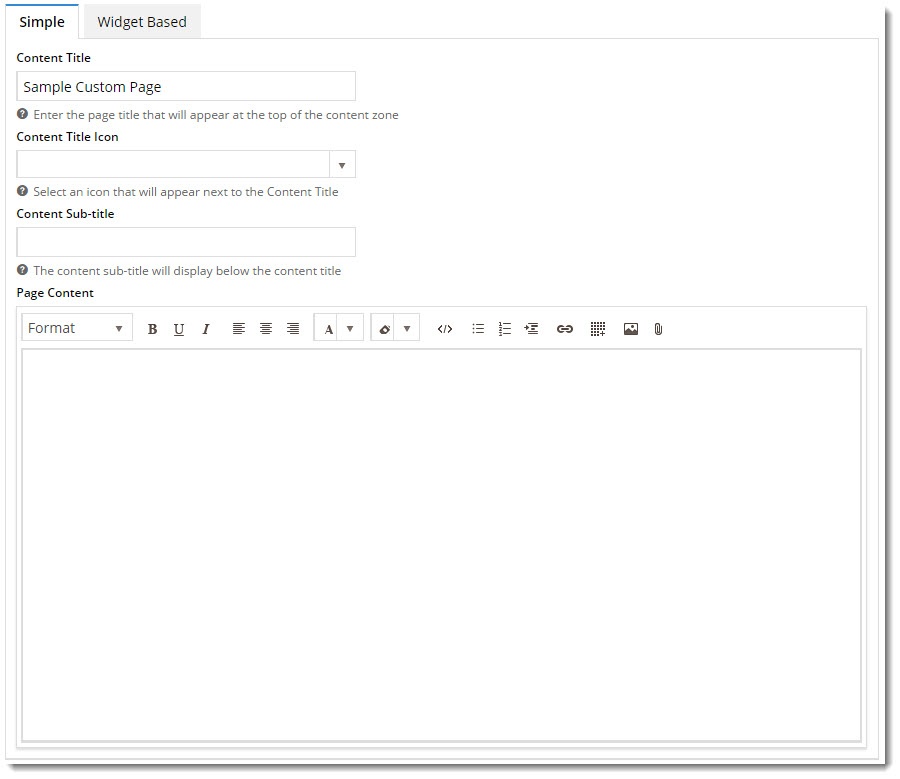
- Widget Based - all page content is added via widgets on a template. Add widgets to display dynamic content such as product campaigns, banner sliders, and more.

- Save & Exit.


...