| Info |
|---|
IMPORTANT - Only Australian addresses can be looked up through Google Address Validation on the Commerce Vision platform. |
| Multiexcerpt | ||||
|---|---|---|---|---|
| ||||
Creating a google API key for use with Google address validation. Using API Keys This guide shows how to create, restrict, and use your API Key for Google Maps Platform. Before you begin Before you start using the Places API, you need a project with a billing account and the Places API enabled. To learn more, see Set up in Cloud Console. Creating API keys The API key is a unique identifier that authenticates requests associated with your project for usage and billing purposes. You must have at least one API key associated with your project. To create an API key:
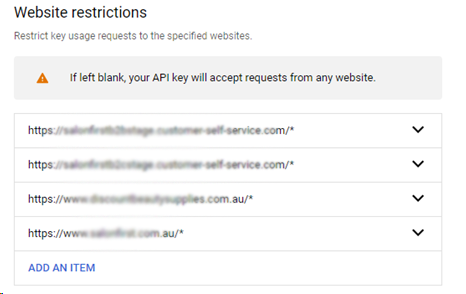
Once your API is created you will need to restrict the API to your website URL and any associated Stage sites so it cannot be used for unauthorized use. Restricting API keysRestricting API Keys adds security to your application by ensuring only authorized requests are made with your API Key. We strongly recommend that you follow the instructions to set restrictions for your API Keys. For more information, see API Key best practices. To restrict an API key:
Make sure to add an asterix after the URL so any associated URLs are also included .
CV support gmail: commercevision.helpdesk2@gmail.com How to add CV support: https://support.google.com/googleapi/answer/6158846?hl=en#zippy=%2Cadd-project-members |
| Multiexcerpt | ||
|---|---|---|
| ||
| **Overview content** |
...
Step-by-step guide
Creating a google API key for use with Google address validation.
Using API Keys
This guide shows how to create, restrict, and use your API Key for Google Maps Platform.
Before you begin
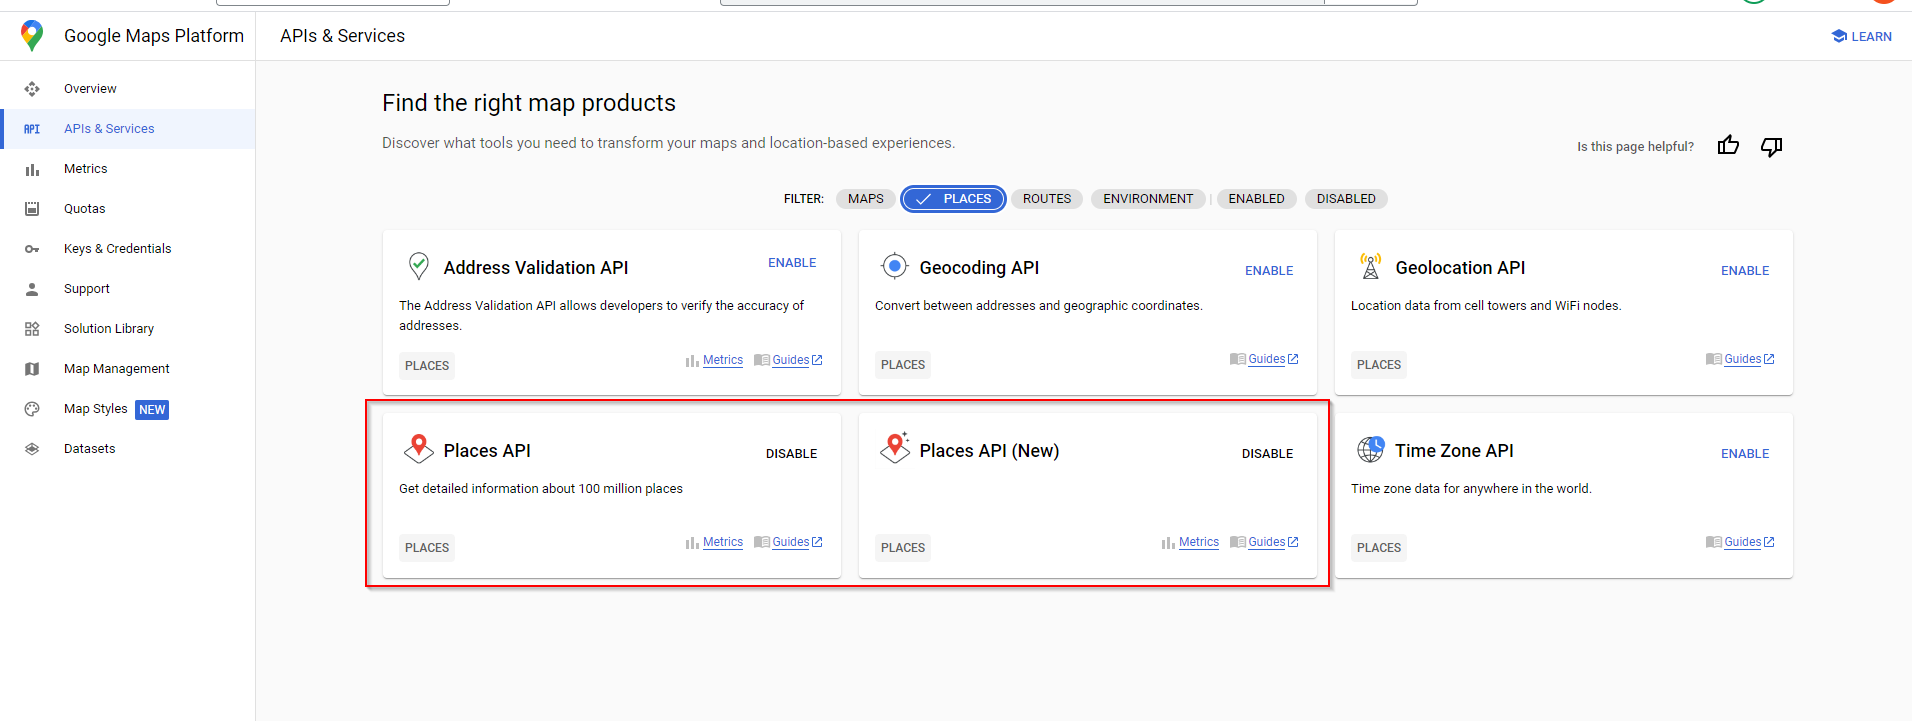
Before you start using the Places API, you need a project with a billing account and the Places API enabled. To learn more, see Set up in Cloud Console.
Creating API keys
The API key is a unique identifier that authenticates requests associated with your project for usage and billing purposes. You must have at least one API key associated with your project.
To create an API key:
- Go to the APIs & Services > Credentials page.
- On the Credentials page, click Create credentials > API key.
The API key created dialog displays your newly created API key.- Click Close.
The new API key is listed on the Credentials page under API keys.
(Remember to restrict the API key before using it in production.)Once your API is created you will need to restrict the API to your website URL and any associated Stage sites so it cannot be used for unauthorized use.
Restricting API keys
Restricting API Keys adds security to your application by ensuring only authorized requests are made with your API Key. We strongly recommend that you follow the instructions to set restrictions for your API Keys. For more information, see API Key best practices.
To restrict an API key:
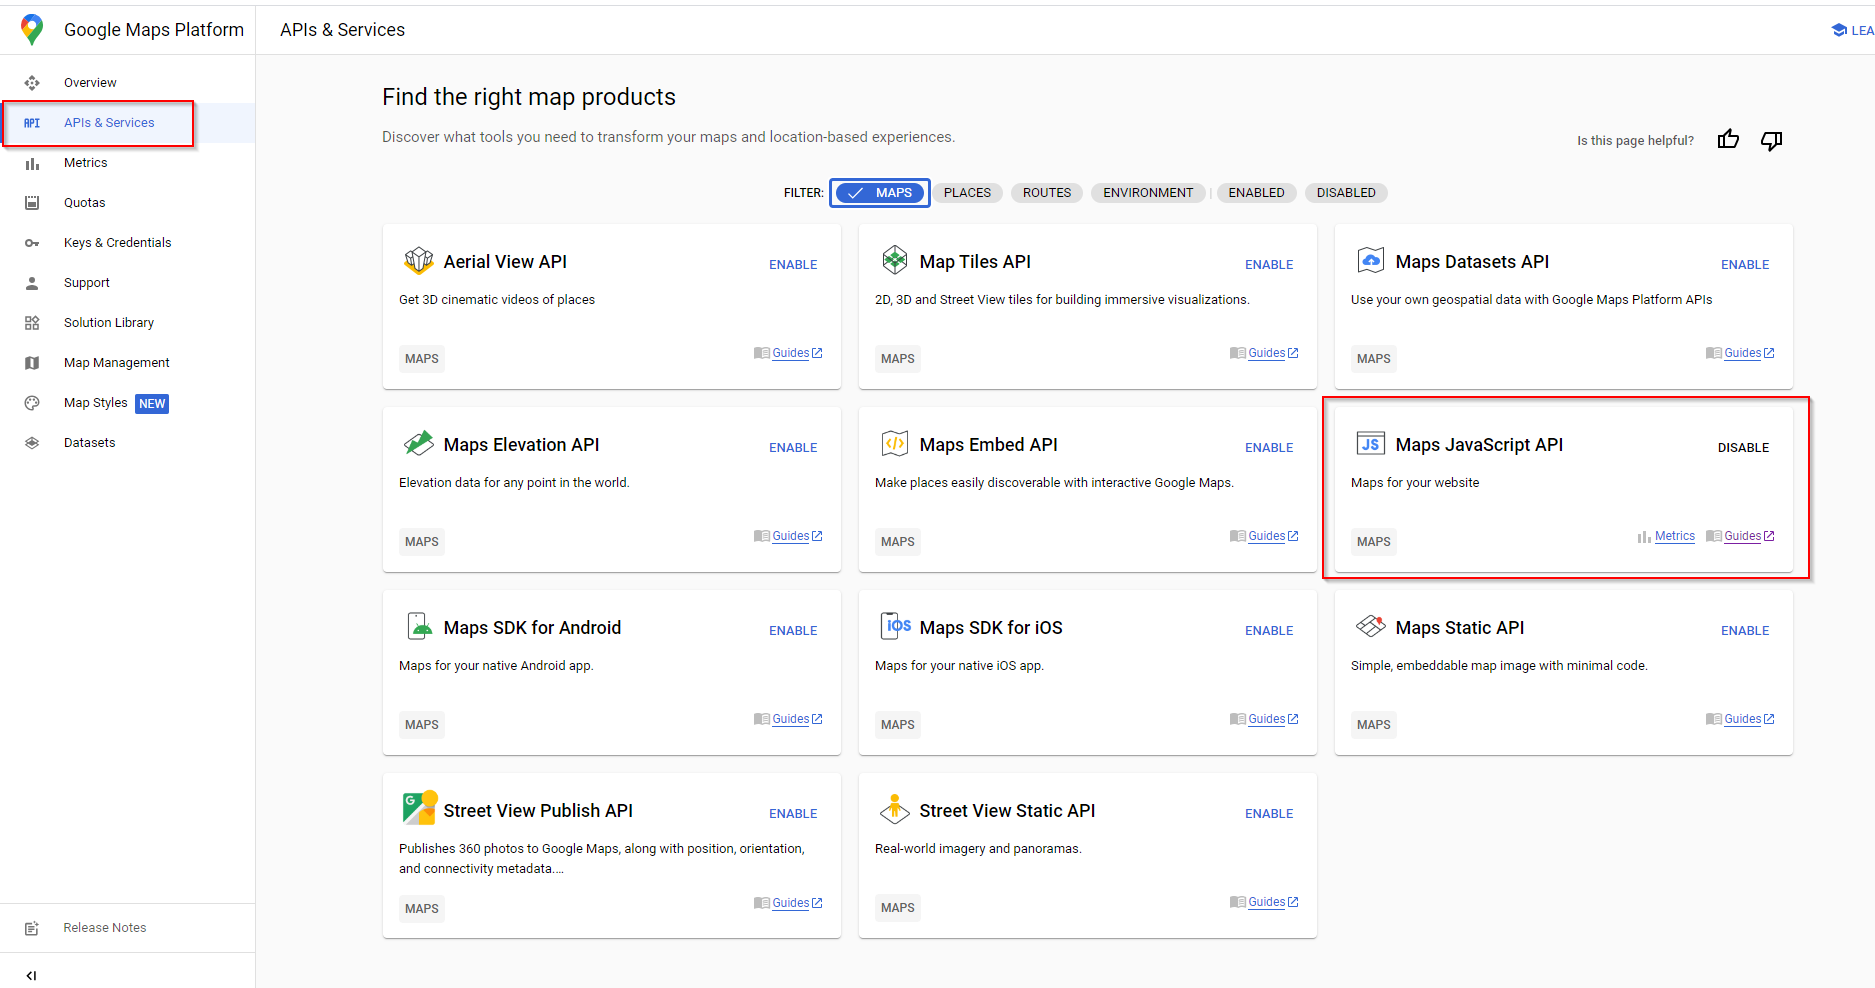
- Go to the APIs & Services > Credentials
- Select the API key that you want to set a restriction on. The API key property page appears.
- Under Key restrictions, set the following restrictions:
- Application restrictions:
Make sure to add an asterix after the URL so any associated URLs are also included .
example:
- API restrictions:
- To finalize your changes, click Save.
- If the API is still not providing the right access – please add the Commerce Vision helpdesk gmail account and provide access so we can configure as required.


CV support gmail: commercevision.helpdesk2@gmail.com
How to add CV support: https://support.google.com/googleapi/answer/6158846?hl=en#zippy=%2Cadd-project-members
Once you have the API key, in the CMS, go to Settings → Settings → Google Merchant Settings. Enter the Google API Key and Store Location Google API Maps URL.

Additional Information
| Multiexcerpt | ||
|---|---|---|
| ||
| Minimum Version Requirements |
| |||||
|---|---|---|---|---|---|---|
| Prerequisites |
| |||||
| Self Configurable |
| |||||
| Business Function |
|
| BPD Only? |
| |||||
|---|---|---|---|---|---|---|
| B2B/B2C/Both |
|
| Multiexcerpt | ||
|---|---|---|
| ||
Contact CV Support |
Contact CV Support
| Third Party Costs |
|
|---|
| Multiexcerpt | ||
|---|---|---|
| ||
CMS Category |
...
Related help
| Content by Label | ||||||||||||||||||
|---|---|---|---|---|---|---|---|---|---|---|---|---|---|---|---|---|---|---|
|
...
| Multiexcerpt | |||||||||||||
|---|---|---|---|---|---|---|---|---|---|---|---|---|---|
| |||||||||||||
Macro Instructions for carrying Article Information through to Feature List
Instructions for carrying Excerpts through from this page to the Feature List Article Page: Add macro / Multiexcerpt (or copy and existing excerpt and edit) or (Copy existing page and place content into existing excerpt macros) On Features List page: Click in the Cell to be populated / add macro / Multiexcerpt Include / Select the Article page and the excerpt (or copy another feature line and edit the 'Article page' source. |
...