...
But did you know you can now apply layers based specifically on a User or Group of Users?
That's right - you can add content to your website that will appear ONLY to a pre-defined group of users. How's that for personalisation?
| Info | ||
|---|---|---|
| ||
You'll need the feature 'Additional Layer Filters' enabled for your site. Contact us to switch this on for you. |
...
Configuring the feature
With the Additional Layer Filters feature enabled, you just need to make sure the setting to enable 'User Group Filtering' is on.
...
- Navigate to Advanced Content → Layers.
- Edit an existing Layer, or Add New Layer.
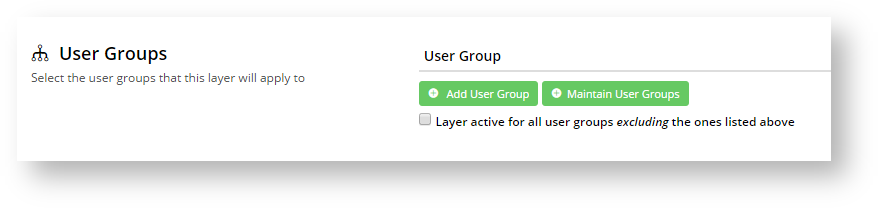
- Scroll to the User Groups section.
- Click Add User Group (or if you haven't yet created your group, click 'Maintain User Groups' and follow the steps above for "Creating a User Group").
- A dropdown list will appear, containing all existing Groups. Select the one you require.
- Consider the setting "Layer active for all user groups excluding the ones listed above" - tick this if you want the group(s) you just added to act as an exclude (rather than include).
- Click Save & Exit (if you were creating a brand new layer, first scroll back up and enter required Layer info such as Name, Description, Authentication Status).
Importing Users
If you've got a lot of users to add to a group, it might be much easier to import them from a spreadsheet, rather than add them one by one. Here's how.
- Navigate to Users → User Groups.
- We'll assume you've already created your group (if not, follow the steps above for Creating a User Group. Find your group in the list and click Users.
Import - Can add based on email address, or even UserID (if you get this data from Analytics, for instance). CSV will accept either/both.
...