| Excerpt | ||
|---|---|---|
| ||
Allow your B2B customers to reprint invoices for their orders. (For PRONTO.) |
| Multiexcerpt | ||||
|---|---|---|---|---|
| ||||
| Anchor | ||||
|---|---|---|---|---|
|
| Warning |
|---|
If you do not have all of the prerequisites listed in the table below, please contact Commerce Vision to discuss your needs.
|
Step-by-step guides
In PRONTO
Using email2me
- Ensure the latest proledb.spl import program is installed.
- Access the Override program table (SYS.M359)
- Set CSS_INVPRT to 'E2ME'
- If the default email2me printer queue is NOT email to me
- Set CSSE2ME to '<printer name>'
- (Refer to $PRONTO/lib/printers for the name or consult the customer)
Using TrueForms Director / TrueForms NEO
- Ensure the latest proledb.spl import program is installed.
- Set up a new entry in the $PRONTO/lib/printers file as follows:
cssinvoice, type=trueform, lpr=/xxx/lbin/cssinvoice $1, no_ff, no_form_type,
where xxx is the pronto directory (e.g. /home/pronto/lbin/cssinvoice would be the full path if /home/pronto was the PRONTO directory)- cd $PRONTO/lbin
- vi cssinvoice
- insert the following code: (use i for insert)
cat $1 >/tmp/cssinvoice- Save the file (:wq!)
- chmod +x cssinvoice
- Determine the PRONTO virtual printer for emails from TrueForms - its normally called "email" or "ztf-email" or similar
- Login to PRONTO
- Access the Override program table (SYS.M359)
- Enter the following codes:
- CSS_EMAIL: set the the name of the virtual printer (from h. above)
- CSS_FR_EM: the name of the from address (e.g. accounts)
- CSS_FR_DM: the domain name (e.g. bhp.com.au) - this would make the full from email = accounts@bhp.com.au
- CSS_INVPRT: set to TF or TFN
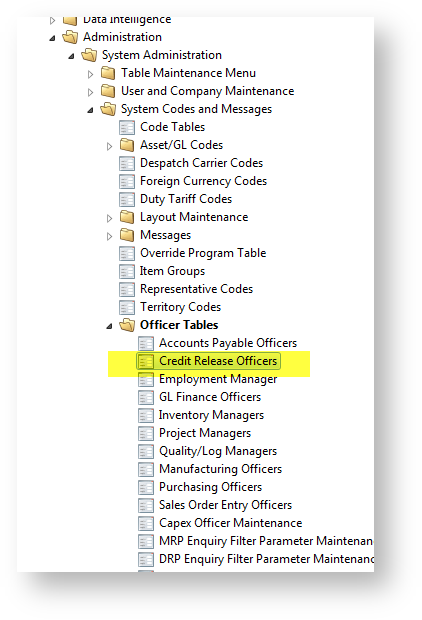
(If you are using True Forms Director - TF or True Forms NEO - TFN)- Ensure the Commerce Vision user (normally commvisi) does not have the "spool" option set in the Credit Release Officers table (SYS.X053).
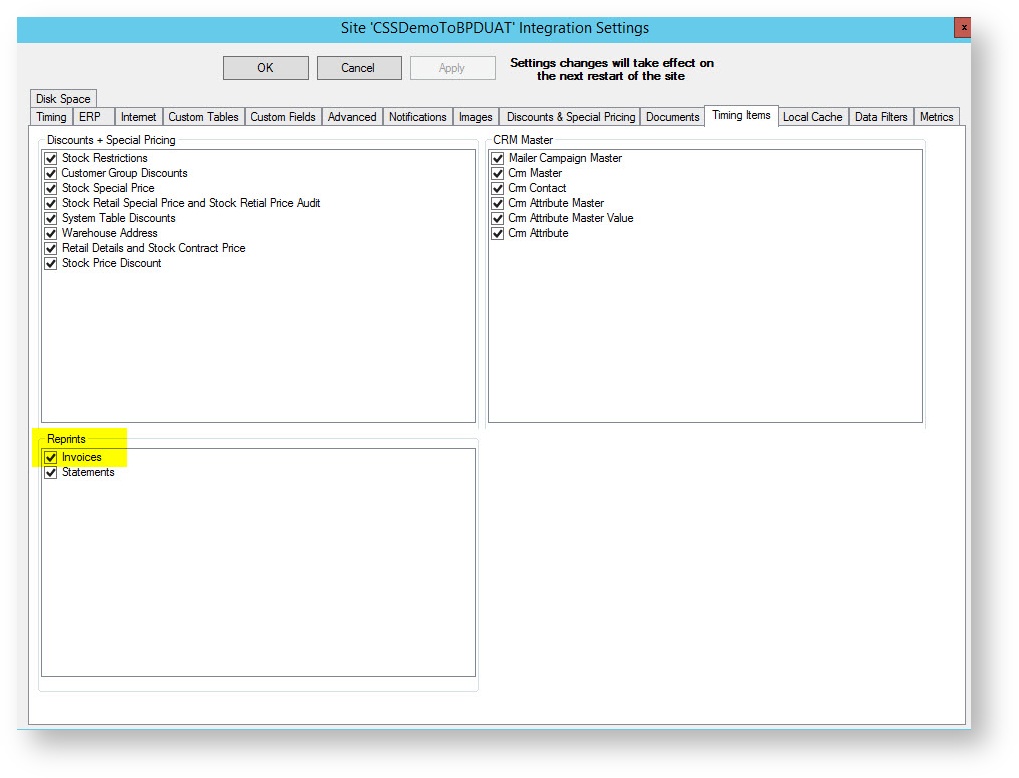
On the Integrator
- Select the Settings gear icon.
- Select the Timing Items tab.
- In the Reprints section, check the 'Invoices' box.
- Click 'Apply', then OK.
- Stop and restart the Integrator.
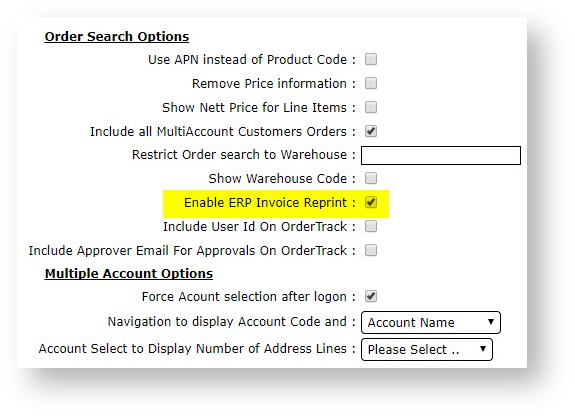
Online (website)
- In the CMS, navigate to Advanced Settings → System Preferences.
- Select the Browse tab.
- Tick Enable ERP Invoice Reprint.
- Click Update.
- For a BPD site, that's it.
- For a Classic site: Create a new content template for the message to show customers once the request has been made.
- Navigate to Content' → Assign Default Templates.
- Assign your new template in the Invoice Re-print Confirmation Template field.
- Click Update.
Path to Credit Limit Officers Table:
Additional Information
| Multiexcerpt | ||
|---|---|---|
| ||
|
| Minimum Version Requirements |
| |||||
|---|---|---|---|---|---|---|
| Prerequisites | ||||||
| Self Configurable |
| |||||
| Business Function |
| |||||
| BPD Only? |
| |||||
| B2B/B2C/Both |
| |||||
| Third Party Costs |
|
Related help
| Content by Label | ||||||||||||||||||
|---|---|---|---|---|---|---|---|---|---|---|---|---|---|---|---|---|---|---|
|