Overview
For CMS Administrators only
| Excerpt |
|---|
For sites on version 3.75+, the Commerce Vision CMS provides access to new layout templates, widgets, and web-based product and category maintenance. The CMS also links to all of the existing administration pages, such as Settings, Menu Editor, and Preferences. |
Before creating a new CMS user, it is important that the same user exists as an Administrator on the website. This way, when the user attempts to access legacy admin pages via the CMS, their credentials are verified and the page is loaded correctly.
...
| ||
Create new CMS Users for administrative functions on your platform. |
User maintenance in the CMS is split between two groups: Website users and CMS users. Website user roles identify the type of access a user has when they login to your ecommerce store.
CMS users are organisational users who access your CMS for platform administration functions. What a CMS user can do is based on their CMS Role(s). For instance, a user with the Category Management and Product Management roles will only be able to view and access product and category maintenance functions. The Administrator role can view and perform all CMS functions, configure feature settings, and manage CMS users, including create new ones.
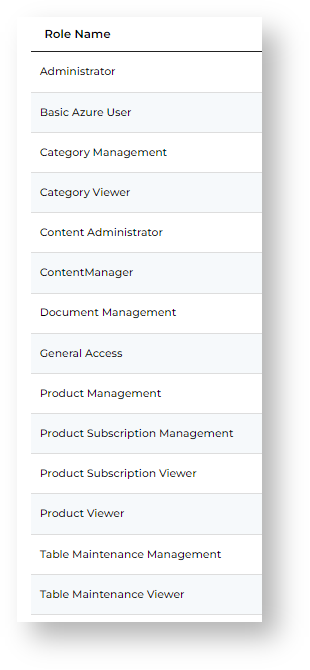
Default CMS Role Permissions
Each role has a set of default permissions. During implementation of your ecommerce store, Commerce Vision would have set up custom permissions against each role for your business.
| CMS Role | Default Permissions | |||||
|---|---|---|---|---|---|---|
| Administrator | All permissions available
| |||||
| Basic Azure User | Azure access | |||||
| Category Management | Can edit and view category products information Can manage and view all product information excluding product media Can edit product variant information | |||||
| Category Viewer | Can view category information only Can view product information only | |||||
| Content Manager | Can manage a sites images and files | |||||
| Document Management | Allow editing of hints on editable fields | |||||
| General Access | Add, edit and delete CMS Users Edit the Updates.css custom styles file Manage Campaigns Clear cache mechanisms on the CSS Site Manage Custom Fields Manage Custom Pages Manage Custom Widgets Manage Feature Settings View Google Analytics menu items Manage Layers Manage Built-in Pages Manage User Groups Manage Web Sites Search Templates for text or widgets View the style-related menu items | |||||
| Product Management | Can edit category products information Can manage and view all product information excluding product media Can manage all product information including documents (with Product Documents enabled) Can edit product variant information Can view category products information only Allows Maintenance of Product Features data (with Product Features enabled) Allows modification of product restrictions (with Product Restrictions enabled) | |||||
| Product Subscription Management | Can view and manage Product Subscription information (with Subscription Products enabled) | |||||
| Product Subscription Viewer | Can view Product Subscription information (with Subscription Products enabled) | |||||
| Product Viewer | Can view product information only Can view category products information only | |||||
| Table Maintenance Management | Can view and manage all Table Maintenance (with Table Maintenance enabled) | |||||
| Table Maintenance Viewer | Can view Table Maintenance only (with Table Maintenance enabled) |
Step-by-step guide
To create Add a new CMS user:
...
CMS user and their CMS role(s).
- In the CMS,
...
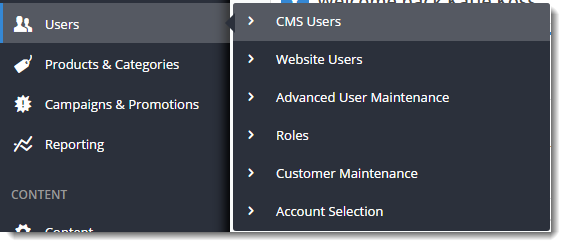
- go to Ecommerce → Users → CMS Users
...
- .
...
- On the CMS User Maintenance page, click Add New User
...
- .
...
- On the Add User page, in CMS User Details, enter details for the new user. NOTE - Ensure the User Name does not contain spaces or special characters.
...
- It can be an email address.
- The Organisation ID field is pre-filled with your organisation name.

...
- NOTE - If this field is not displayed, it means the system will just default to your organisation.
- Two-factor authentication will automatically be set for the user. Unless there are special circumstances, this should not be turned off. Learn more: 2FA CMS user authentication
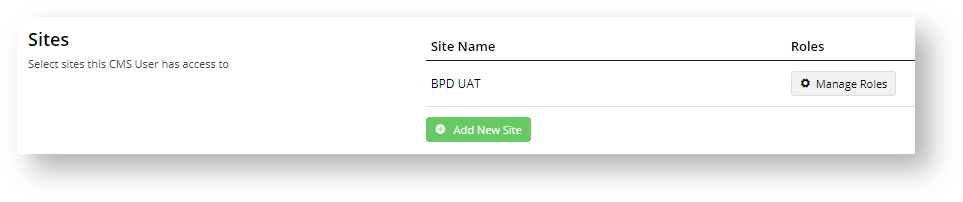
- In the Sites section, click Add New Site and select the site this user can access from the Site Name dropdown. To add the site, click Add New Site.
- Repeat Step 6 to add other sites, e.g. Live and Stage
...
The new user will now be able to login to the CMS and access the site's existing backend pages, as well as the new CMS functionality.
...
- .
- Click Save & Exit.
- Scroll down to the Sites section. To add one or more roles, click Manage Roles.
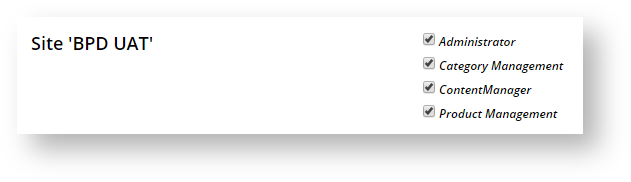
- Tick one or more applicable roles, then click Save.
Related Resources
| Content by Label | |||||||||||||||||||||
|---|---|---|---|---|---|---|---|---|---|---|---|---|---|---|---|---|---|---|---|---|---|
|