| Info |
|---|
Only users that are enabled as an Account Administrator can create new users for that Customer account. |
| Excerpt | ||
|---|---|---|
| ||
Create a new User through the Admin interface on your website. |
Overview
Customer Self Service (CSS) allows for new users to be created either via the administration interface, or via CSV import. This page covers the basic set-up of new users via the admin interface.
Each user:
...
This provides a guide to creating new website users while logged into the website as Website Administrator or the User Maintenance page accessed through the dashboard for non-website administrator roles. NOTE - A user still has to be enabled as an Account Administator to create new users on that account, whether staff or customers. New website users can also be created in the CMS by staff who are CMS administrators.
When creating a user, ensure the user has the following:
- a unique login (normally in the form of an email address).
- must be associated association with an ERP Debtor Code.
- can have access to many Debtor Codes , or be associated with just one.
- ie.eg. A , a branch manager will access one code, a national manager will access all codes, etc (can be configured as wildcards).
- must be assigned assignment of a Role (or even multiple Roles).
- can have various settings applied (Order dollar limits, who approves orders, etc).
Step-by-step guide
To Create a New User:
- Login as an Administrator.
- Navigate to 'Accounts' --> 'Account Selection' (zAccounts.aspx).
- In the Search box, enter the Customer Code or Name the new User will be associated with.
- Select the required record via radio button.
- Click the 'Users' link at the bottom of the table. A list of current users for that Customer Code will be displayed.
- Click the 'New' link at the bottom of the table. The 'User Details' fields will now become editable.
- Populate each field as detailed in the legend below.
- Click 'OK' to save.
...
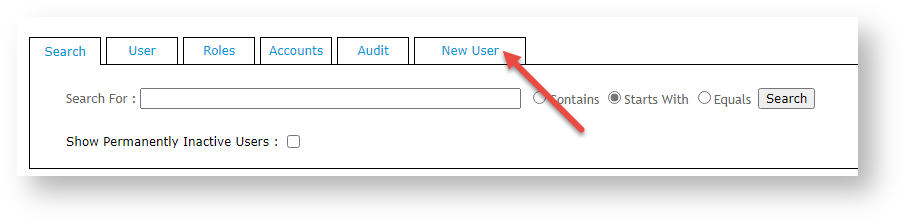
create a new website user:
- If you're Website Administrator, navigate to Advanced User, then click New User.
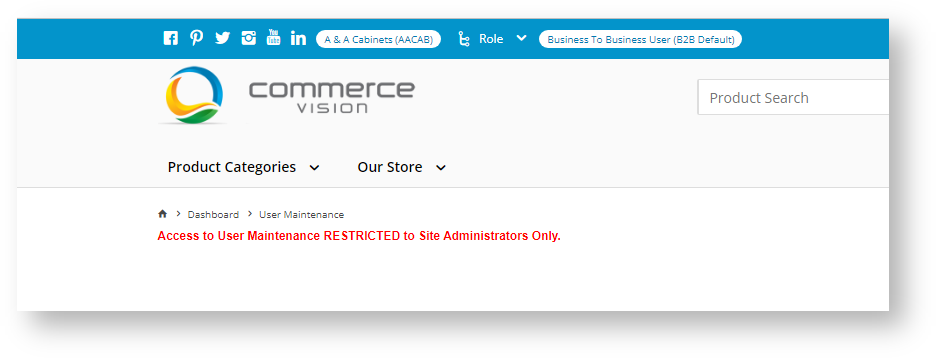
If you are a non-Website Administrator role with Account Administrator acccess, navigate to Dashboard → User Maintenance, then click New User. (NOTE - this page is available only if it has been added to Dashboard. See: Add a New Menu Item.)
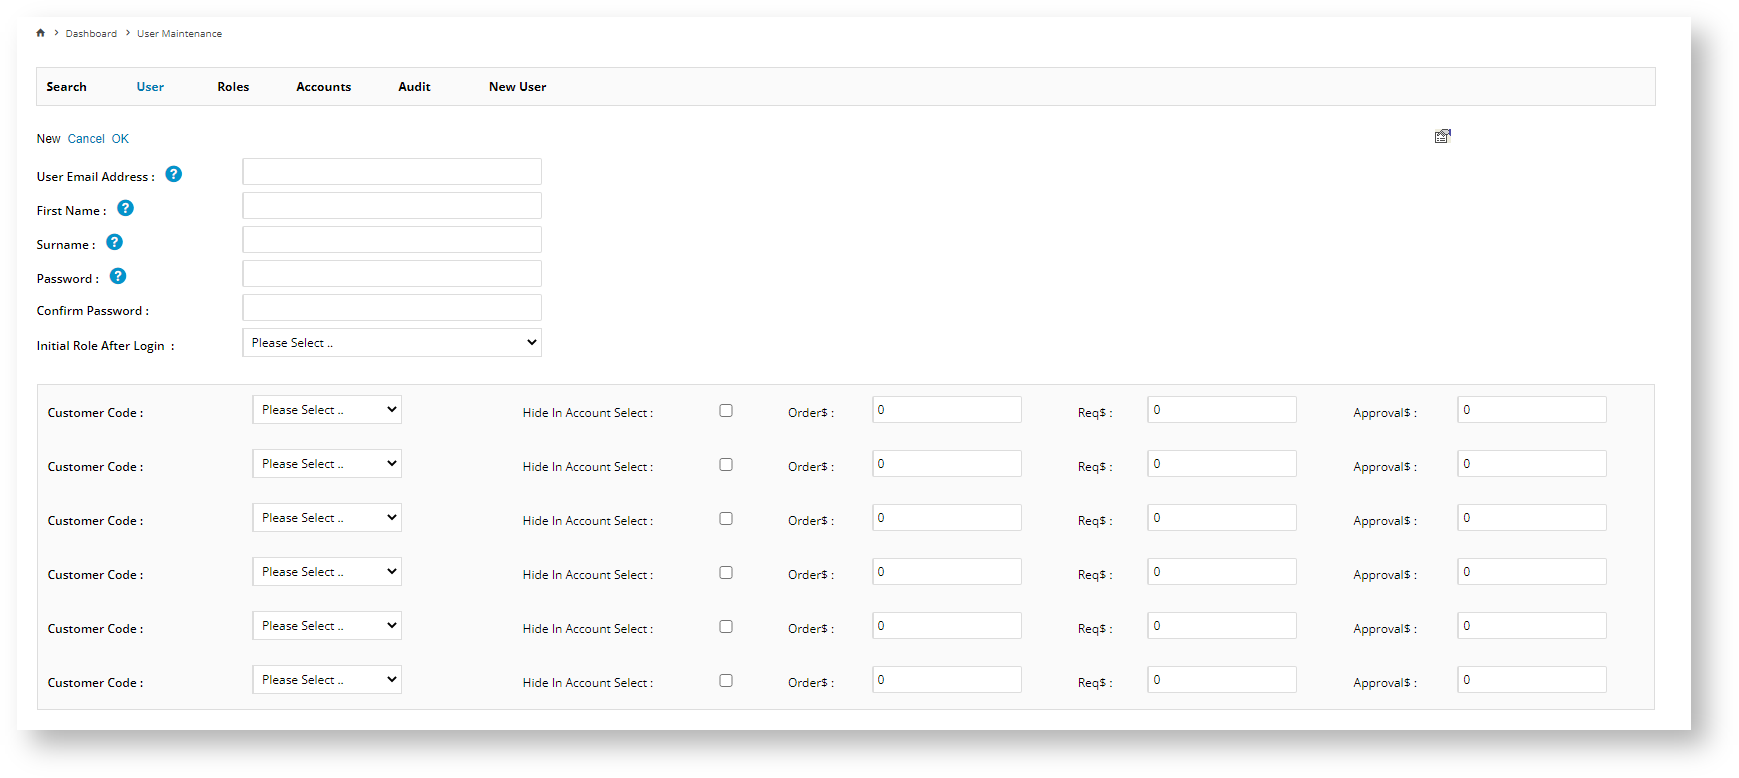
If your user account do not have Account Administrator access, this message is displayed:Enter the new user's details.
Field Name Description User Email Address The user's email address. This will also be the user's login/ID.

...
First Name The user's
...
first name. Surname The user's surname. Password The user's initial password. Confirm Password The user's initial password (repeated). Initial Role After Login The role the user will operate on once they have successfully logged in. Customer Code The account the user is associated with. There can be more than one customer account. Deactivate User Account (Not displayed with Dashboard access.) When ticked, the user's account is disabled. Disabled users cannot log in. Hide in Account Select When ticked, if the user is associated with more than one account, they cannot switch to this customer account when the user is logged in. Order Limit The upper limit dollar amount the user is permitted
...
per order. Requisition Limit The upper limit dollar amount the user can request for approval on this account. Approval Limit (Applies only if the Customer uses order approvals.) The upper limit dollar amount the user can approve on this account. Orders Approved By (Not displayed with Dashboard access.) When the user places orders exceeding their Order Limit, this is the user who should approve those orders. Account Administrator (Not typically displayed with Dashboard access.) When ticked, grants access to 'Advanced/Extra User Maintenance' on the Administrator's role. Account Administrators are able to set up and maintain other users.
To save the user, click OK.
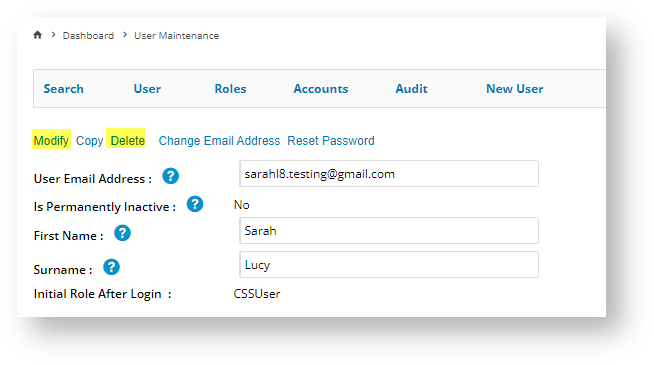
To edit or delete a user
...
:
- Navigate to User Maintenance
...
- (/zUsers.aspx).
...
- Find the user with the Search tool, then click on the radio button next to their login ID.
- Depending on what you want to do, click Modify or Delete.
| Info |
|---|
There is a system setting to toggle whether a confirmation is requested when deleting a user. This setting is called 'Show Confirm On Grid Delete/Remove' and is found under the 'General' Tab in 'Settings' (/zSettings.aspx). |
Related help
| Content by Label | ||||||||||||||||||
|---|---|---|---|---|---|---|---|---|---|---|---|---|---|---|---|---|---|---|
|