...
We've recently updated the interface for our Section Menu Editor in the CMS, so creating and editing your content menus just became much a whole lot simpler.
Take a look.
...
| Info |
|---|
Before you can take advantage of our new Section Menu Editor, you'll need to be running version 4.06 or higher. We'll also examine your current menu data prior to enabling the feature, to ensure a smooth transition from old to new. Interested? Contact us to get started! |
Creating a New Menu
- In the CMS, select Navigation → Section Menu Editor.
- Click Create New Menu.
- Give your menu a description / label.
- Save.
- Add Item to Menu.
- Give the new item a label and select the type of menu item you wish to add - page, product, category or link.
- The dropdown list will change depending on the menu type you choose - you can lookup products / categories, existing pages, or input a complete URL for a link.
- Valid URLs must start with either http:// or https://
- Javascript code must start with javascript:
- You can select additional options for Pages:
- Include in Site Map
- Open in New Window (this option is also available for Links)
- Hidden
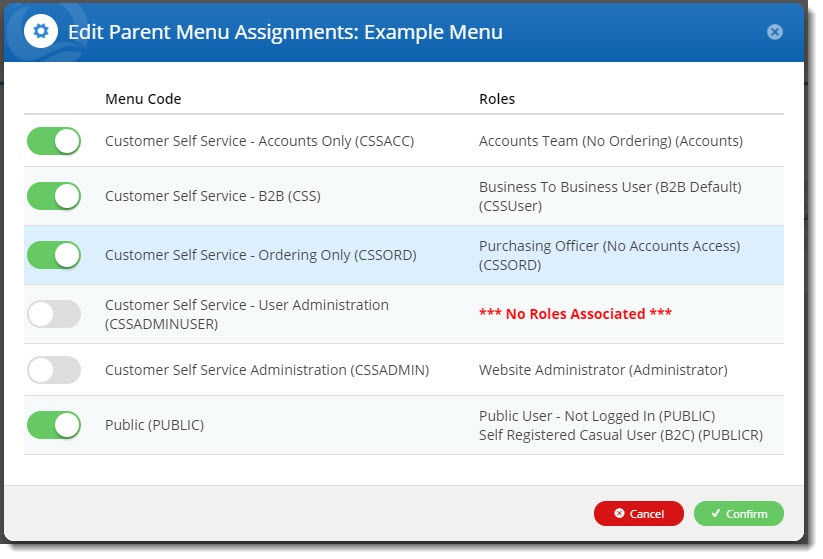
- Next, you can configure who can access this menu. Select Options → Associated Roles.
- By default, each item you add to a section menu will inherit the role permissions of the top level parent item. However, you can configure different access to individual menu items if required.
- When you first create a new section menu, it will be linked to ALL menu codes. You can toggle off the ones you don't want right here.
- Click Confirm, then repeat Step 5 onward to build out your section menu. You can even drag and drop the menu items to re-order them if you decide the sequence isn't right.
- Save your new menu.


Displaying a
...
menu on
...
your site
Once you've created or edited your got a section menu, the next step is to display it on your site. To You can do this , you'll need a Section Menu widgetin one of 2 ways: using a Section Menu widget, or including it with your site's Mega Menu.
Both options are covered below.
Using a Section Menu widget
A Section Menu widget can be placed virtually anywhere on your website, so it's the most flexible option for displaying a content menu.
- Navigate to Content → Page Templates and select the template you wish to display your menu on. For example, You might choose the Theme Layout for your site's footer, or the content zone of your home page, for example.
- Scroll to the required zone and click Add Widget.
- Search for and select Section Menu widget and click , then click Add Widget.
- The widget configuration window will open automatically for you to adjust settings.
- Find the Section Menu Item Code field, and select your newly created section menu from the dropdown list.
- Specify any remaining settings you require (icons, etc.), then if you're ready for this widget to display immediately, toggle the 'Enable widget on Save' setting at the bottom of the window before you hit the and Save button.

As part of the Mega Menu
If your website uses a Mega Menu (rather than a Navigation Menuwhere your top level categories are listed individually, rather than in one big flyout), you can choose to display include a section menu within that same area.
You can configure the Mega Menu widget to include display a section menu either before, or after the product categories.
...