...
| Multiexcerpt | ||||
|---|---|---|---|---|
| ||||
CMS Scripts & Styles Editor Functionality |
Overview
Past functionality
Whenever you needed to upload customised JavaScripts or Style Sheets for use in CMS, you would need to navigate to use the File Manager menu and upload the files into the relevant folderfunction, then reference them in a HTML Snippet widget, and apply to a page(s).
If you had to change the scripts, you couldn’t edit them within CMS. Instead, you had to make your changes locally and then upload the amended files to your CMS.
The HTML Snippet widget allows you to do so much more than applying styles or running scripts. Therefore, unless you added a meaningful description to the HTML widget, how would you know what it was doing? You couldn't.
New functionality
| Multiexcerpt | ||
|---|---|---|
| ||
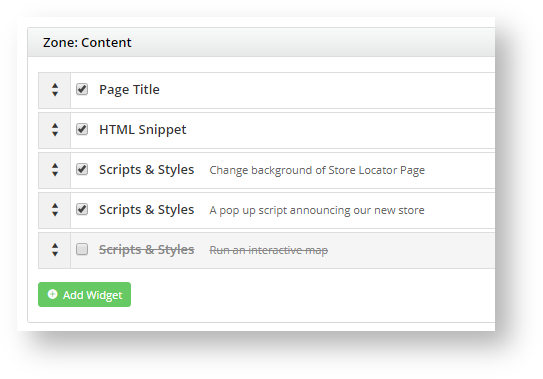
The new CMS Style Sheet Editor functionality CMS Scripts & Styles function allows you to create and edit scripts and styles from within CMS, and, because the widget functions to run scripts or apply styles only, you as CMS widgets. And because these widgets are dedicated only to running scripts or applying styles, you will know at a glance if a page is using customised JavaScript or Style Sheets. The With the Scripts & Styles widget allows you to , you can bundle related scripts and styles into one widget, to function as a unit. Or you can load multiple Scripts and Style widgets to operate independently on a page. Ticking You can also easily turn them on and off by ticking the checkbox next to the widget in the page layout turns them on or off when needed. IMPORTANT - Access to Scripts & Styles widgets is automatically available for version 4.13.02 or higher. If your system needs to be upgraded, please contact us. |
How does
...
Scripts & Styles work?
When you create a customised script or style sheet in CMS, the system will add automatically adds them to the correct system folder. All files are minimised once you click Save to reduce load times.
...
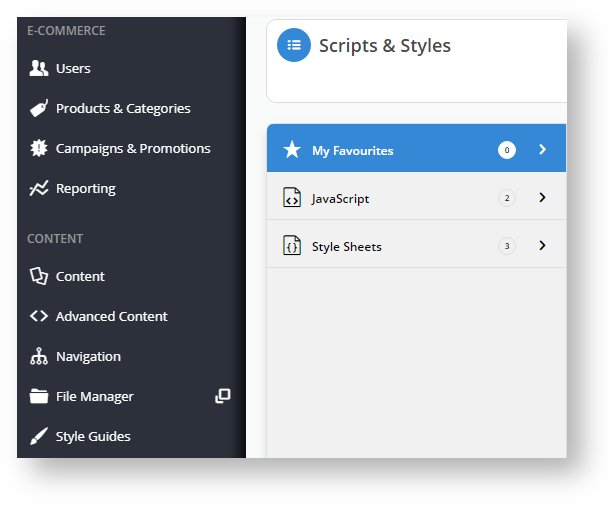
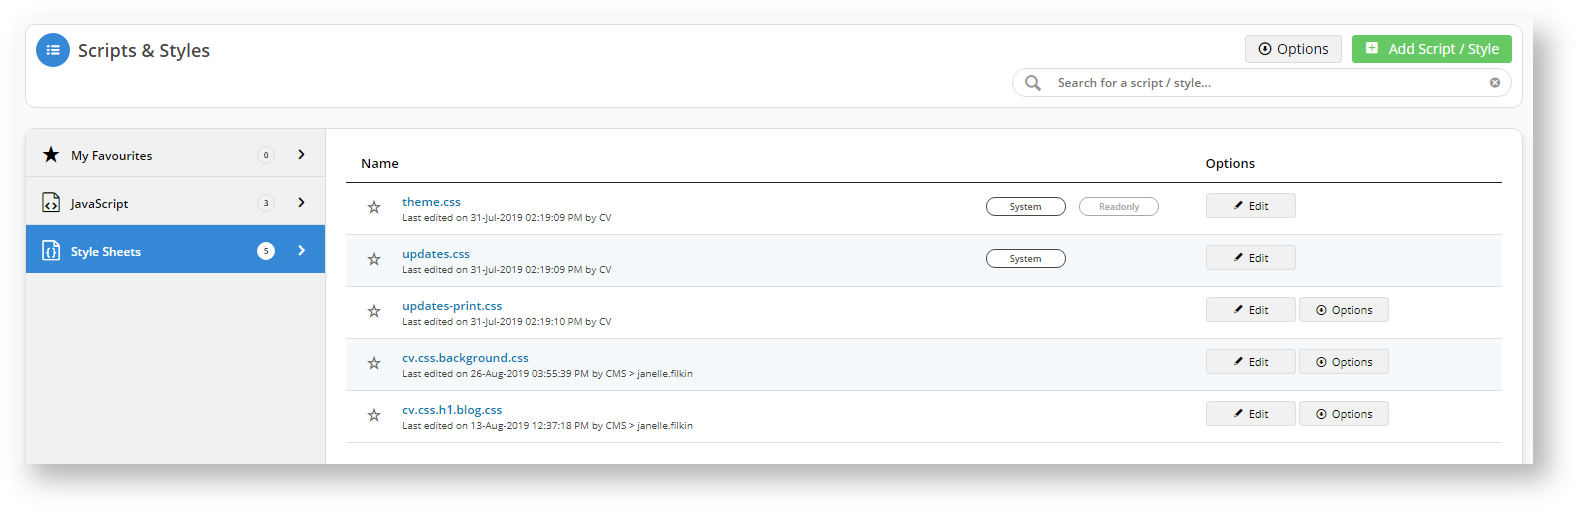
To see the scripts and styles that exist in your CMS, navigate to Advanced Content → Content → Scripts & Styles.
Step-by-step guide
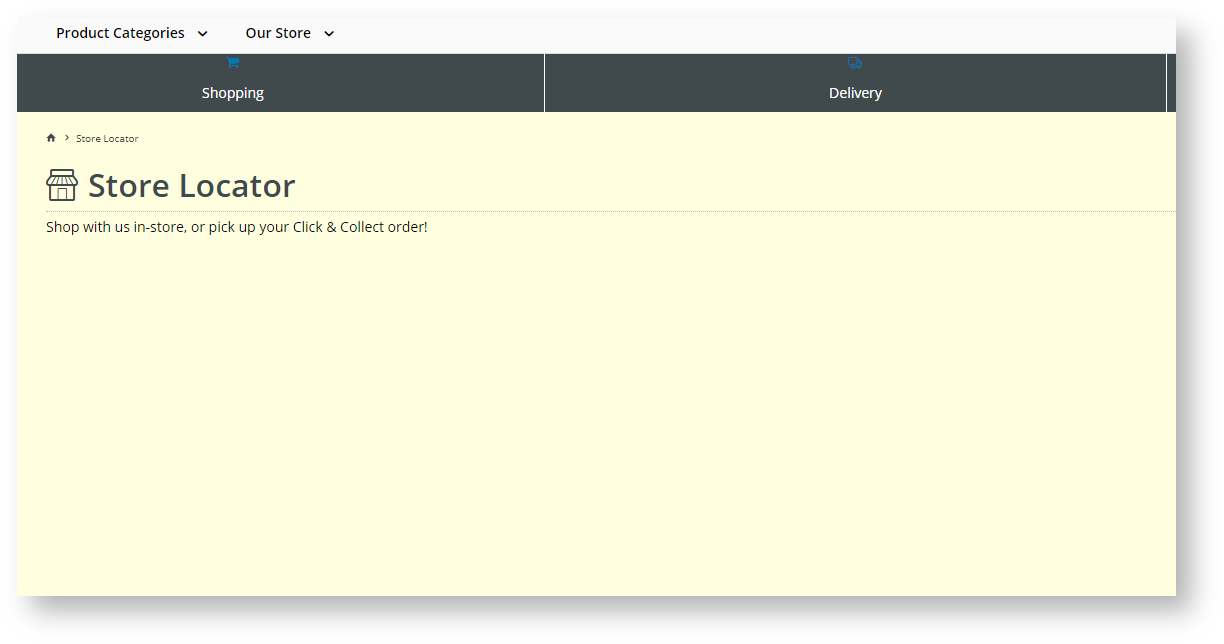
To start using the widget, you don’t have to do anything other than upgrade to or be running a version 4.13.02 or higher.To best explain the functionality, we will execute make a simple change to the background colour of our Store Locator page.
1. In your CMS, Go to Advanced Content.
2. Click Click Scripts & Styles.
3. Select Style Sheets4.
4. Click + Add Script/Style at the top right-hand side of the browser.
5. You can choose to create a JavaScript or a Style Sheet. We will select Style Sheet and type in Select Style Sheet.
6. In File Name, enter an appropriate name that follows the naming conventions of our site.

67. Select
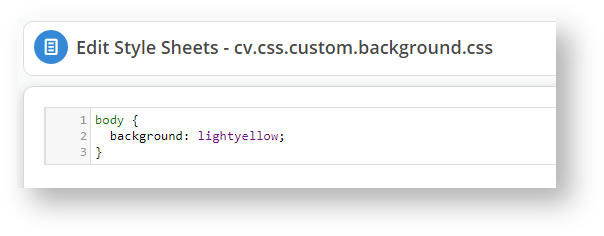
7. Click the Add button. The system will open a blank editing window for you to type .
8. Type in your custom style sheet , or you can paste the text from a file you already created elsewhere.
...
9. If you hover over Options at the top right of your browser, next to Cancel and Save, you will see File History. Use the file history to monitor changes to the script and revert to an older version if needed by clicking on the version and selecting Restore this version.10. When you have finished, click Save.
10. Click Cancel to exit out of the script editor.
Applying a script or style to a page/template
Now we will apply that style sheet to our Store Locator page (or the Page that you have chosen).11. In
12.
- In your CMS, select Content → Pages & Templates
13. Click to edit 15. Search for Scripts & Styles—the
- At the top right of the screen, type Store Locator into the “Search for a page/template” prompt box. Your page name may be different.
- Click Edit. for the page/template name.
14. Click
16. Make sure you have highlighted
- Once in the page, click Add Widget.
- In the search field, start typing 'Scripts & Styles' — the system will auto-fill the results.
,
- Select 'Scripts & Styles
- ' and click
17. In the window that opens up, type in a meaningful description.
18. Click Edit next to Scripts & Styles.


19. The system will display customised script and style files. Select the one you created from the dropdown list and click
20.click
- to open the Scripts & Styles window.
- In Description, enter a meaningful description for the use of this style. This will display next to the style name when it is in use.
- Add a Layer if required.
- From the Scripts & Styles dropdown list, select the style you created and click Add.
- Click Edit if you want to make some last minute changes to the Style Sheet, otherwise,
Apply
1 23. Select
- to apply the script or style, click Save.
The CMS will now show you have
- applied that Script & Style. You can add multiple scripts or styles to the same widget.
21. “Enable widget on Save” is selected by default, disable it if you don’t want it taking effect yet. Otherwise, click Save.
22. You can now see, at a glance, that the Store Locator page has a script or style applied to it.

to effect the changes
- To see the script or style applied on the page/template, select Publish (top right of the screen)
24.
- .
- Go to your site and open the Store Locator page (or the page to which you made changes).
Deleting a Script or Style
...
| Info |
|---|
Note - you will not be able to delete scripts and styles that are currently being used in a page or template. |
Content →
- In the CMS, navigate to Advanced
2. Click on the
- Content → Scripts & Styles.
3. You will notice that some
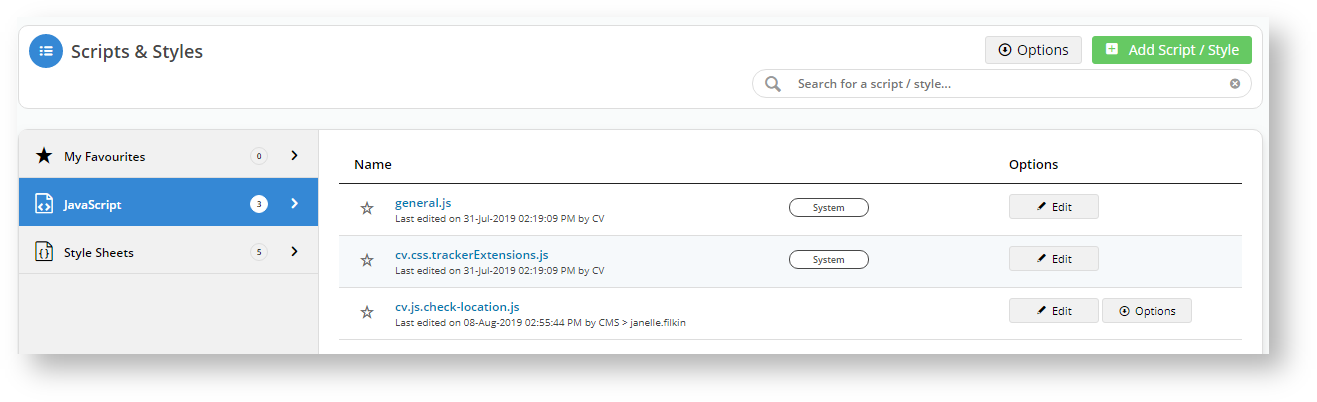
- Depending on whether you want to delete a javascript or style sheet file, click on the Javascript or Style Sheets tab.
an
- Notice that System files have
and an Options button. The System ones have an Edit only, and the theme.css is Readonly.
- 'Edit
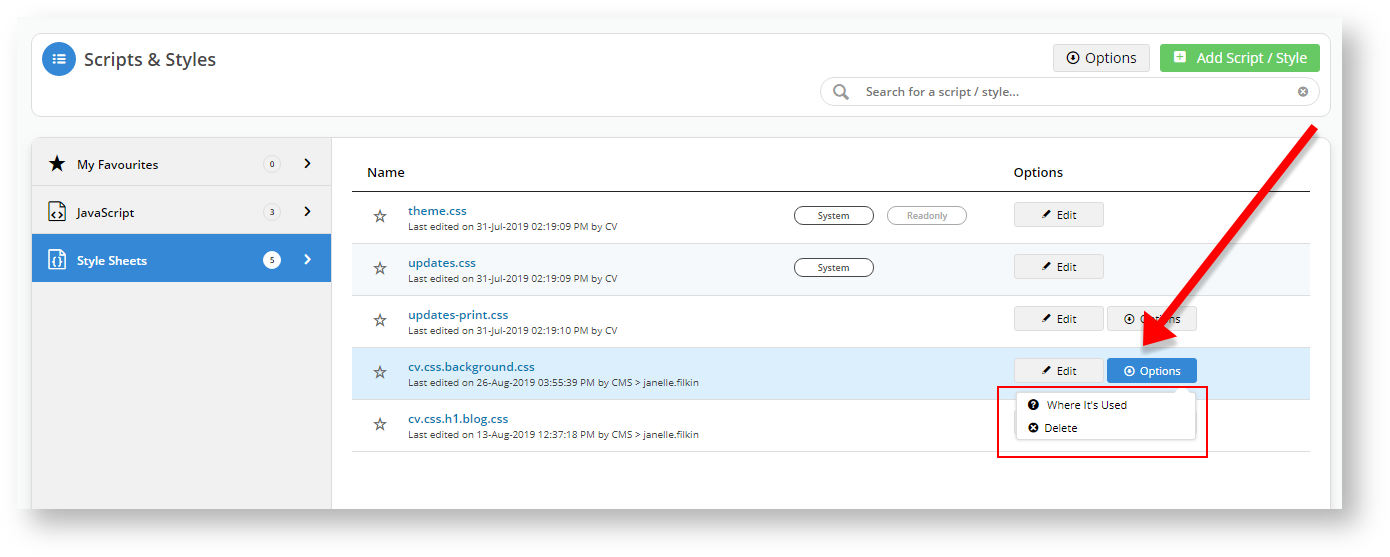
4. If you hover over the Options button, you will see those files have two options: Where it's Used and Delete.
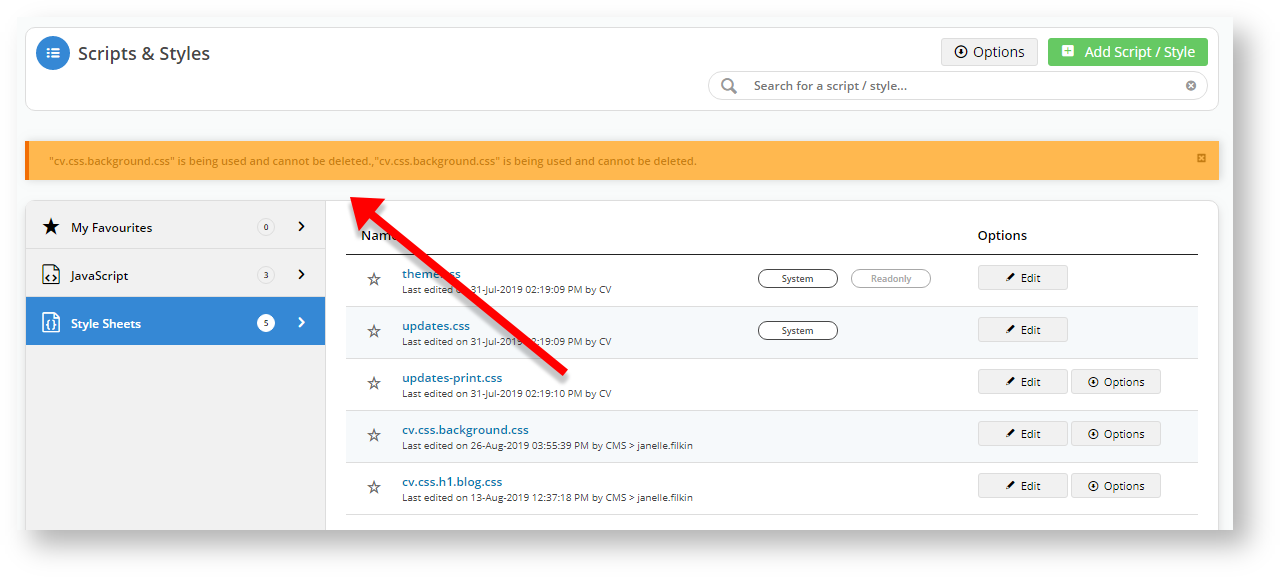
5. Click on Where it's Used for the cv.css.background.css file.
6. The system tells us what we already know: cv.css.background.css is used on the Store Locator template.
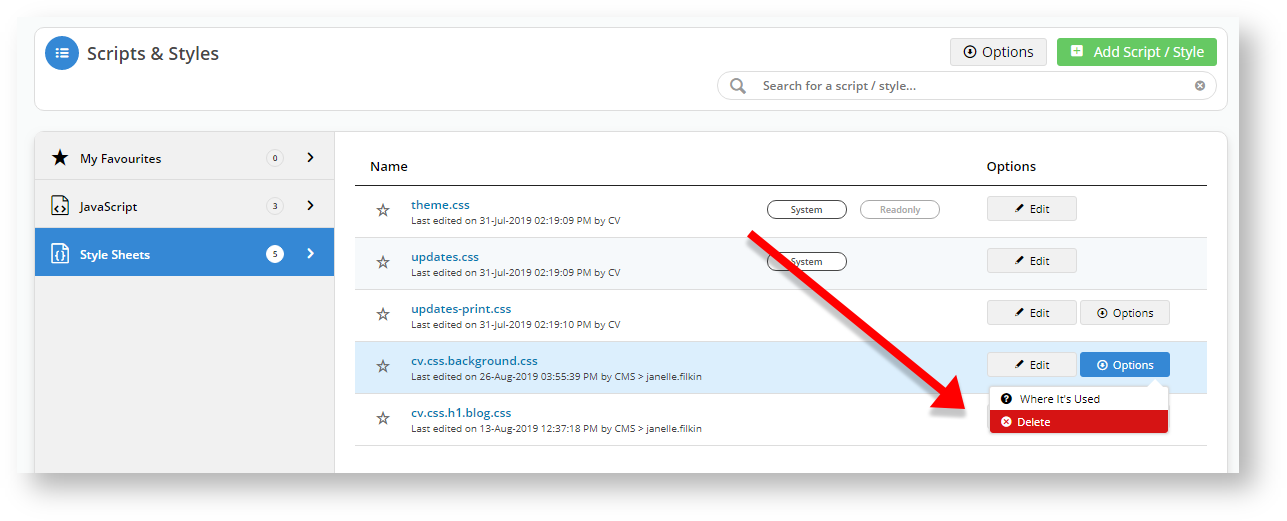
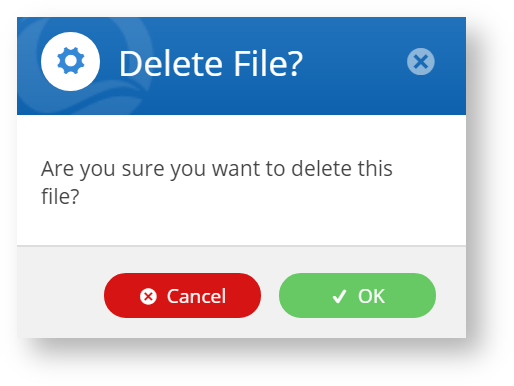
7. Let's try and delete that file. Hover over the Options button and select Delete.
8. The system asks us if we want to delete the file. Click OK.
9. The system will not delete the file because, as it already told us, and what we already knew, that file is in use.
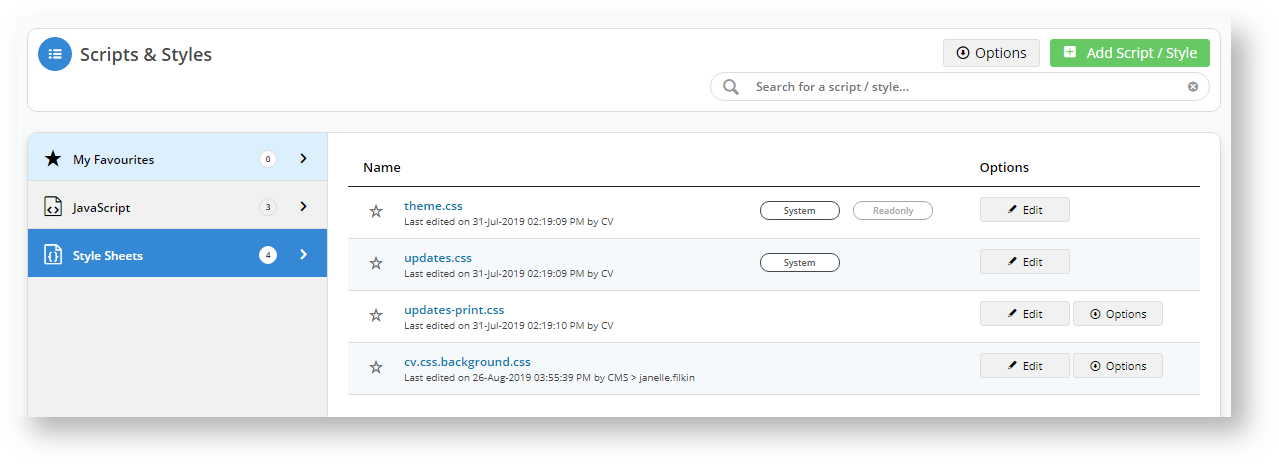
10. We realise our mistake and hover over the Options button for the cv.css.h1.blog.css file and select Delete.
11. Confirm the deletion, and the system removes the file.


Additional Information
...
| MultiExcerptName | Additional Info |
|---|
...
- ' buttons only and cannot be deleted. User-created ones have 'Edit' and 'Option' buttons.
- To delete the file, hover over its Options button and click Delete.
- In the 'Delete widget' box, if you are sure you want to delete this file, click OK otherwise, click Cancel.
Checking where a script or style is used
- In the CMS, navigate to Advanced Content → Scripts & Styles.
- Depending on whether you want to check a javascript or style sheet file, click on the Javascript or Style Sheets tab.
- Find the file name, hover over its Options button and click Where It's Used.
Additional Information
| Minimum Version Requirements |
| |||||
|---|---|---|---|---|---|---|
| Prerequisites |
| |||||
| Self Configurable |
| |||||
| Business Function |
| |||||
| BPD Only? |
| |||||
| B2B/B2C/Both |
| |||||
| Ballpark Hours From CV (if opting for CV to complete self config component) |
| |||||
| Ballpark Hours From CV (in addition to any self config required) |
| |||||
| Third Party Costs |
| |||||
| CMS Category |
|
Related
...
help
| Content by Label | ||||||||||||||||||
|---|---|---|---|---|---|---|---|---|---|---|---|---|---|---|---|---|---|---|
|
...
| Multiexcerpt | |||||||||||||
|---|---|---|---|---|---|---|---|---|---|---|---|---|---|
| |||||||||||||
Macro Instructions for carrying Article Information through to Feature List
Instructions for carrying Excerpts through from this page to the Feature List Article Page: Add macro / Multiexcerpt (or copy and existing excerpt and edit) or (Copy existing page and place content into existing excerpt macros) On Features List page: Click in the Cell to be populated / add macro / Multiexcerpt Include / Select the Article page and the excerpt (or copy another feature line and edit the 'Article page' source. |
...