Customer Self Service allows for the option of store pick-up pickup for customers during checkout. . This feature is commonly referred to as 'Click & Collect'.
In addition to configuring the site to offer store pick-uppickup, the various warehouses or store locations need to be enabled so they are presented as an option during checkout.
| Note |
|---|
This guide applies to sites using Commerce Vision's 'Best Practice Design' (BPD) framework only. |
Step-by-step guide
To Maintain Pick-up Warehouses:
...
create a new Store Location:
- Login to the CMS.
- Navigate to 'Settings' --> 'Store Locator' (/StoreLocatormaintenance.aspx).
- Select the 'Store Locator' tab.
- Click 'New'.
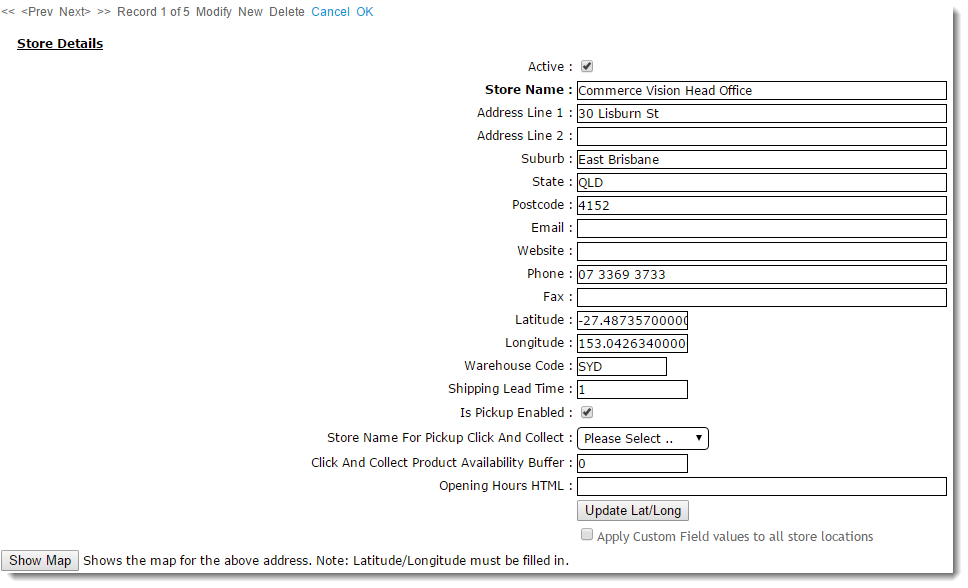
- Populate the Store Name, Address, and contact fields.
- Populate the 'Latitude' and 'Longitude' values (this site may be helpful http://www.latlong.net/)
- Populate the 'Warehouse Code'.
- Populate the 'Shipping Lead Time' (the number of days required to process and ship an order from this warehouse from when it is first submitted).
- Tick the 'Is Pick-up Enabled' setting to activate this location for Click & Collect.
- Click 'OK' to save.
To Maintain Pickup Warehouses:
- Login to the CMS.
- Navigate to 'ContentSettings' --> 'Store Locator Maintenance' (/StoreLocatormaintenance.aspx).
- Search for the required store or click 'Search' to display all current records.
- Select the required store record via radio button. The 'Store Details' tab will load.
- Click 'Modify'.
- Tick or untick the setting labelled 'Is Pick-up Enabled', as required.
- Click 'OK' to save.
...
The 'Is Pick-up Enabled' setting will integrate to Pronto's 'StoreLocation' table for the edited Warehouse Code/Store Location.
Related articles
| Content by Label | ||||||||||||||||
|---|---|---|---|---|---|---|---|---|---|---|---|---|---|---|---|---|
|