Overview
| Excerpt | ||
|---|---|---|
| ||
Instead of manually creating website users one by one, administrators can bulk import users and user customers via CSV import. |
With a With a CSV file, new website users and user customers can be imported in bulk, saving the administrator from manually creating each record individuallycreating each record individually. Each row of the CSV file corresponds to a user record.
...
- User ID (generally an email address)*
- Notification Email Address*
- Deactivate User (Yes or No)*
- First Name
- Last Name
- Password
- Force Password Change (Yes or No)
- Job Title
- Section
- Phone Number*
- Fax Number
- Default Cost Centre
- Customer Code*
- Global Catalogue Access (Blank, Denied, Full or ViewOnly)
- Orders Approved By
- Special Instructions
- Contract Items Only (Yes or No)
- Initial Role*
- Approval Type (Blank, SPU, MPU, SPA, MPA, MPAS, H, HC or HAL)
- Approve Non Contract Items (Yes or No)
- Deny Product Entry on Approval (Yes or No)
- Allow Product Entry on Approval (Yes or No)
Step-by-step guide
To Create and Populate the CSV Import File:
...
1. Create and populate new users CSV file
Download this csv template or follow the instructions to create one.
View file name User_Import.csv height 250
To create the CSV file for import:
In an editor such as Notepad, open a new text file. You can also use Excel.
Expand title Click here for a guide to creating the file in Excel... 1. Copy the header text.
EmailAddress, NotifyEmailAddress, Deactivated, FirstName, Surname, Password, ConfirmPassword, JobTitle, Section, PhoneNumber, FaxNumber, DefaultCostCentre, CustomerCode, GlobalCatalogueAccess, OrdersApprovedBy, SpecialInstructions, ContractItemsOnly, InitialRole, ApprovalType, ApproveNonContract, DenyApprovalProductEntry, AllowApprovalProductEntry2. Open a blank Excel worksheet.
3. Click to select the first row in the first column,

4. Paste the text into the cell.
5. Select the Data menu, then click Text to Columns.

6. Select Delimited, then Next.
7. Tick Comma, then Next.
8. Click Finish.
9. Save the file.
- Copy and paste the following text into the file:
EmailAddress, NotifyEmailAddress, Deactivated, FirstName, Surname, Password, ConfirmPassword, JobTitle, Section, PhoneNumber, FaxNumber, DefaultCostCentre, CustomerCode, GlobalCatalogueAccess, OrdersApprovedBy, SpecialInstructions, ContractItemsOnly, InitialRole, ApprovalType, ApproveNonContract, DenyApprovalProductEntry, AllowApprovalProductEntry - Save the file with an extension of .csv
2. Populate the CSV file with records
- Open the newly created this CSV file in Excel. The above header text should now form the headers (fields) should be displayed in Row 1 (Line 1) of the first 18 22 columns.
- Populate the spreadsheet with the required data, one line per user record.
Save The CSV file should look like this (in Excel):
- Enter one user record per row. This means User 1 occupies Row 2 (Line 2), etc. NOTE - Some fields are mandatory. If a mandatory field is not populated for a user record, the user will not be uploaded.
- When all records have been entered, save the file.
To Perform a User Import:
...
3. Upload CSV file
To upload the prepared CSV file to your website:
...
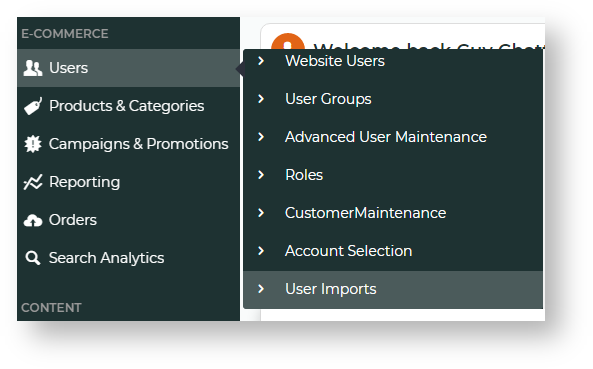
- In the CMS, navigate to Users → User Imports. Or when logged in as Administrator on your site, Accounts → User Import (/zUserImport.aspx).
...
- NOTE - If this page has not been set up for your website, please contact Commerce Vision for assistance.
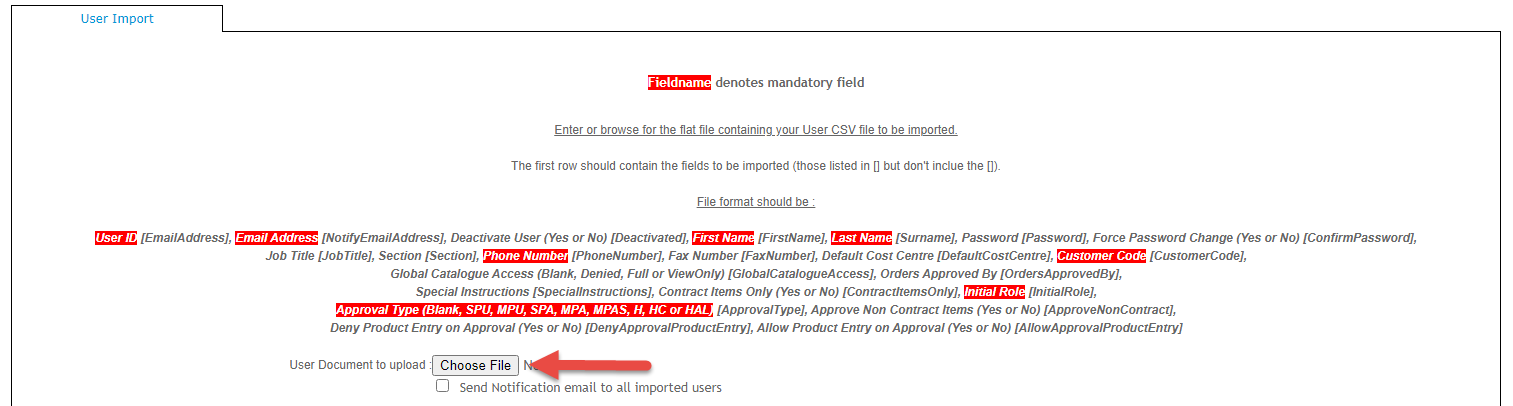
- In the first section of the page called 'Enter or browse for the flat file containing your User CSV file to be imported.'
...
- , click the Choose File button.
- Select the CSV file. Once selected, the file name displays next to Choose File.
- To have a registration notification emailed to every new user, tick Send Notification email to all imported users.
- Scroll down and click the Import Now button.
- Check the message box below 'Import Now' to verify your import is successful. Any skipped rows and errors will be displayed.


Related help
| Content by Label | ||||||||||||||||||
|---|---|---|---|---|---|---|---|---|---|---|---|---|---|---|---|---|---|---|
|