...
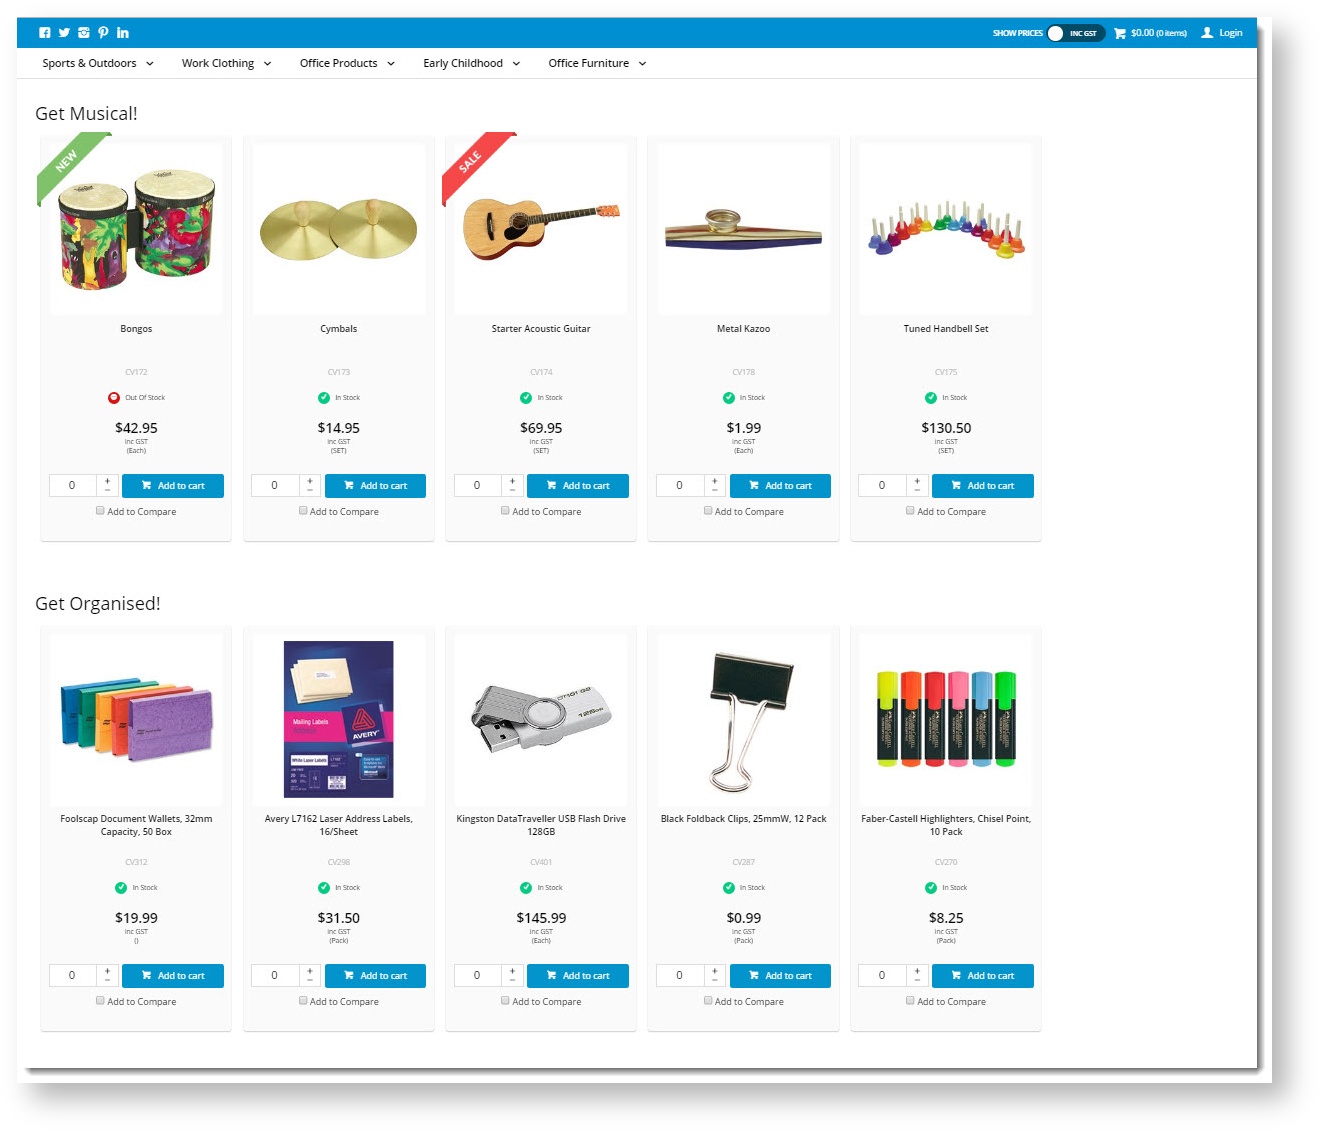
Here's how I want it to look when I'm finished. You can see that all of the musical instruments are in one group, and the office products in another:
Step-by-step guide
- First, I'll need to create my campaign and populate it with products. If you're not sure how to do this, see our guide in Product Campaigns.
| Info | ||
|---|---|---|
| ||
Be sure to sequence the products in the order they should appear in each part of your split campaign. If a product is in the wrong order, it can display in the incorrect section. |

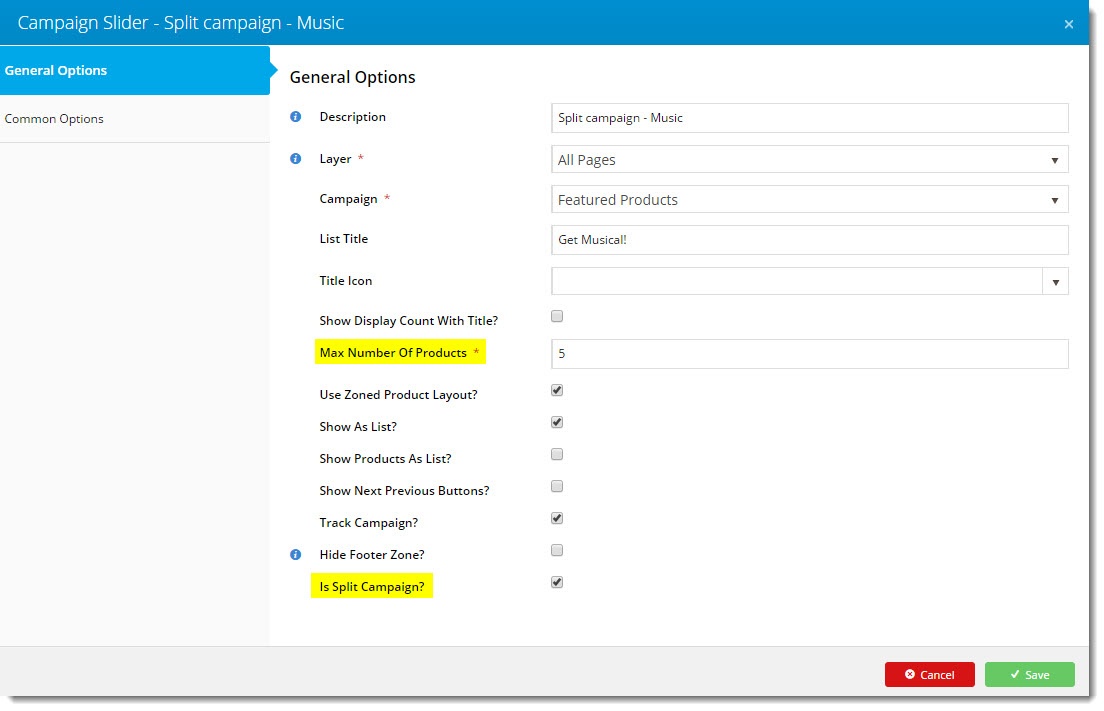
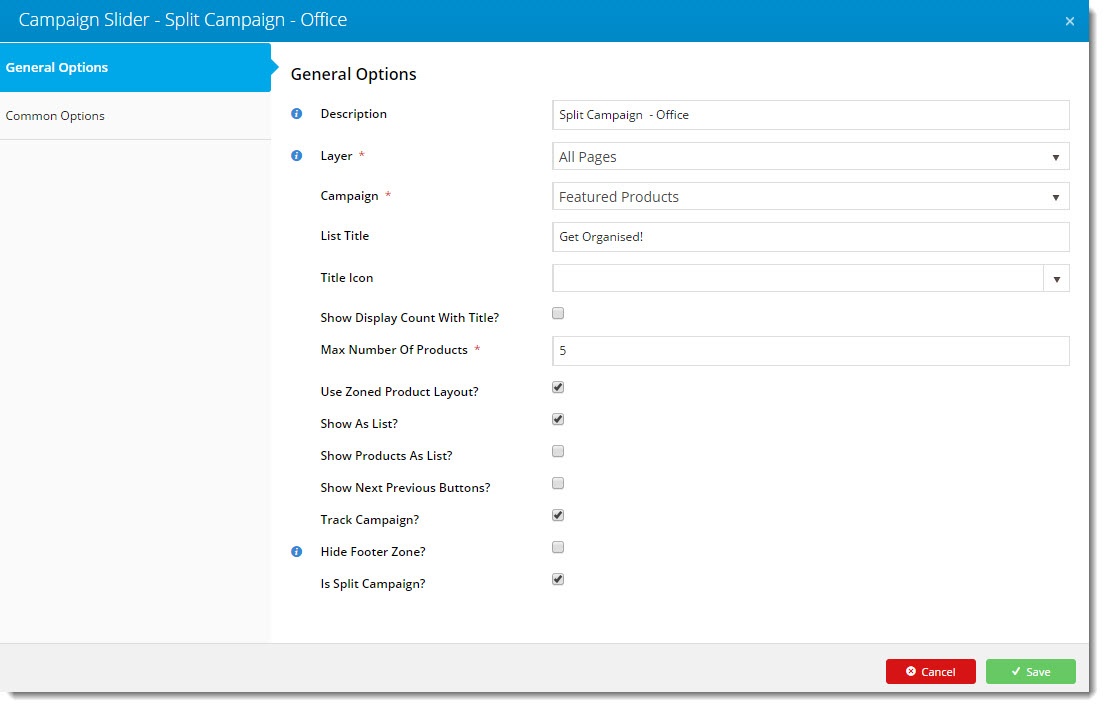
22. Next, add the Campaign Slider widget to the page and configure it.
| Expand |
|---|
...
|
...
|
...
|
...
|
...
|
...
|
...
|
...
|
3. Repeat steps 2 - 6 for your next group of products from this campaign.
You
4. You can add as many widgets as you have products for!
In another browser/incognito tab, load your website and check the display of your campaign. Looks great, right?
And that's it! Your split campaign is all set up and ready to captivate your customers.
...