...
| Info |
|---|
This feature must be switched on for your website by Commerce Vision. |
When enabled, this setting allows the This feature helps to make sure you have real human customers and not bots visiting and browsing your ecommerce store based on their activity in a session. A session is created when a user first comes to your site. Their IP address is logged.
When enabled, you can set up monitoring and restricting of incoming concurrent requests to your site made by a unique IP addresses. Both page views and dynamic service request totals can be monitored. Threshold values for either or both can be set so that if the number of views/requests reach threshold values set per unique IP address, subsequent requests will be blocked. Such data are collected and can be viewed. Specific IP addresses can be excluded from being checkedaddress in a session. Monitoring is done by setting session maximum limits (threshold values) of:
- page views, and/or
- dynamic service requests.
When a maximum threshold value is reached, your site can be set to:
- deny new requests rightaway by showing a '503 server busy' error
- redirect them to a challenge page (a page with Google Capcha on it) they have to pass successfully. (NOTE - If using this option, the page must be created first.) Failure to pass this challenge will result in denial of new requests.
When a unique IP address is restricted, they are logged. This data can be collected and viewed. You can also add specific IP addresses to a whitelist so they are excluded from being monitored and restricted.
Configure Settings
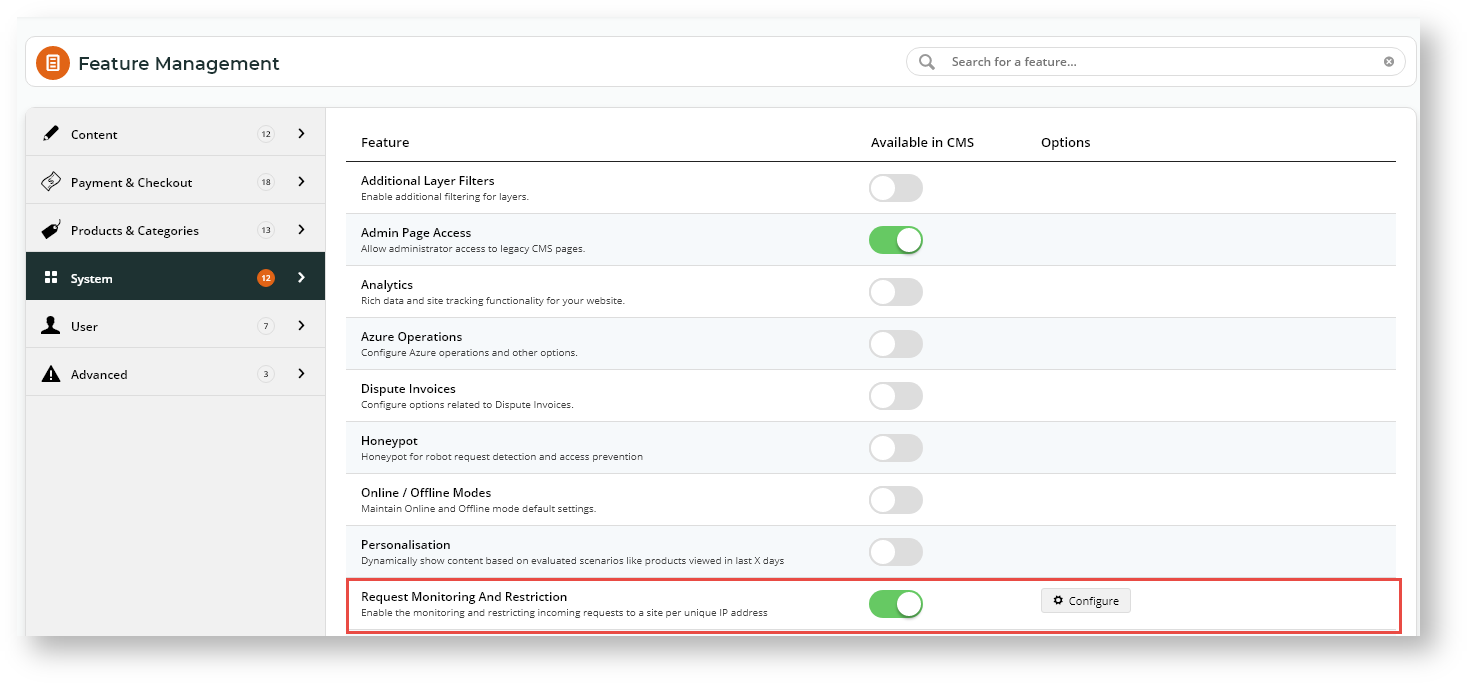
- In the CMS, navigate go to Settings → Settings → Feature Management → System → Request Monitoring and Restriction.
- Toggle ON When the Enable Request Monitoring and Restriction is enabled. click Configure. (If this option Configure is not availabledisplayed, contact Commerce Vision to have the feature switched onswitch on this feature.)
Click Configure.
- In Request Monitoring Dynamic Service Count Threshold, enter the threshold number of value for dynamic service counts above which the request is monitoredrequest numbers before monitoring the IP address. Default: 0 (off)
- In Request Monitoring Page View Count Threshold, enter the threshold value for number of page view counts views before monitoring the request is monitoredIP address. Default: 0 (off)
- In Total Request Initiate Challenge Threshold, enter the total number of requests by non-whitelisted unique IP addresses before the challenge is initiated. The challenge is a page with captcha, which the user has to completepass.
- In Total Request Terminate Challenge Threshold, enter the total number of requests before failed attempts at the challenge is stoppedCaptcha challenge the user can have. Default: 0 (off)
- In Total Request Deny New Session Threshold, enter the threshold value above which will produce the '503 - server too busy' page.
- In Request Monitoring Excluded IP Address, enter one or more whitelist IP addresses to be excluded from monitoringthat can exceed the threshold values set for monitoring. E.g., you might have testing or development IP addresses you might want to exclude.
- In Challenge Page Content Before, (if using Challenge) enter the HTML code for the page together with the Captcha challenge that appears displayed after the challenge threshold has been is reached.
- In Challenge Page Content After, (if using Challenge), enter the HTML code for the page together with the Captcha challenge that appears displayed after the challenge threshold has been reached.
Related help
| Content by Label | ||||||||||||||||||||
|---|---|---|---|---|---|---|---|---|---|---|---|---|---|---|---|---|---|---|---|---|
|
| Excerpt | ||
|---|---|---|
| ||
Enable and configure content protection settings to restrict anti-scrapping. |
Web scraping is increasingly used to extract a website's content and data, often conducted through automated via bots and crawlers. For instance, competitors may target your site this way to retrieve content for various reasons. To discourage scraping of your Customer Self Service eCommerce Platform site, you can enable the Honeypot setting. This helps detect suspicious IP addresses and temporarily restricts them from accessing your site. Administrators can view the list of restricted IP addresses and remove them if needed. A suspicious activity report can be set up and automatically emailed to specific recipients to enhance monitoring.
How it works
IP addresses are flagged as suspicious when they access a special trap route on your site. This route to a 'hidden' page will not be accessed through usual browsing or by legitimate purchasing customers/website visitors.
Step-by-step guide
To enable and configure the setting,
...
| Tip |
|---|
This page should be edited to resemble other pages on your site. |
...
View restricted IP addresses list
All IP addresses that are restricted currently or in the past are listed in the Restricted IP Maintenance section of the Honeypot Settings screen. They will remain in this list even when expired unless manually deleted.
To delete an IP address, tick its Delete checkbox, then Save or Save & Exit.
Send suspicious activity report
| Info |
|---|
Implementing this function requires consultation with Commerce Vision. |
A scheduled task can be set up so that a suspicious activity report (CSV file) can be emailed to specific recipients at regular periods. The report will contain the following information:
- unexpected number of requests per time period for a given User is over a threshold,
- unexpected number of total requests for a set time period,
- and other custom data that can be queried.
- Navigate to Settings → Feature Management → System.
Toggle ON Suspicious Activity, then click Configure.
In the Suspicious Activity Settings screen, to enable the feature for your site, toggle ON Enable Periodic Report Email.
To set task date/time and frequency, enter Scheduled Task Settings.
Schedule Start Date: select the date and time the system will run the suspicious activity task.
Report every N Minutes: enter the frequency (in minutes) the report generates.
Report Data Query Parameters helps to monitor unusually high traffic activity on your site.
Time Period Minutes: enter the period for monitoring. Default: 60min
Pages Per Time Period: enter the number of pages accessed per the time period entered to be included
Pages Per Session: enter the number of pages accessed per session to be included
Report Email Settings sets information about the report recipient(s) and email message.
Send to Email Address: enter the email address the report is to be sent to
Email Subject: enter subject title for email. Default: Suspicious activity report
Email Content: edit the message body in the editor as required. Default: Attached is the suspicious activity report datais reached.
Related help
| Content by Label | ||||||||||||||||||||
|---|---|---|---|---|---|---|---|---|---|---|---|---|---|---|---|---|---|---|---|---|
|
...