| Multiexcerpt |
|---|
| hidden | true |
|---|
| MultiExcerptName | Feature Title |
|---|
|
Authority To Leave |
Overview
| Multiexcerpt |
|---|
| MultiExcerptName | Feature Overview |
|---|
|
|
...
Allow users to grant 'Authority To Leave' |
|
...
...
designated location if unavailable, at checkout. This info can be mapped to a field in your ERP. |
|
- Authority to Leave functionality is enabled in the Checkout template in the CMS.
- Once the user selects the Authority To Leave option, that information is then displayed by various widgets as they progress through the checkout process.
- Authority To Leave information is also displayed in the Order Confirmation Email.
- (If used) Authority To Leave information can be mapped to the Delivery Instructions field on the ERP sales order at integration.
The guides below will walk you through the implementation of Authority To Leave for your website.
...
...
Step-by-step guides
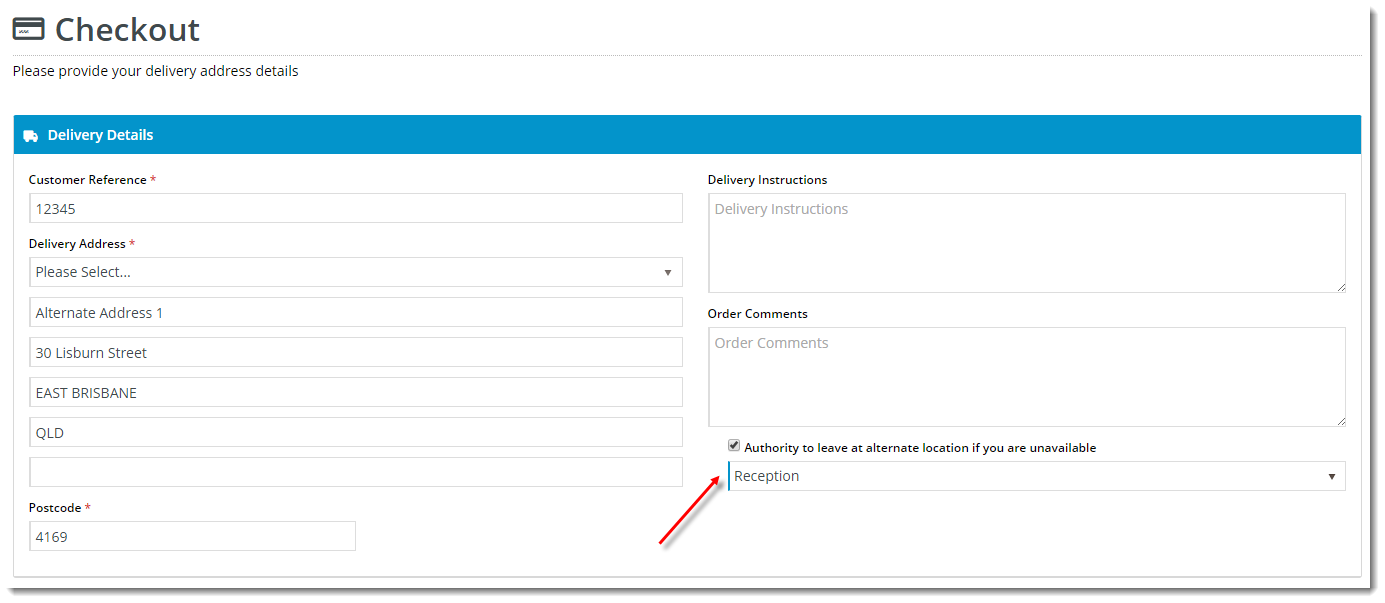
Enable Authority To Leave for the Checkout Address page. This is where your customers select the Authority To Leave option, as well as their designated location.
- Login to the CMS.
- Navigate to Content --> Standard Pages.
- Select the Checkout template.
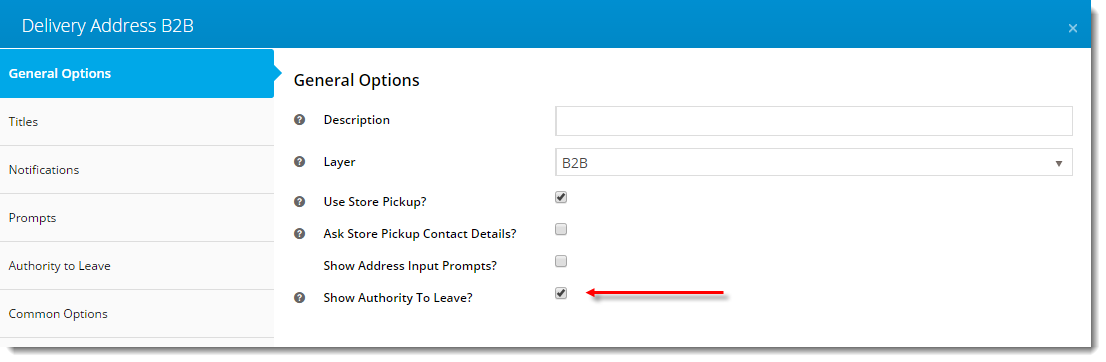
- Edit the Delivery Address B2B widget (if not applicable to your site, edit the Delivery Address B2C widget instead).
- Tick the 'Show Authority To Leave' flag.
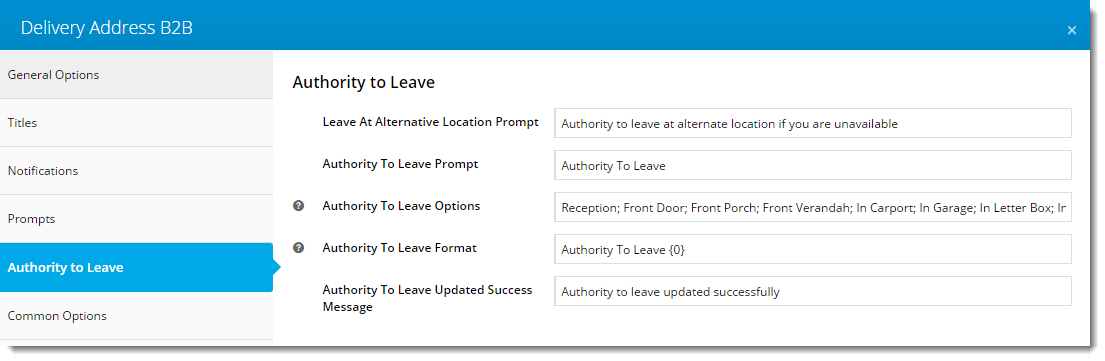
- Select the Authority to Leave options section and update values as required.
- Click 'Save'
- Repeat the above steps for the Delivery Address B2C widget (if applicable to your site).
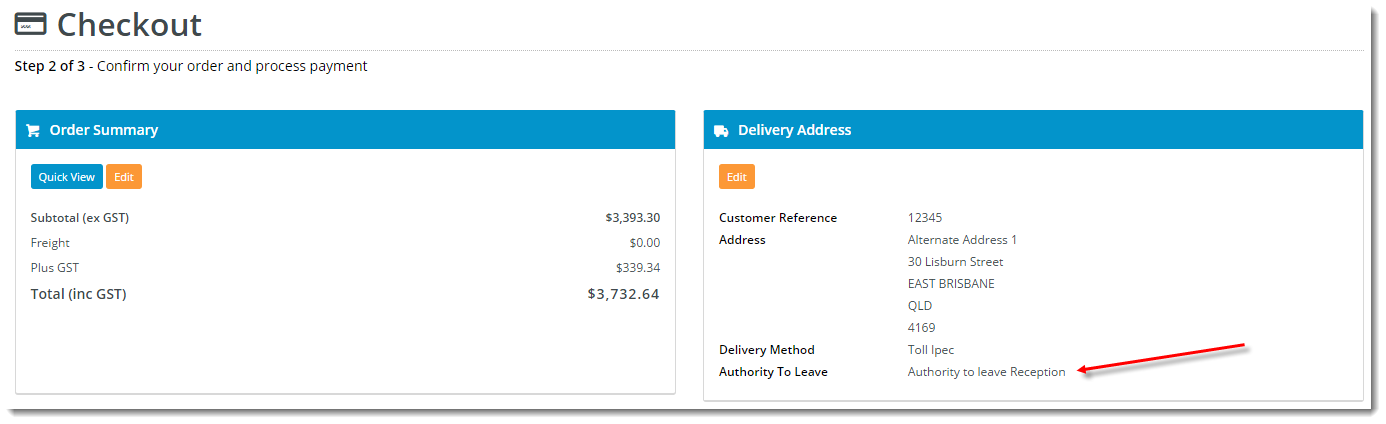
Next, enable the display of Authority to Leave info on the Checkout Review page:
- Still in the Checkout template, Edit the Checkout Review Addresses B2B widget (if not applicable to your site, edit the Checkout Review Addresses B2C widget instead).
- Tick the 'Show Authority To Leave?' flag.
- Edit the Authority To Leave Prompt if required.
- Click 'Save'.
- Repeat the above steps for the Checkout Review Addresses B2C widget (if applicable to your site).
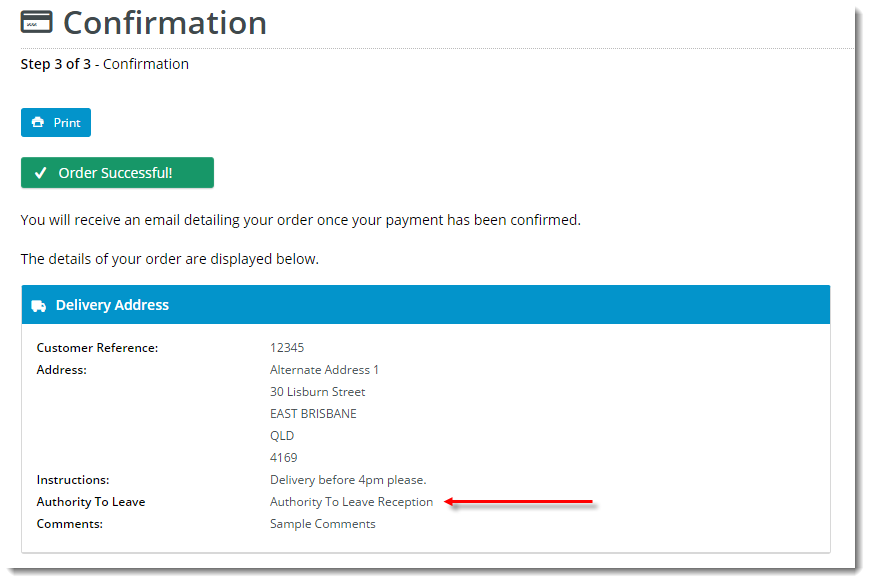
You will also want to enable the display of Authority To Leave info on the Order Confirmation page:
- Still in the CMS, navigate to Content --> Standard Pages.
- Select the Order Confirmation Page template.
- Edit the Order Confirmation Address B2B widget (if not applicable to your site, edit the Order Confirmation Address B2C widget instead).
- Tick the 'Show Authority To Leave?' flag.
- Select the Authority to Leave options section and update prompt text and format if required.
- Click 'Save'.
- Repeat the above steps for the Order Confirmation Address B2C widget (if applicable to your site).
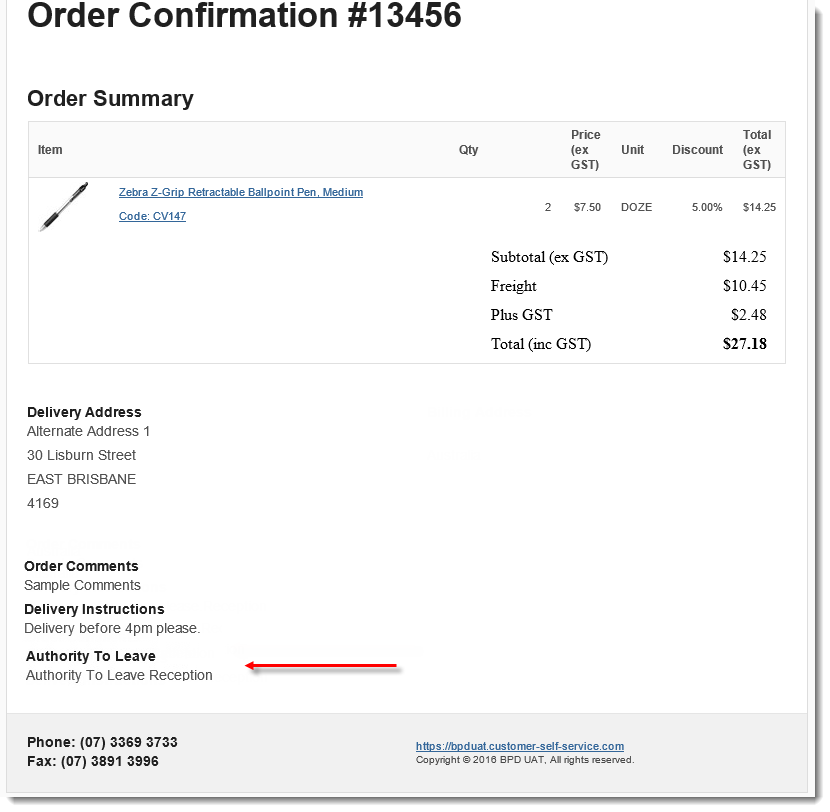
Last, enable the display of Authority To Leave info on the Order Confirmation email:
...
Congratulations! Authority To Leave functionality is now enabled for your site.
Additional Information
| Multiexcerpt |
|---|
| MultiExcerptName | Additional Info |
|---|
|
-- |
| Minimum Version Requirements |
| Multiexcerpt |
|---|
| MultiExcerptName | Minimum Version Requirements |
|---|
| 03.83.00 |
|
|---|
| Prerequisites | |
|---|
| Self Configurable |
| Multiexcerpt |
|---|
| MultiExcerptName | Self Configurable |
|---|
| Yes |
|
|---|
| Business Function |
| Multiexcerpt |
|---|
| MultiExcerptName | Business Function |
|---|
| Fulfillment |
|
|---|
| BPD Only? | |
|---|
|
| B2B/B2C/Both |
| Multiexcerpt |
|---|
| MultiExcerptName | B2B/B2C/Both |
|---|
| Both |
|
|---|
Ballpark Hours From CV (if opting for CV to complete self config component) | | Multiexcerpt |
|---|
MultiExcerptNameContact CV Support |
| Ballpark Hours From CV (in addition to any self config required) | | Multiexcerpt |
|---|
| MultiExcerptName | Ballpark Hours From CV (in addition to any self config required) |
|---|
| Contact CV Support |
|
|---|
Ballpark Hours From CV (if opting for CV to complete self config component) | | Third Party Costs |
| Multiexcerpt |
|---|
| MultiExcerptName | Third Party Costs |
|---|
| n/a |
|
|---|
CMS Category | | Multiexcerpt |
|---|
| MultiExcerptName | CMS Category |
|---|
|
Related
...
help
| Content by Label |
|---|
| showLabels | false |
|---|
| max | 5 |
|---|
| spaces | KB |
|---|
| showSpace | false |
|---|
| sort | modified |
|---|
| reverse | true |
|---|
| type | page |
|---|
| cql | label in ("settingscheckout","how-to","cms","checkoutdelivery") and type = "page" and space = "KB" |
|---|
| labels | how-to cms checkout settings |
|---|
|