...
The layout and look of a product Campaign is generally configured during the implementation phase of a website, but the maintenance of Campaign content is performed by the website's AdministratoreCommerce Team.
Step-by-step guides
To Create A New Campaign:
| Table of Contents |
|---|
Create The Campaign
- Login to the CMS.
- Navigate to 'Campaigns & Promotions' --> 'Campaigns' (/zcampaign.aspx).
- Click 'New'.
- Populate the fields as indicated below: Click 'OK' to save.
- Campaign Code - a unique identifier for the Campaign.
- Description - A brief description of the Campaign.
- Start Date - The date the Campaign becomes active.
- End Date - The date the Campaign finishes. Once this date has passed, the Campaign will no longer be displayed to users.
- View Campaign using Template - Leave blank (no longer in use)
- Display Template Columns - Leave blank (no longer in use)
- Bulk Email Template - Leave blank (no longer in use)
- Click 'OK' to save.

Add Products To The Campaign
Once a Campaign has been created, it can be populated with products. This can be done either manually, or via import.To Manually Add Products To A Campaign:
- Login to the CMS.
- Navigate In the CMS, navigate to 'Campaigns & Promotions' --> 'Campaigns' (/zcampaign.aspx).
- Select the required Campaign from the list via radio button.
- Click 'Products'.
- Click 'New'.
- Assign values to the fields as indicated below:
The Header Row this product sits under (If Header Rows are in use within the campaign).
- Product Code - The product's PRONTO stock code.
- Seq - The sequence or order in which the product should appear, in relation to other products within the campaign.
- Campaign Product Header Row Id -
- Leave blank (no longer in use)
- Click 'OK' to save.

- Repeat Steps 5-7 for additional products as required.
...
| Info |
|---|
If there are a large number of campaign products to be loaded, it may be more efficient to perform a product import. It should be noted that if a Campaign already contains products, performing an import will replace the existing products with those contained in the .csv file. The imported products will not append the existing ones. |
...
Import Products To
...
The Campaign
...
- Login to the CMS.
- Navigate to 'Campaigns & Promotions' --> 'Campaigns' (/zcampaign.aspx).
- Click the 'Import Products' tab.
- Click the 'Select' button to browse to the saved campaign products flat file (or drag and drop the file if browser-supported).
- Click the 'Create Campaign Products' button.
- A success/failure message will be displayed in the dialogue box below the 'Create Campaign Products' button. Any errors encountered will be detailed here.
...
| Info |
|---|
The CSV flat file should contain the following header fields as Row 1: CampaignCode, ProductCode, Seq, IsHeading Please note that:
|

| Warning |
|---|
If a Campaign already contains products, performing an import will replace the existing products with those contained in the .csv file. The imported products will not append the existing ones. |
Removing products from a Campaign is a straightforward process.
To Delete Products From A Campaign:
Add The Campaign Widget
Once your campaign is created, you can display it on the web with a widget!
- Login to the CMS.
- Navigate to 'Campaigns & Promotions' --> 'Campaigns' (/zcampaign.aspx).
- Select the required Campaign from the list via radio button.
- Click 'Products'.
- Select the required Product from the list via radio button.
- Click 'Delete'.
- Repeat Steps 5-6 for additional product deletions as required.
- to Content → Standard Pages.
- Select the page template to add the campaign to (the Home Page is a popular location).
- Select the appropriate zone according to the page layout, and click 'Add Widget'.
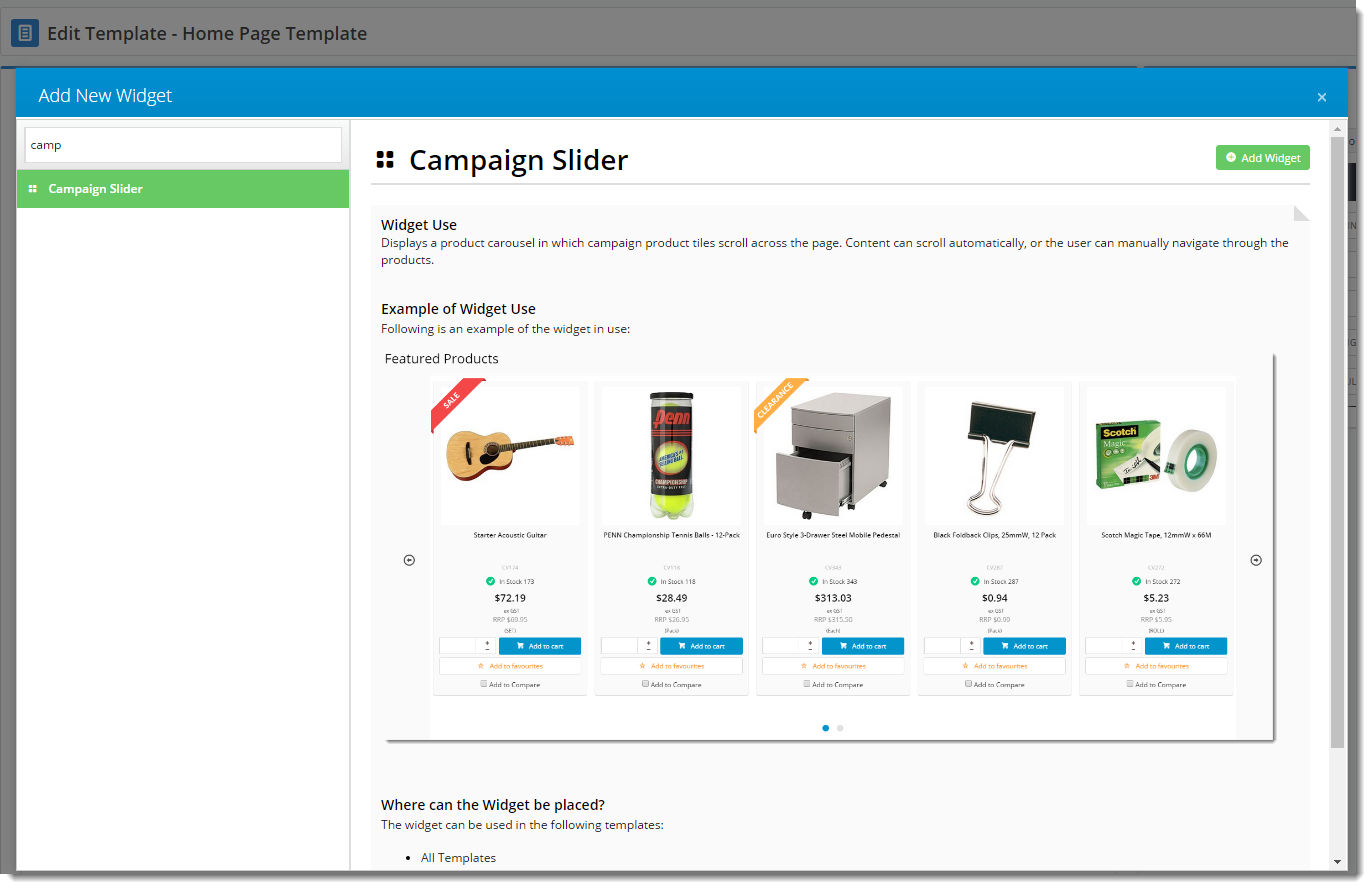
- Search for 'Campaign Slider' and click 'Add Widget'.
- Drag the widget to the correct position in the zone (if required), then click 'Edit'.
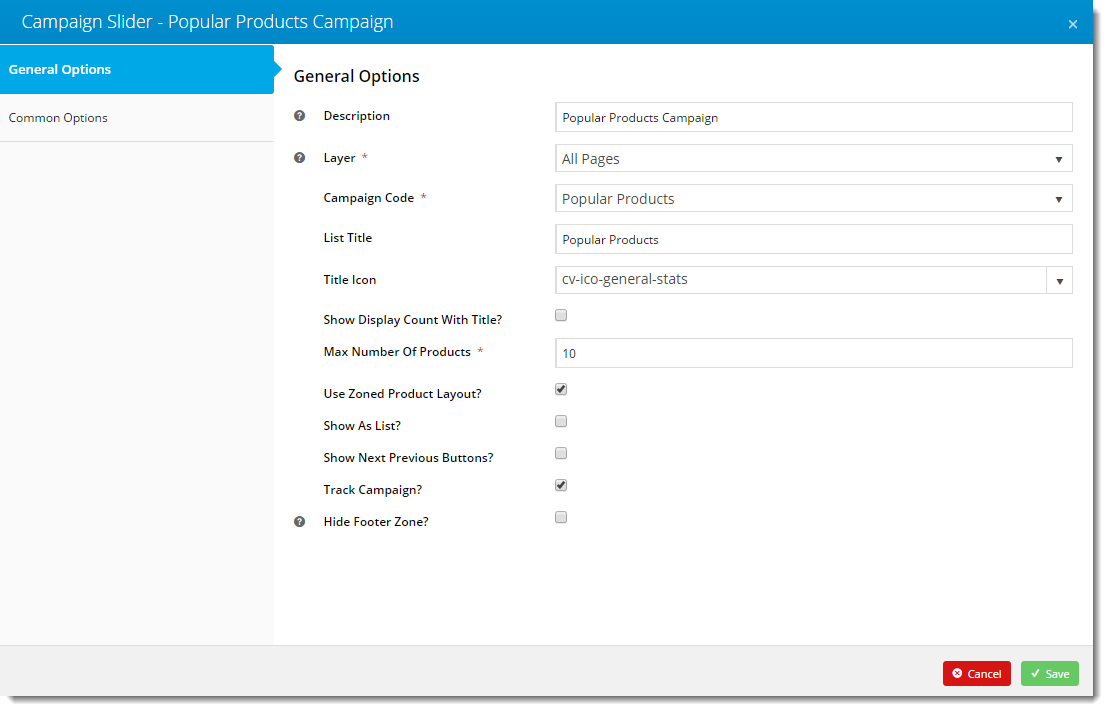
- Set the widget options as required, making sure you select your campaign from the 'Campaign Code' dropdown. Full widget documentation can be found here - Campaign Slider Widget.
- Click 'Save'.
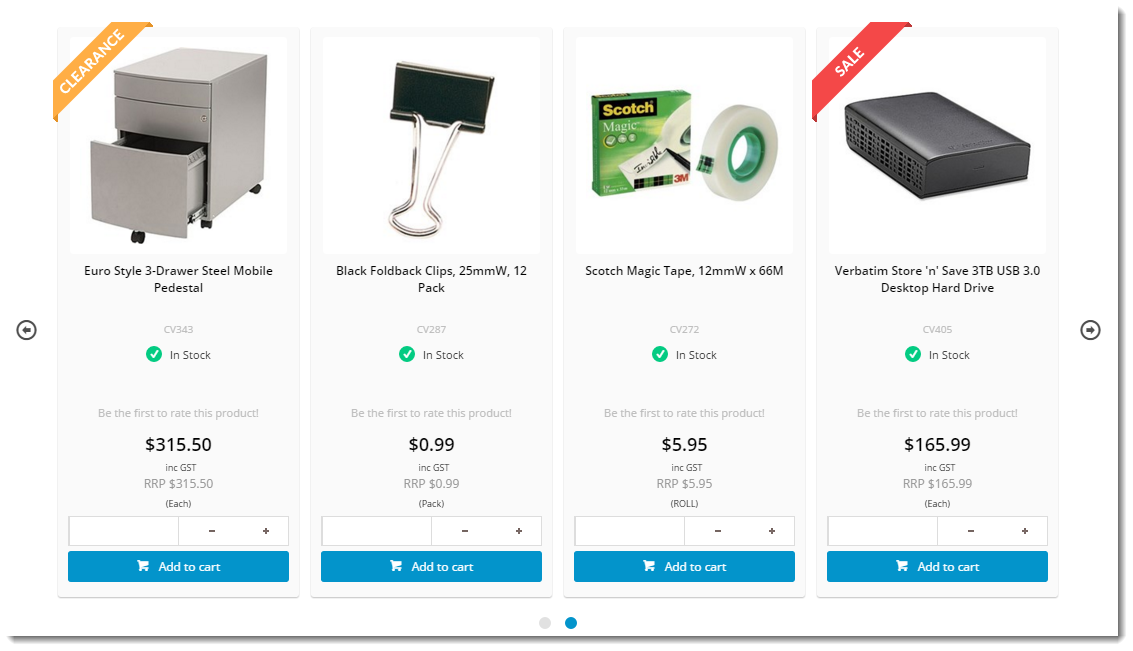
- Load your website in another browser or incognito tab and verify that the campaign is displaying as expected.

Related articles
| Content by Label | ||||||||||||||||||
|---|---|---|---|---|---|---|---|---|---|---|---|---|---|---|---|---|---|---|
|