Contents
| Table of Contents | ||
|---|---|---|
|
What Is It?
| Excerpt |
|---|
Here's where I give you an example / use case for flyer creator. Need to double check this again. Customers like Kincrome might want to allow their customers (say Bunnings) to create flyers containting Kincrome products? OUR customer allows THEIR customer (who is an onseller/distributor) to create a flyer... I believeDo your customers distribute products on your behalf? Would you like to give them a way to advertise those products on the fly? Perhaps Sales Reps would appreciate a 1-page flyer they can leave with their customers. Or they'd like to include marketing material in the cartons leaving their warehouse. Allow us to introduce Flyer Creator! You can now give your customers the tools to produce simple product flyers directly from your website. Content is generated in seconds and output in PDF format. |
This guide will step you through the process of creating quick and easy flyers via the CMS.
...
KK NOTE - I need to replace the output image once the logo works and the styling is fixed
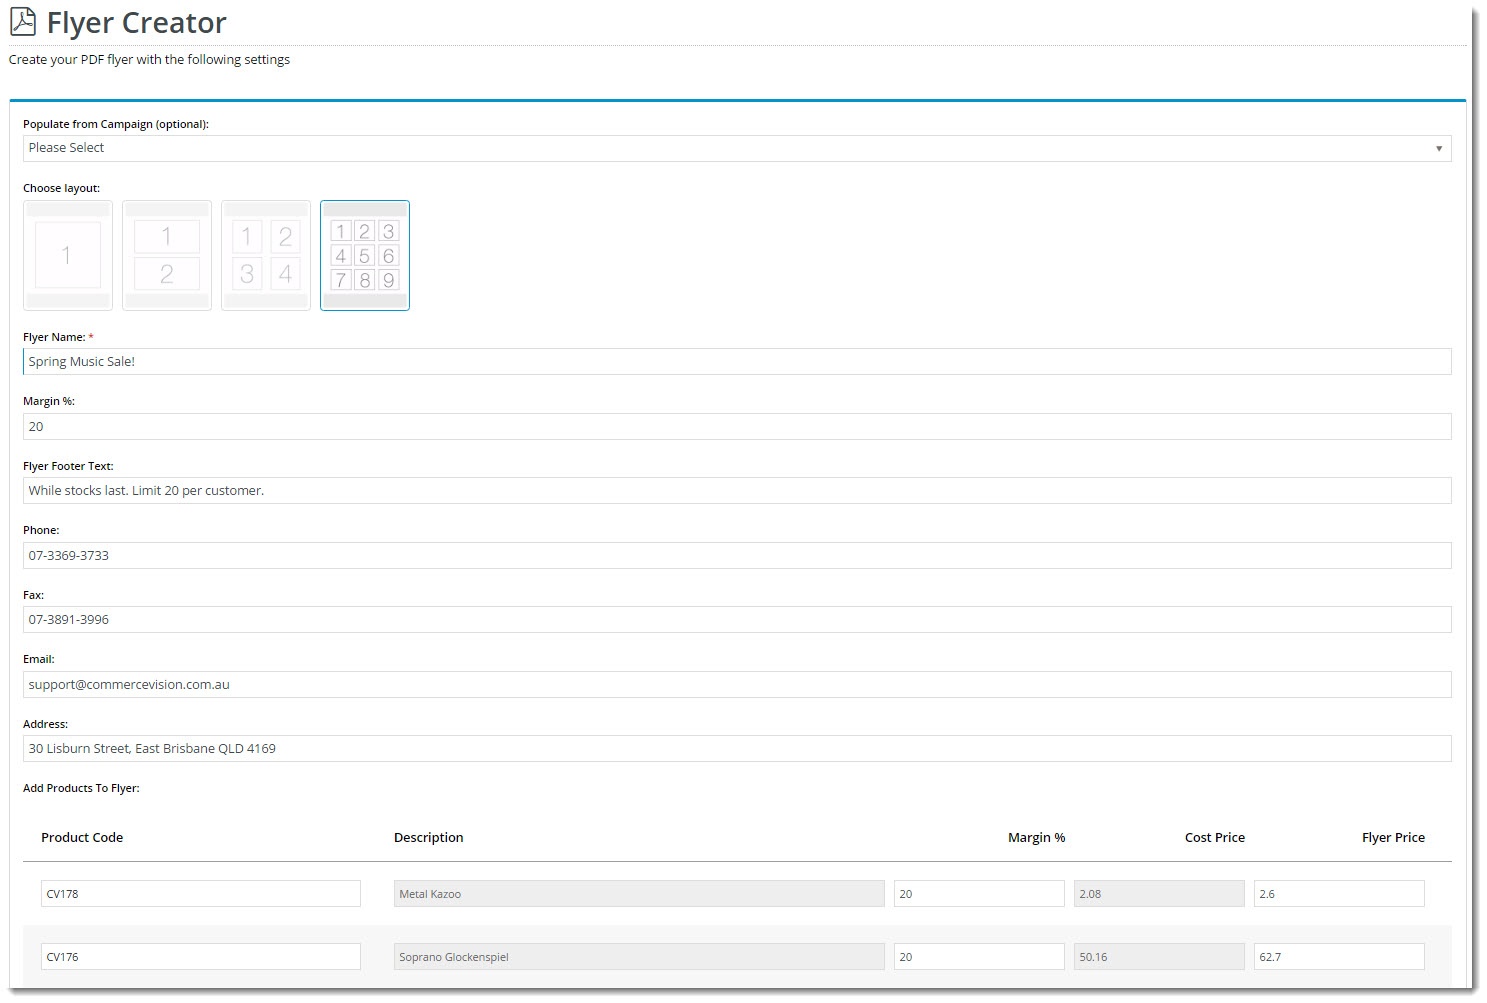
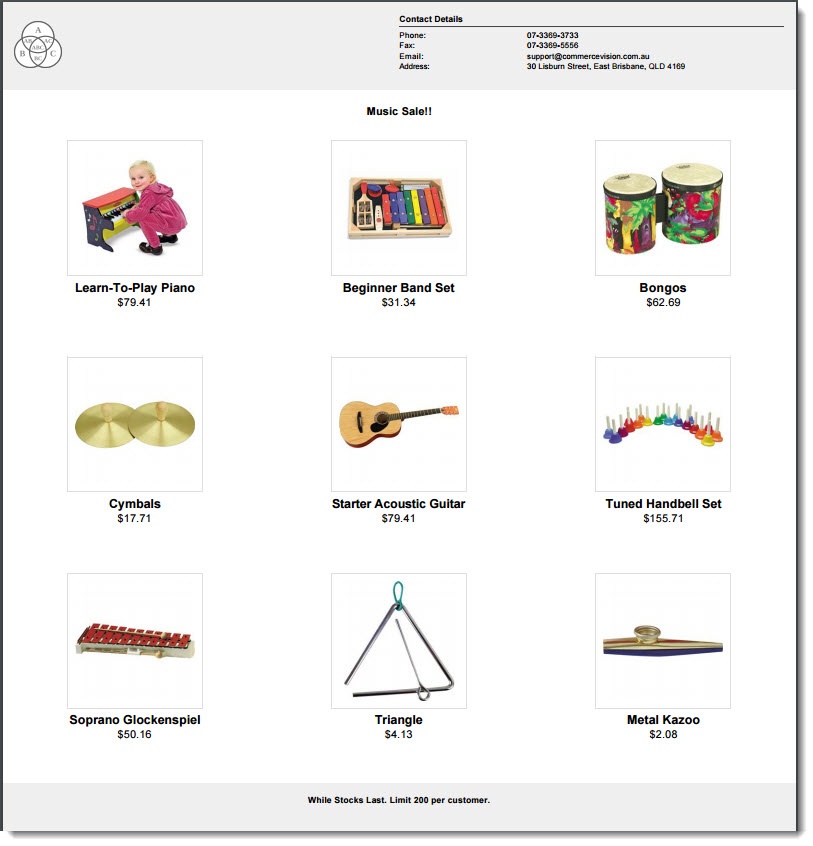
| Flyer Creator Input | Flyer Creator Output |
|---|---|
|
|
...
- Navigate to Content → Flyers.
- Select the layout template you wish to customise.
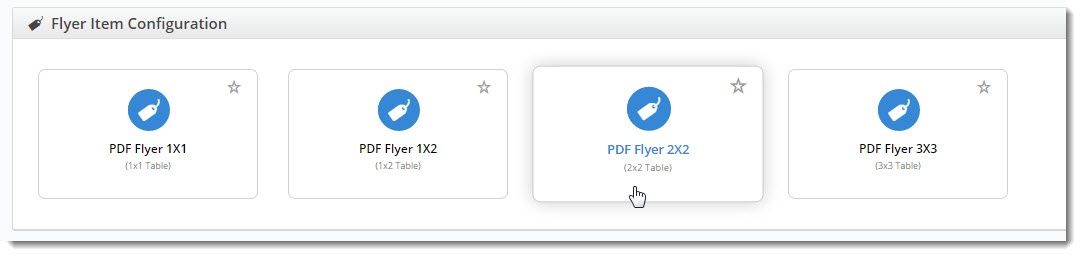
- The template will load, revealing the list of widgets.
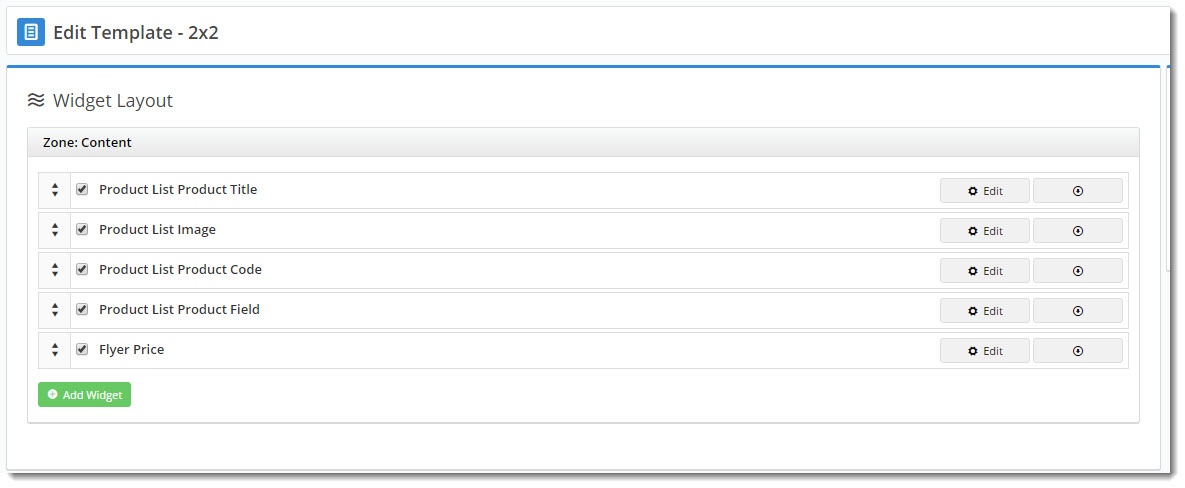
- To add a new widget, click 'Add Widget' and select from the list of options.
- To reorder the content, drag and drop widgets to new positions in the list.
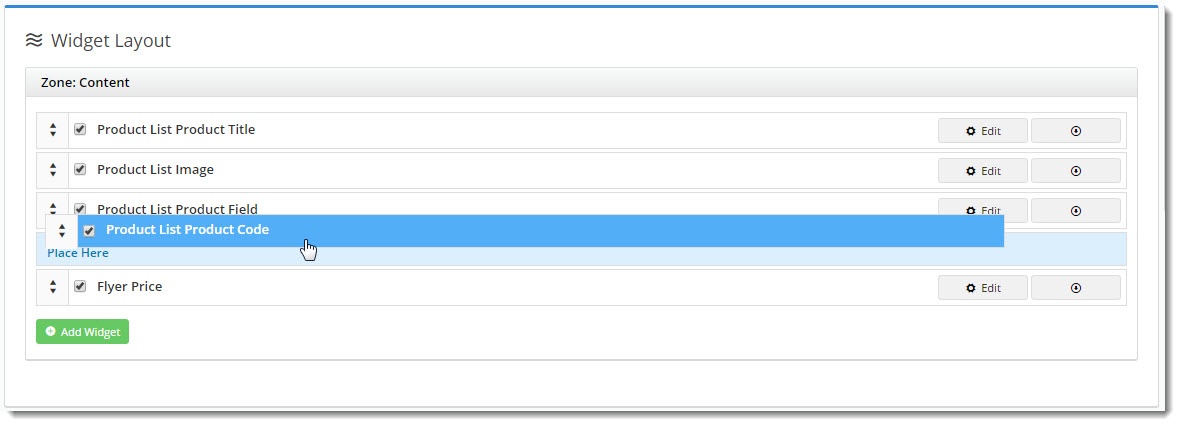
- To deactivate (but not delete) a widget, untick the box next to the widget name. You'll see the name change to grey with a strikethrough.

- To edit options, click 'Edit'.
- To delete a widget, click 'Delete' in the options dropdown.

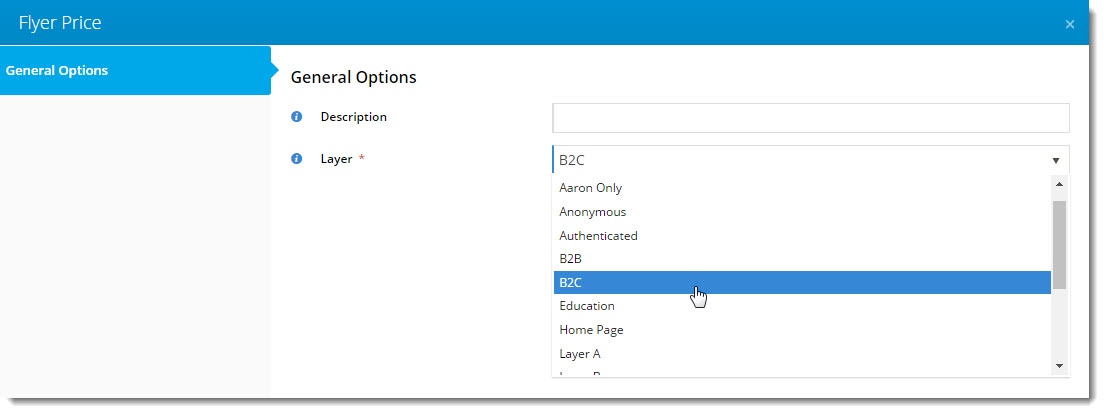
This is where you can also specify content to appear only for certain audiences, using Layers. For instance, you might want pricing hidden on flyers created by B2B users, due to fluctuations between customers.
The Layer setting on each widget allows you to personalise content depending on the user. Check out our guide on Layers for more detail.
Customising the Theme
The PDF Flyer Layout is the equivalent of your site's Theme Layout. It determines the header and footer content, and the stylesheet used for the look and feel.
- Navigate to Content → Flyers.
- Select the PDF Flyer Layout template.
- The template will load, revealing the list of widgets as follows:
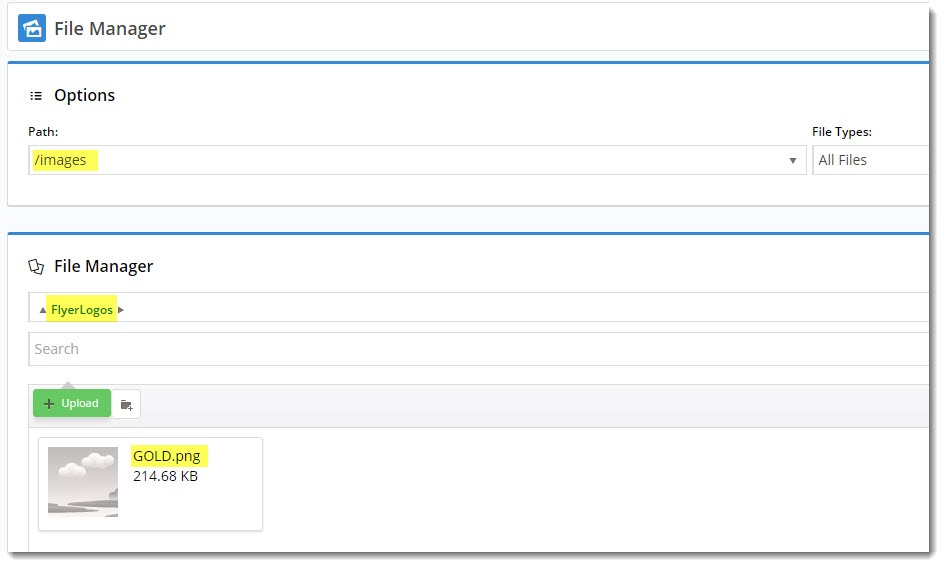
Customer Logo widget - outputs the logo for the logged in customer.
You will need a logo image uploaded to the images/flyers folder for each customer who uses Flyer Creator. The filename should be in the format 'CustomerCode.png' (or .jpg).
Tip You can override the path to use a different folder by entering the new file location in 'URL Override Path' (example shown below for customer code 'GOLD').
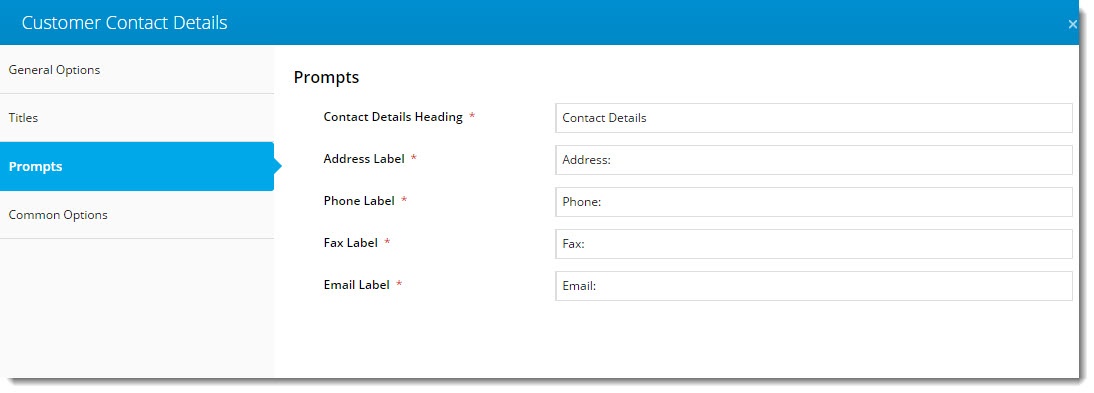
Customer Contact Details widget - outputs the default address for the logged in customer.
Tip You can give each customer the ability to override this address by enabling the 'Show Address Entry' option in the Flyer Creator widget (refer to Configuring the Flyer Creator section, above).
Edit the various field labels on the Prompts tab.
Flyer Product List Grid widget - outputs the actual product data in the main content zone of the PDF.

And there you have it! Allow your customers to create flyers quickly and easily using the flyer creator.
Related articles
| Content by Label | ||||||||||||||||||
|---|---|---|---|---|---|---|---|---|---|---|---|---|---|---|---|---|---|---|
|