...
Log into your CMS.
Navigate to Settings → Feature Management.
Click on Payment & Checkout.
Locate Terminal Payment.
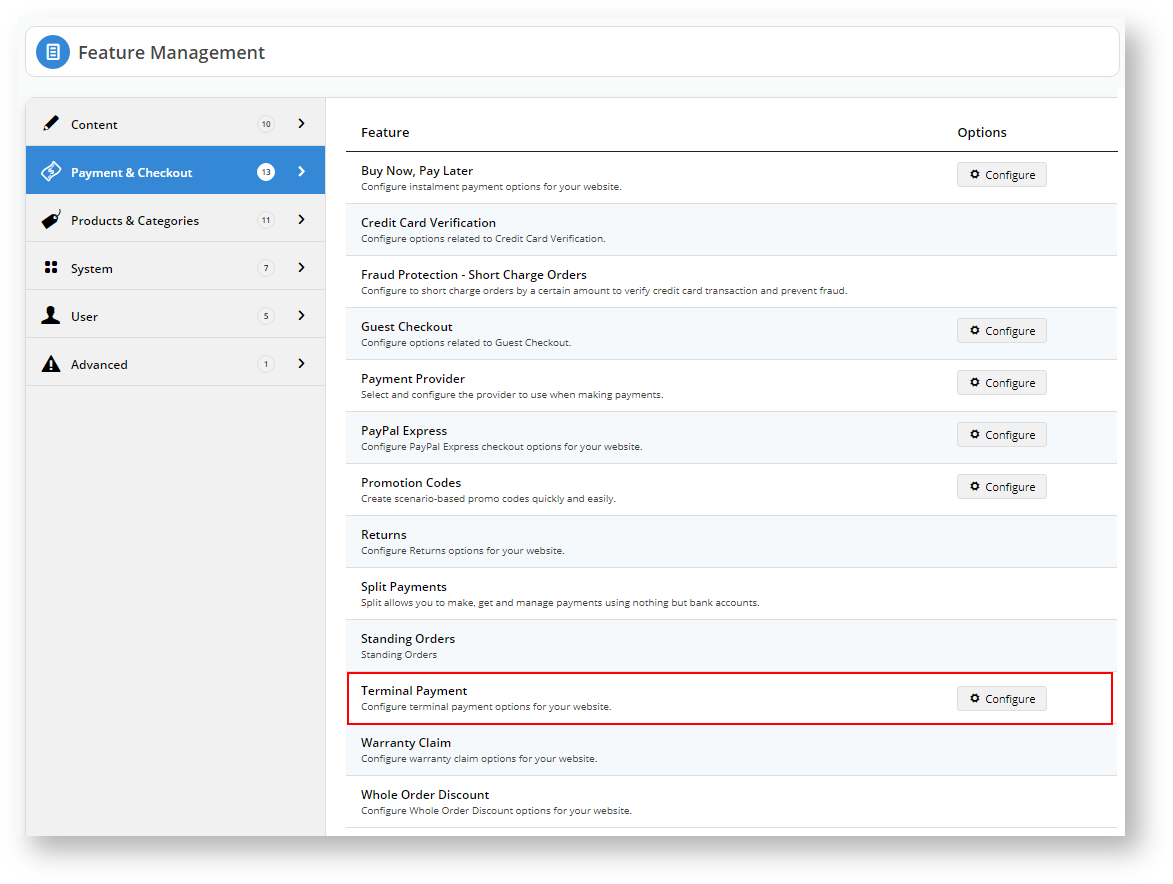
Click Configure.
Turn on the options: Enable Terminal Payment and Enable Terminal Payment for Trade Docket. The Trade Docket is the customer receipt.
Click Save and Exit to effect your changes.
We will now head over to your website and purchase a product to test the Albert Payment Terminal Functionality.
We recommend testing this functionality in your staging site before taking it live.
Follow your standard procedures to purchase a product and head to the checkout.
When you get to the payment area, you should see a new Terminal option. ## start here tomorrow##.
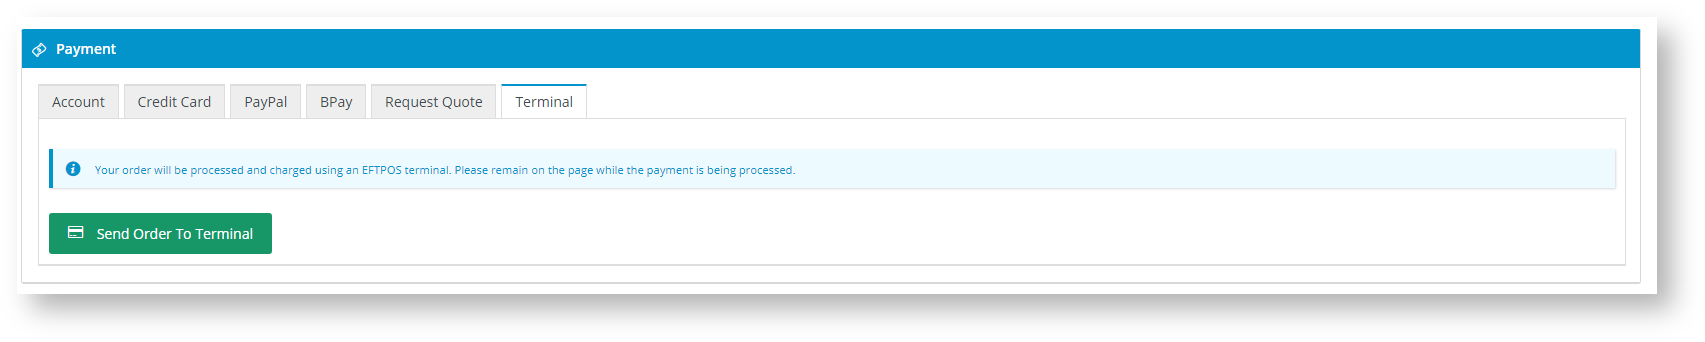
Ensure your Albert Terminal is turned on and connected to your provider.
Click Send Order to Terminal.
A Payment Processing message will display

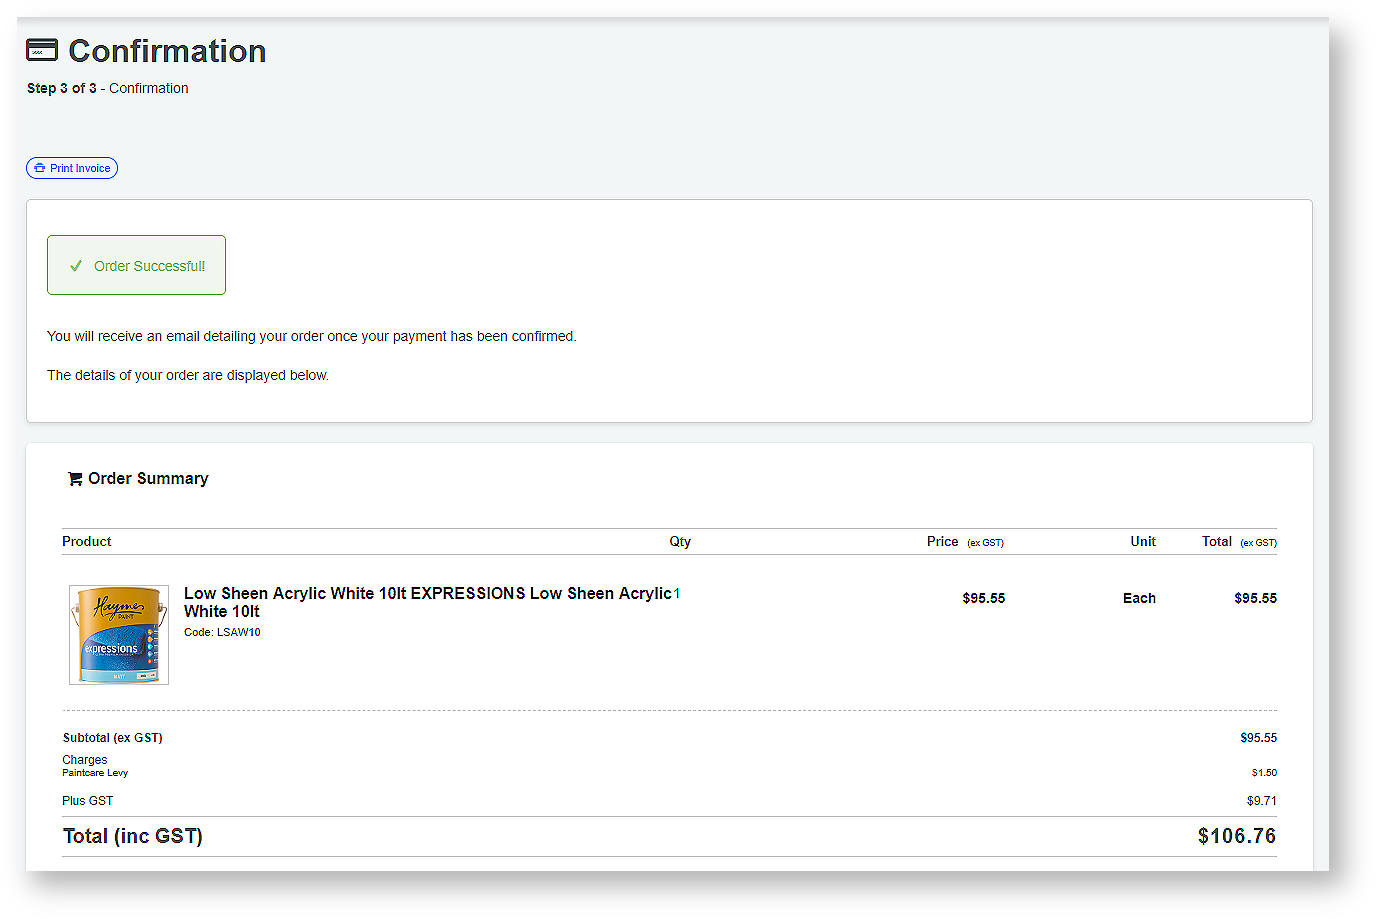
The system will display a Successful Order Confirmation message if the payment processes correctly.
Should the payment fail, you will receive a Payment Not Processed message. The system will allow you to retry the payment.
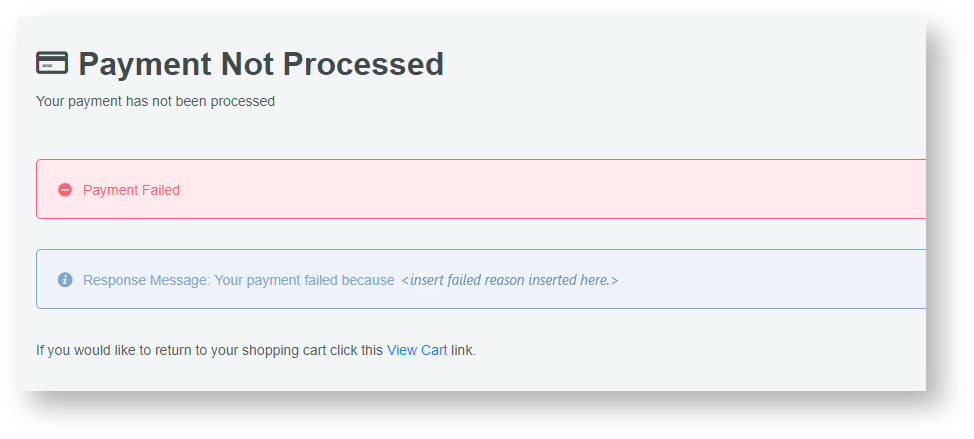
Should the payment fail again, the system will cancel the terminal transaction.

Additional Information
| Multiexcerpt | ||
|---|---|---|
| ||
|
| Minimum Version Requirements |
|
|---|
|
|
| |||||
| Prerequisites |
|
|---|
| ||||||
| Self Configurable |
|
|---|
| Business Function |
|
|---|
| ||||||
| BPD Only? |
|
|---|
| B2B/B2C/Both |
|
|---|
| ||||||
| Ballpark Hours From CV (if opting for CV to complete self config component) |
| |||||
|---|---|---|---|---|---|---|
| Ballpark Hours From CV (in addition to any self config required) |
| |||||
| Third Party Costs |
|
| |||||
| CMS Category |
|
|---|
|
Related articles
| Content by Label | ||||||||||||||||||
|---|---|---|---|---|---|---|---|---|---|---|---|---|---|---|---|---|---|---|
|
...