...
- Navigate to Settings → Feature Management → Products and Categories.
- Toggle ON Cost Centres.
- Click Configure.
- In the Cost Centres Feature Settings screen, configure the settings as required.
The Overrides feature can be used instead of global settings when the Overrides buttonappears.
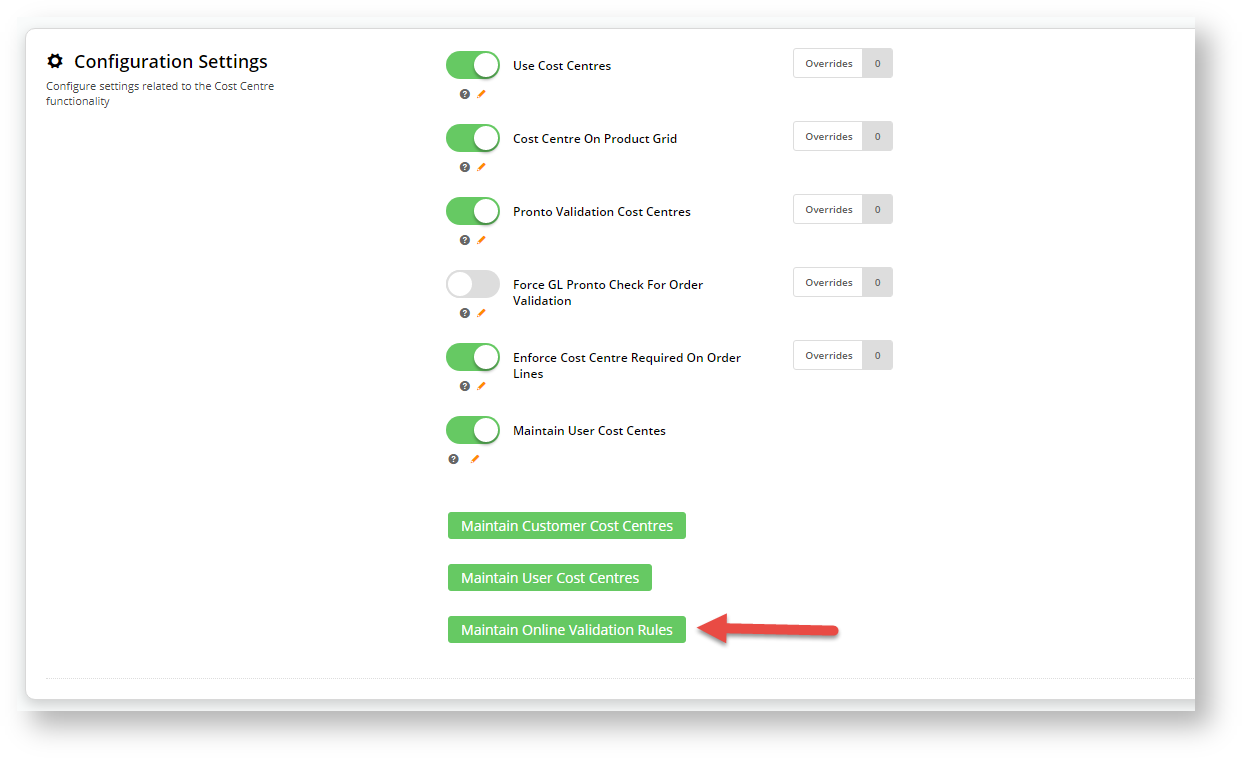
- Use Cost Centres: toggle ON to enable Use Cost Centres on the website.
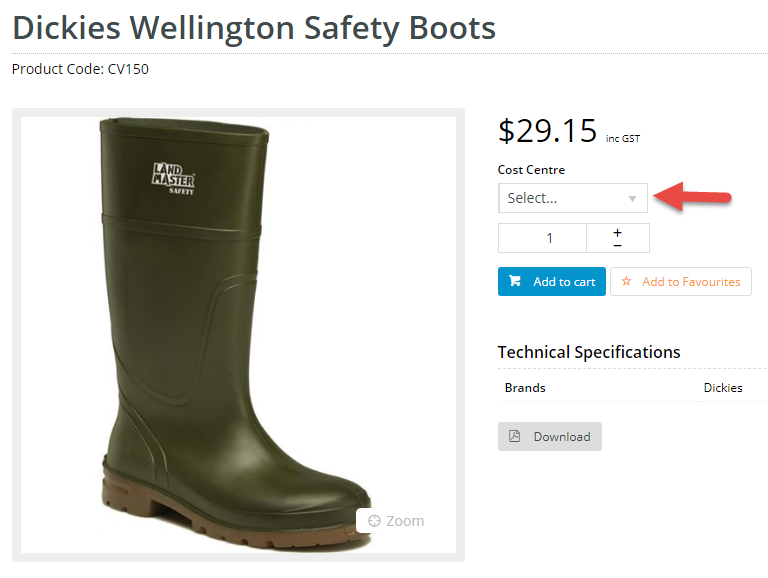
Cost Centre On Product Grid: toggle ON to display the Cost Centre selection dropdown in a product's detail page. This allows the user to select a call centre when adding each product to cart.
Expand
title Click here to view an example...
- Pronto Validation Cost Centres: (for Pronto users only) Toggle ON to use validation rules from Pronto. The alternative is to set up online validation rules.
Force GL Pronto Check for Order Validation: (for Pronto users only) Toggle ON to force a validation error on checkout when the user is not in a role that allows them to enter cost centres and there are cost centre validation errors.
Enforce Cost Centre Required on Order Lines: toggle ON to force users to select a cost centre per order line during checkout.
Warning If cost centres are set as mandatory on order lines, cost centre codes must be set up for the customer, otherwise the user will not be able to checkout.
Expand
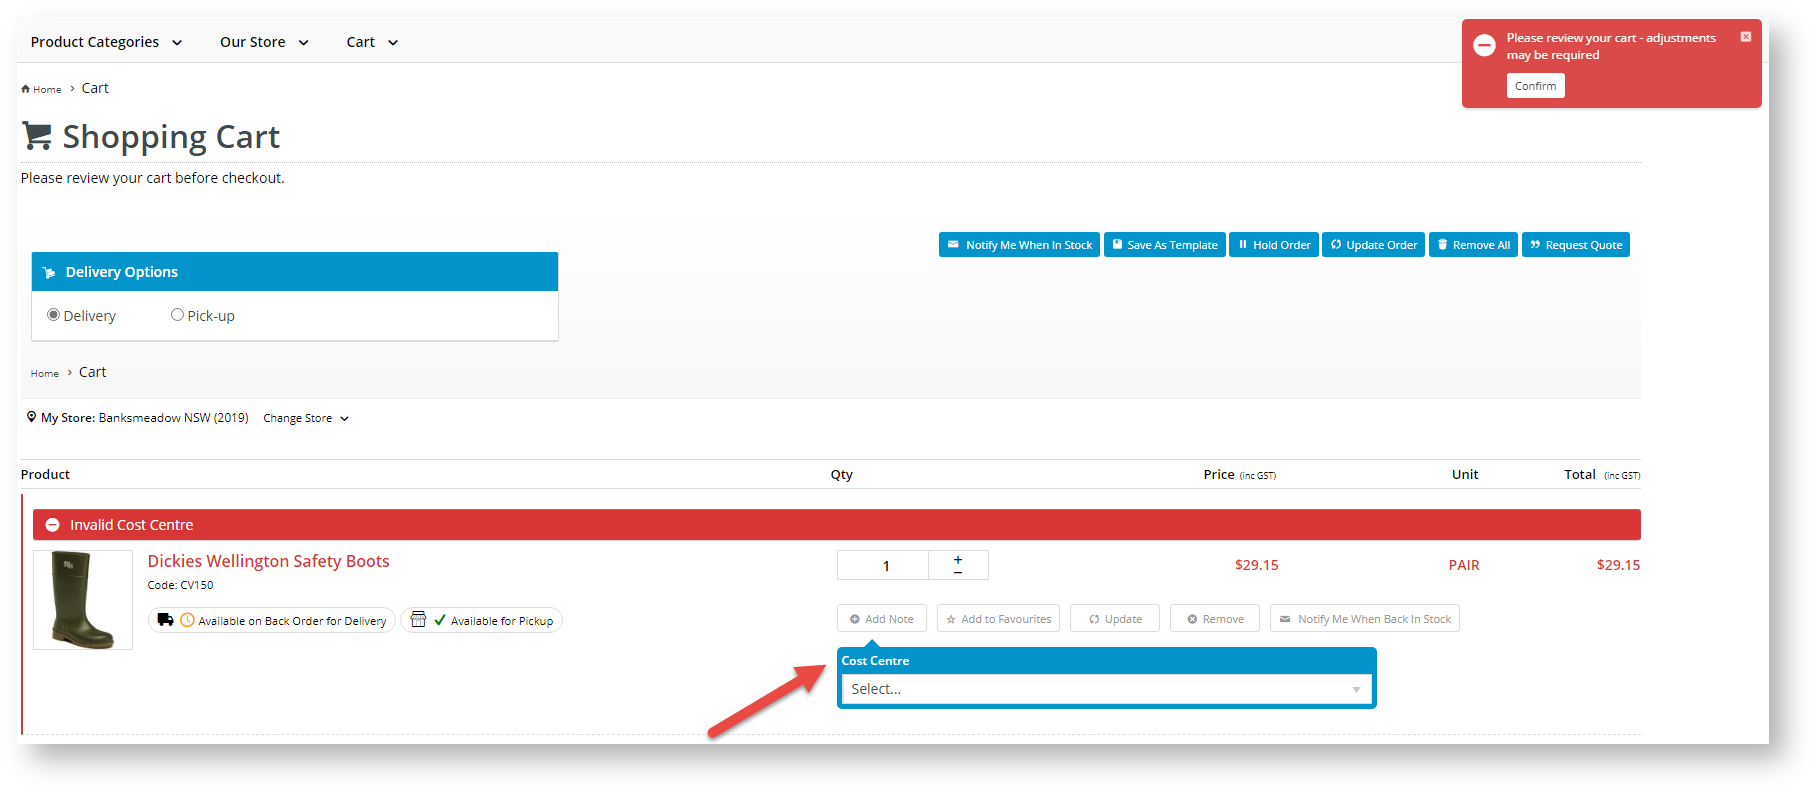
title Click here to view example... If Enforce Cost Centre Required on Order Lines is ON and a cost centre has not been entered for each product in the cart, an alert message will display to inform the user.
Maintain User Cost Centres: toggle ON to allow cost centres at the user level to be maintained. Once this is enabled, options to access cost centre maintenance at customer and user levels are displayed. NOTE - User level cost centre maintenance will also be available via a user's Edit User's screen.


...
- In the Cost Centres Feature Settings screen, ensure the Maintain User Cost Centres toggle is ON.

- Click Maintain Customer Cost Centres.
- In the Maintain Customer Cost Centres screen, any existing cost centres are listed. Click Add Cost Centre.

- In Customer, select the customer code for this cost centre. NOTE - Make sure you're entering the Customer Code, not the Bill To Code.
- In Cost Centre Code, enter a code for the new cost centre.
- In Cost Centre Name, enter a name/description for the cost centre. This will be displayed to the user in the 'Select cost centre' dropdown list during the order process.
- Click Save, or Save & Add Another if you want to add another new cost centre.
Assign a Cost Centre to a Customer User
This function can also be accessed via the Edit User's screen.
...
Bulk Import/Export Cost Centres
Instead of maintaining cost centres manually, you can also bulk import/export them.
Import Cost Centres
IMPORTANT - You should have the prepared csv file ready to import before beginning. You can download a template in the Customer Cost Centre Import page.
- In the Maintain Customer Cost Centres screen, hover over the Options button and select Import Customer Cost Centres.
- Select the Import Type to use. TIP - Use Append adds new customer cost centres to the list of existing cost centres. Any duplicates will not be uploaded. Use Overwrite to add new customer cost centres and replace all existing cost centres.
- Click Select Files and upload your cost centre .csv file. The import will automatically begin.
- If successful, the following messages will display on the screen. Any duplicate cost centres will not be added. These will be mentioned. If unsuccessful, a fail message will display.


Export Cost Centres
The Export function lets you download a .csv file containing all cost centres.
- In the Maintain Customer Cost Centres screen, hover over the Options button and select Export Customer Cost Centres.
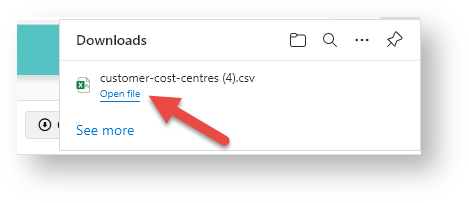
- The file will automatically download. To view the file, click Open file.
Assign Cost Centre to a Customer User
| Tip |
|---|
When Maintain User Cost Centres is enabled, you can also access this function via each user's Edit User's page. |
To create a cost centre at the customer use level:
- In the Cost Centres Feature Settings screen, ensure the Maintain User Cost Centres toggle is ON.
- Click Maintain User Cost Centres.
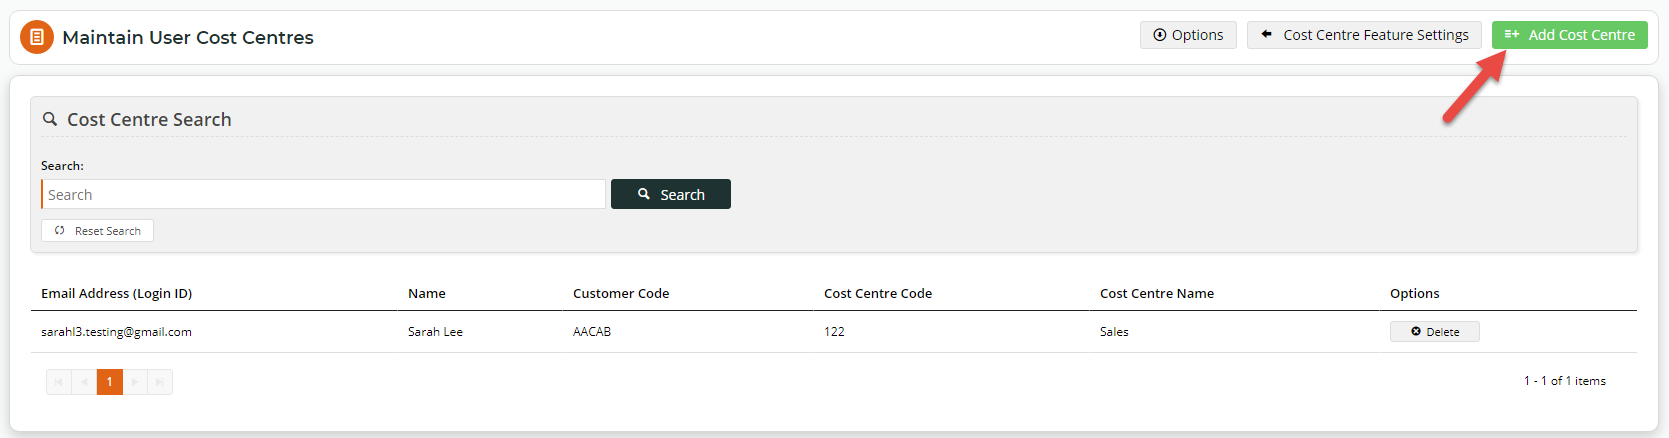
- In the Maintain User Cost Centres screen, any existing User Customer cost centre assignments are listed. Click Add Cost Centre.
- In User, select the user.
- Depending on the User, in Customer, linked customer accounts are displayed. Select the customer.
- In Cost Centre, from the dropdown list, select a code. NOTE - if there are no cost centres, you cannot proceed with assigning a cost centre to this user.
- Click Save, or Save & Add Another if you want to assign another cost centre to a user.
Bulk Import/Export User Cost Centres
Instead of maintaining cost centres for users manually, you can also bulk import/export them.
Import User Cost Centres
IMPORTANT - You should have the prepared csv file ready to import before beginning. You can download a template in the User Cost Centre Import page.
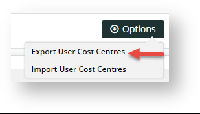
- In the User Cost Centre Import screen, hover over the Options button and select Import Customer Cost Centres.
- Select the Import Type to use. TIP - Use Append adds new customer user cost centres to the list of existing ones. Any duplicates will not be uploaded. Use Overwrite to add new customer user cost centres and replace all existing cost centres.
- Click Select Files and upload your cost centre .csv file. The import will automatically begin.

Export Customer User Cost Centres
The Export function lets you download a .csv file containing all customer users and their cost centres.
- In the User Cost Centres screen, hover over the Options button and select Import User Cost Centres.
- The file will automatically download. To view the file, click Open file.

Maintain Online Validation Rules
- In the Cost Centres Feature Settings screen, click the Maintain Online Validation Rules.
- Click Add New Validation Rule.
Related help
| Content by Label | ||||||||||||||||||
|---|---|---|---|---|---|---|---|---|---|---|---|---|---|---|---|---|---|---|
|