Par Value (Vendor Managed Inventory (VMI)) Order Templates allow administrators to import csv files to create refill orders. Templates are linked to Customer Codes, so users login and can access these via the VMI Template page (separate from their standard Order Templates).
Each template contains product lines, as well as space for associated notes (e.g. 'Print Room Level 2'). Lines can be dragged and dropped by the user to re-sequence as needed.
Each product line displays a Max Count value, as well as a Current Count quantity input field. Copying the lines from a par value template to your current order looks at the Max Count vs the Current Count (quantity on hand), and orders the difference.

Setting up Refill Orders
To Import a Par Value Template:
- In the CMS, navigate to 'Import Par Value Templates' (or 'Import User Templates').
- To browse to the order template csv, click 'Choose File'.
- Once the file is selected, to import the template, click Import Now.
Success and/or error messages will be displayed in the dialogue box on completion of the import.
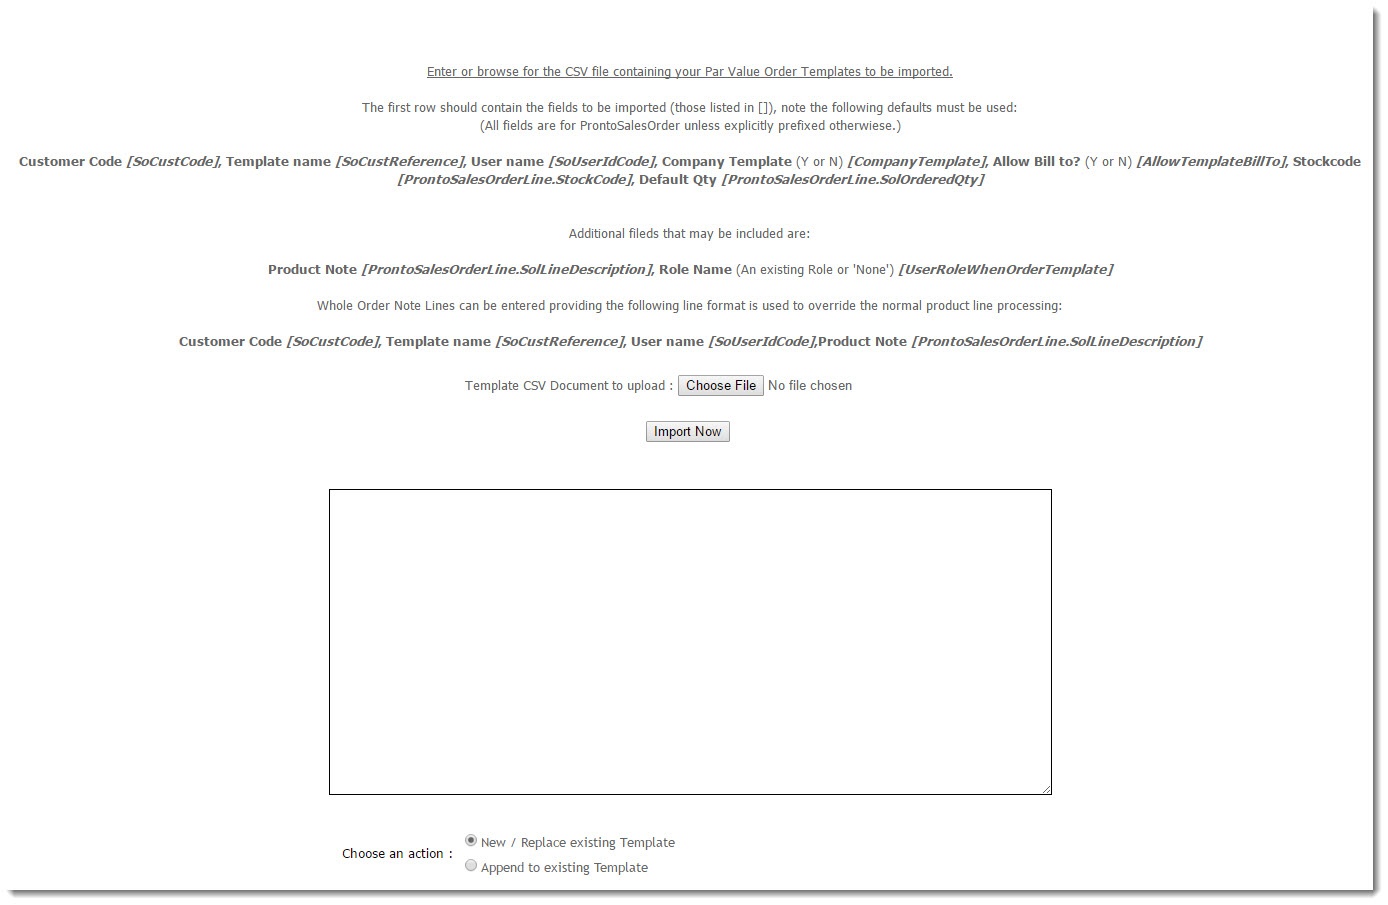
There are actually two file formats accepted by the import program. The format shown above will include a note input area within each product line.
However, some organisations prefer the note lines to be separate to the product lines. To acheive this, simply add a column at the start of the file for ProntoSalesOrderLine.SoILineType (N for Note line, S for Stock line). You can download an example here.
To Maintain a Par Value Template:
- Login to the CMS.
- Navigate to Par Value Template Maintenance.
- Enter the Customer Code you wish to edit templates for and click 'Search'.
- Select the required customer via radio button. The list of templates for that customer will load.

- Click View against the required template.
- Edit the template as needed.
- Click 'Save Template Changes' at the bottom of the grid.

To allow access to VMI Par Value Templates for the end user, you will need to add the page 'OrderTemplates.aspx?ParValueOrderMode=true' to their role's menu.
Customise Text
Update the Maximum Quantity Column Heading:
- In the CMS, navigate to Advanced Content → Resources.
- Search for and select the radio button next to the resource code rcParValueOrderQtyColHeadingOrderGrid.
- Click Modify and enter in the title for the message box.

- To save changes, click OK.
Update the Current Count Column Heading:
- In the CMS, navigate to Advanced Content → Resources.
- Search for and select the radio button next to the resource code rcParValueCurrentCountColHeadingOrderGrid.
- To enter the message box title, click Modify.
- To save changes, click OK.
Update the Par Value Order Template Import Instructions:
- In the CMS, navigate to Advanced Content → Resources.
- Search for and select the radio button next to the resource code rcImportTemplatesCSVFieldsInstructionsParValueMode.
- To enter the message box title, click Modify.
- To save changes, click OK.