Overview
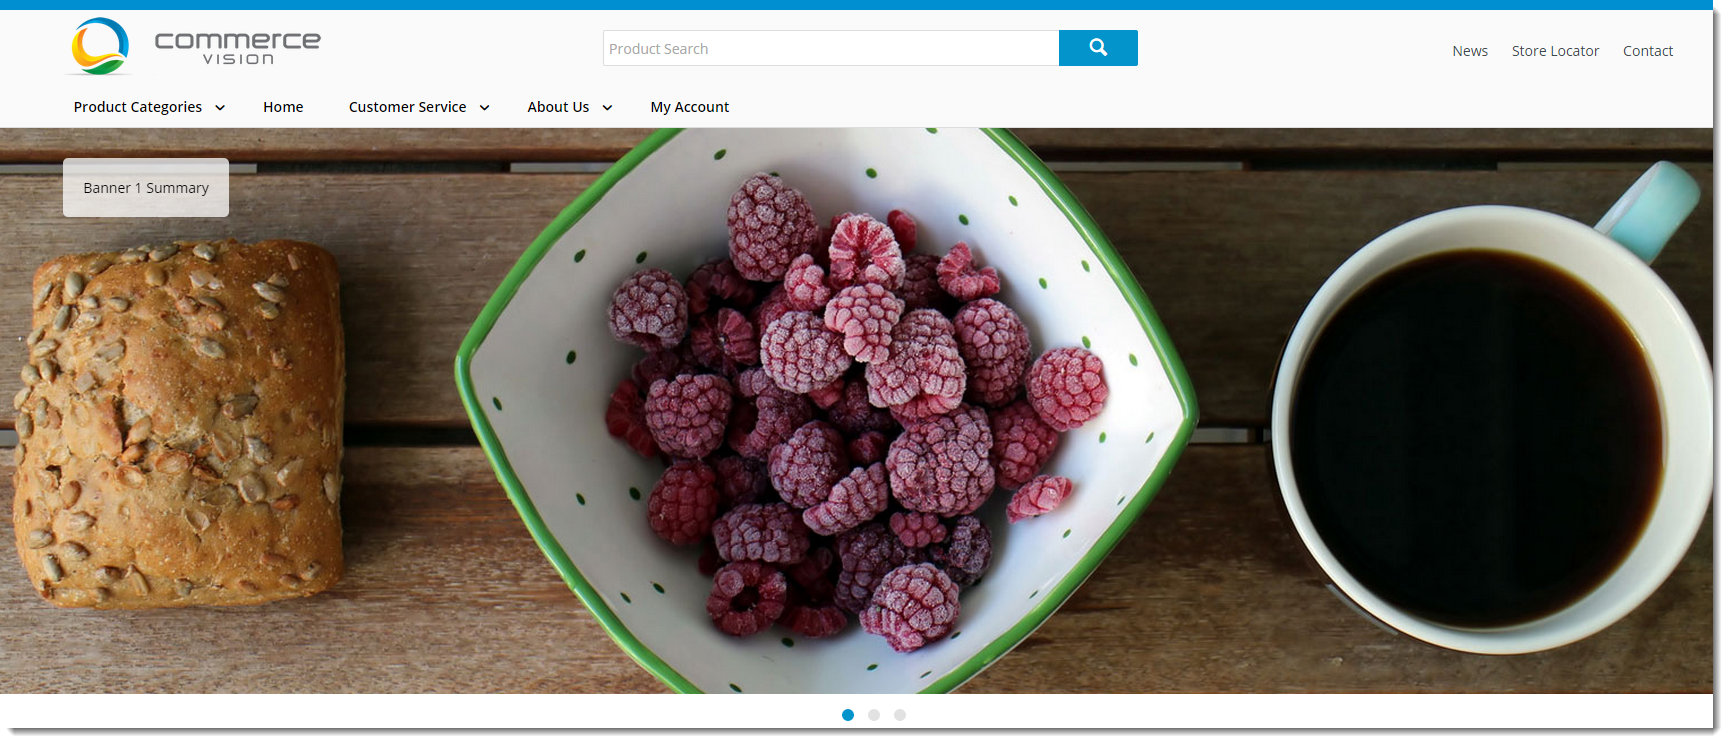
Home page Banners are a popular feature, allowing a series of large 'hero' images to loop through in sequence. This image carousel can loop automatically, or be controlled by the user.Banner images can be linked to relevant site content such as products or categories, or to external web pages or static content.
Step-by-step guide
To Implement a Home Page Banner:
- Upload the required image files to the server via FTP. For further information, see Loading Site Content Via FTP Using FileZilla.
- Login to the website as an Administrator.
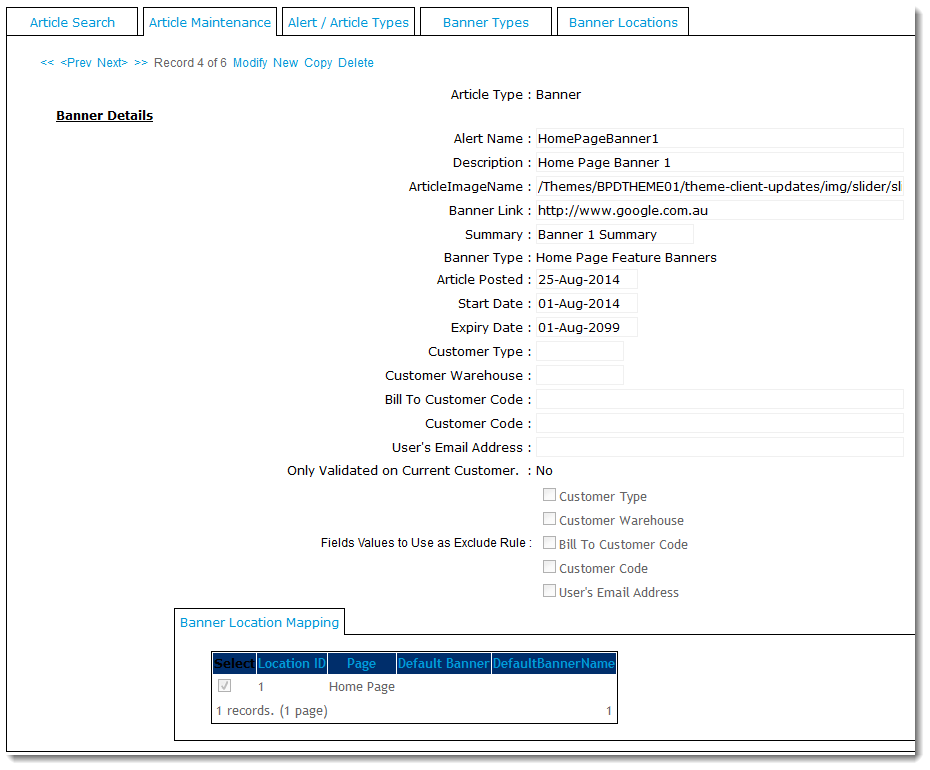
- Navigate to 'Content' -> 'Article Maintenance'.
- Click 'New'.
Enter values for the following fields (any fields not listed below may be left blank):
Prompt Value Notes Article Type Banner This option should be available in the drop-down list. Alert Name A Banner name of your choice For Administrator use; this field isn't displayed by default. Description A short description for the Banner For Administrator use; this field isn't displayed by default. Article Image Name Image file name This is the large Banner image. (Field available from version 3.74+.) Banner Link Link to the required content This could be a Category Code, Product URL, web page, or other required content. Summary Short summary text This content displays in a transparent overlay on the banner image itself (Only available fromversion 3.74+). If this field is left blank, the overlay will not render. Banner Type Home Page Feature Banners This option should be available in the drop-down list. (The exact name can be determined by clicking the 'Banner Types' tab.) Article Posted The Banner creation date For Administrator use; this field isn't displayed by default. Start Date Start Date for the Banner The Banner will become visible on this date. Expiry Date End Date for the Banner The Banner will disappear after this date.
- In the 'Banner Location Mapping' tab, tick the box to select the 'Home Page' location.
- Click 'OK' to save.
- Repeat Steps 3 - 6 as required to create additional Banners.
Banners can also be targeted to specific customers or users. Simply populate the relevant field with the required Customer Code, Type, or User Email Address, for example. The banner will then be restricted to that user or group. Leaving these fields blank will default to ALL users.
Please note - When making changes to a Banner on the Home Page, the site's Template Cache will need to be refreshed (or the testing User will need to login/logout) before the changes take effect on the web.
This guide applies to classic CSS websites. If your site is on the Best Practice Design framework, refer to our updated guide here - Slider Banners.
Related articles