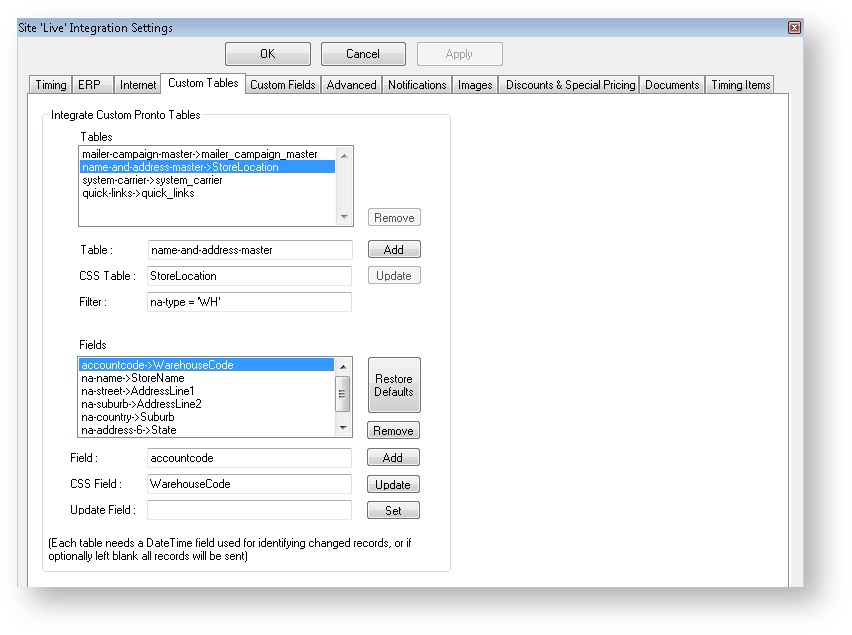
The Customer Self Service eCommerce Platform Integrator is capable of handling tables that are not part of standard integration functionality.
Custom tables and fields can be specified on the Integrator Settings 'Custom Tables' tab. Multiple tables can be included, along with filter queries for each.
Step-by-step guide
To Configure the Integration of Custom Tables:
- Open the Integrator Client.
- Click the 'Settings' icon.
- Click the 'Custom Tables' tab.
- Enter the PRONTO table name into the 'Table' field.
- Enter the corresponding Web table name into the 'CSS Table' field.
- Enter the Filter (or where clause) into the 'Filter' field and click 'Add'.
- Note - leave the 'where' keyword out of the filter; simply follow the format: fieldName1='fieldValue1' and fieldName2 = 'fieldValue2' etc.
- Enter the first field name into the 'Field' field and click 'Add'.
- Enter the corresponding Web field name into the 'CSS Field' field.
- Repeat steps 6 - 8 until all fields to be integrated from the table have been added.
- One of the fields should be a 'Date Time' field used to identify changes to the record; select the field and click 'Set' to identify it as the 'Update Field'. If the 'Update Field' is left blank, all records on the table will be sent.
- Click 'OK' to save changes.
Custom PRONTO tables cannot be integrated unless the corresponding CSS Tables have been created. If you are unsure how to create a web database table, contact our Support Team.
Related help
