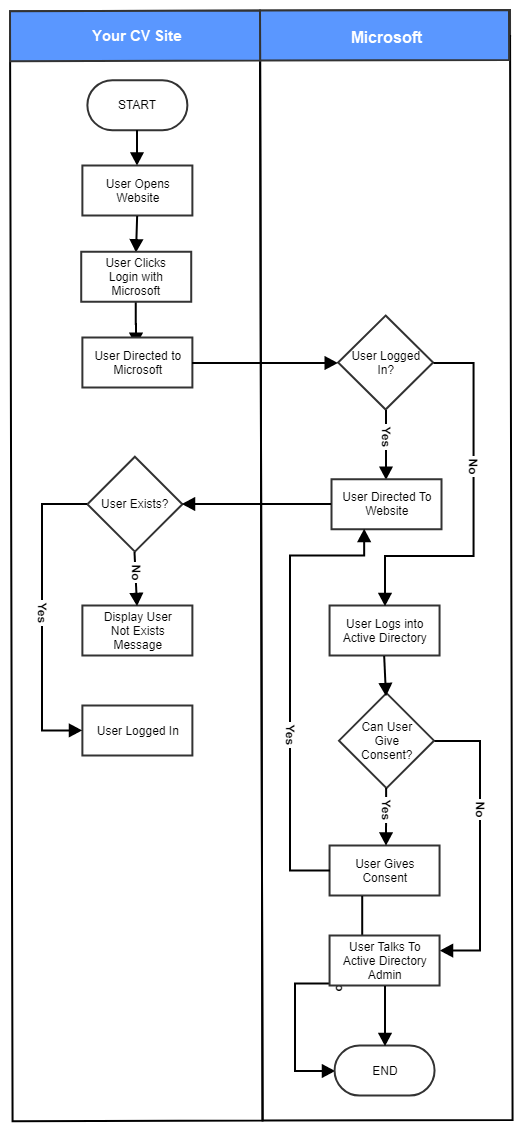
Integration Flowchart
Register the Web App in Azure Portal
Login to your Azure Portal. If you have multi Active Directories in the Azure Portal, check you're on the correct Azure AD.
Navigate to the Microsoft identity platform for developers App registrations page.
Click the New registration button.

In the Register an application page, enter your application's registration information:
- In the Name section, enter a meaningful application name. NOTE - The first time a user selects to login with their Microsoft account on your site, this name is displayed in the 'Permission requested' popup.
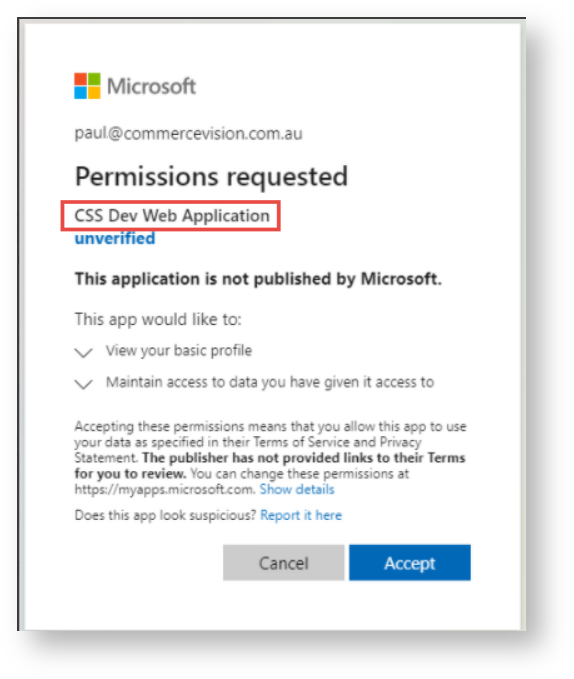
- In the Name section, enter a meaningful application name. NOTE - The first time a user selects to login with their Microsoft account on your site, this name is displayed in the 'Permission requested' popup.
- Set the Supported account types as required:
Accounts in this organizational directory only (Your Directory only - Single tenant)
Only user and guest accounts in your directory can log in
Use this option if your target audience is internal to your organization.- Accounts in any organizational directory (Any Azure AD directory - Multitenant)
All users with a work/school account from Microsoft can log in. They include school/business Office 365 users.
Use this option if your target audience is business or educational customers and to enable multitenancy. - Accounts in any organizational directory (Any Azure AD directory - Multitenant) and personal Microsoft accounts (e.g. Skype, Xbox)
All users with a work/school or personal Microsoft accounts can use your application or API. They include Office 365 schools/business users as well as personal accounts for services like Xbox and Skype.
Use this option to target the widest set of Microsoft identities and to enable multitenancy. - Personal Microsoft accounts only
Personal accounts that are used to sign in to services like Xbox and Skype.
Use this option to target the widest set of Microsoft identities.
Set the redirect uri as your website url.
To create the application, click the Register button.
In the app's registration screen, make note of the Application (client) ID value and Directory (tenant) ID as these need to be entered in the CMS for your CV site.

In the app's registration screen, click on the Authentication tab in the left.
- In the Redirect URIs section, select Web and click Add URI.
- Enter each of the following URIs separately, clicking 'add uri' each time.
- In Front-channel logout URL, enter https://yourdomain/signout-oidc
- In the Advanced settings | Implicit grant section, check ID tokens
- Supported account types should already be selected correctly but change if required.
Click the Save button.
In the app's registration screen, click on the Certificates & secrets blade.
- In the Client secrets section, click on New client secret:
- Type in the name: SingleSignOnClientSecret
- Select one of the available key durations (In 1 year, In 2 years, or Never Expires) as per your security concerns.
- To generate the key value, click the Add button.
- Copy the generated value. IMPORTANT - This key value will not be displayed again, and is not retrievable by any other means. So make sure to note it down from the Azure portal before navigating to any other screen or blade.
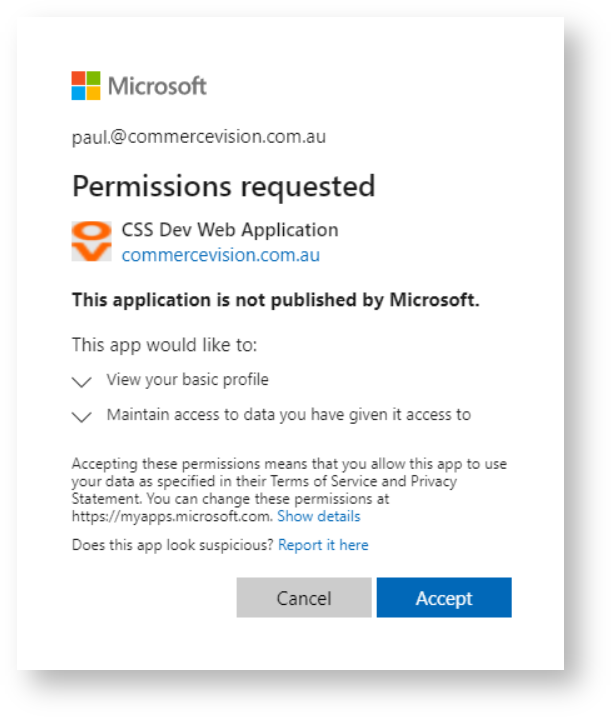
- To set up branding for the Permission Requested popup, click the Branding blade.
- Update all fields on this page and upload a brand logo.
- If you have a Microsoft Partner Center (MPN) ID, add it here.
- Click the Save button.
Now you can go into the CMS for your CV site and configure the settings for Active Directory SSO.
User Information
- The user must exist on the website where the email address matches the Microsoft Account email address. If this is not the case, the user will see the following error (N.B This can be configured in CMS - Third Party Login Features - Invalid User Message):

- The user must give the application permission (see Permission requested below) or the following error will be displayed. NOTE - This can be configured in CMS - Third Party Login Features - Declined Consent Message.
- A user can revoke the permission for the app from their Office 365 portal.

Related help