...
| Excerpt |
|---|
Exporting Products from a CampaignYou can export the list of existing products in the campaign as a CSV file. 1. In the Options menu, select Export Products. The CSV file is automatically downloaded to your device.
Importing Products to the Campaign You can add products and/or change the display order of existing products to the campaign. To add a product individually, click the +Add Product button. You can also import products in bulk. For this option:
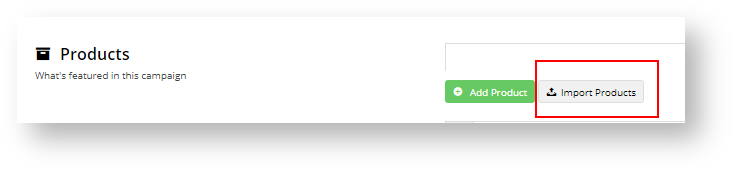
In 1. In the Options menu, select Import Products or click the Import Products button next to the + Add Products button. 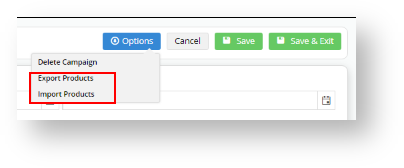
2. Create a CSV file for the products you want to import. In the Campaign Product Import page, you can download an example template. This template provides details of the headers needed and an example of a product. 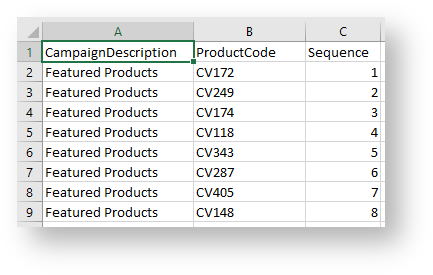
3. For each product you want to import, enter these details: - 'CampaignDescription', enter the Campaign Name
- 'ProductCode', enter the product's code,
- 'Sequence', enter the number you want the product to display in the campaign.
4. Save the file.
| Tip |
|---|
| title | Use Overwrite to change product display order |
|---|
| You can use Overwrite Import if you just want to resequence the order existing products display in a campaign. In the CSV file, under the 'Sequence' header, simply change the number for each existing product. For instance, we have changed 'CV148' so it displays first by changing its number to '1'. All other products will move down in the list. IMPORTANT- As you can see, it's the Sequence number that controls the display order, not the position the product sits in the CSV file. 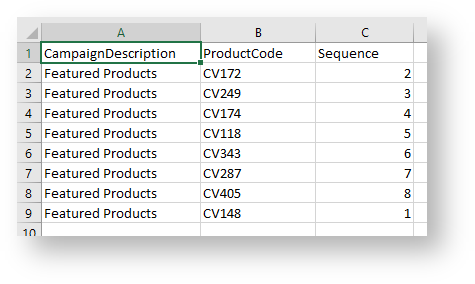
|
45. In the File Upload section, for Import Type, select 'Append' if you want to add more products to the campaign, or 'Overwrite' to replace all existing products and their display orders. 56. Click Select files.... 67. Select the CSV file you created earlier. 78. Check the Import Log section for system messages about your import. If one or more products were successfully imported, 'Import Successful' is displayed.
You may see one or more other Import Log messages: i. If the Import Type selected is 'Append' and the product is already in the campaign, this message is displayed. Note- 'Line _' tells you the product row number in the CSV file. Since the Header occupies Line 1, the first product will be 'Line 2' etc.  ii ii. If the Campaign Name entered under the CampaignDescription header for a product does not match the current campaign, this message is displayed: 
|
...
1. In the CMS, navigate to the page you want the campaign to appear on. For example, Content → Other Pages & Templates, and select the Home page template.
2. Select the appropriate zone according to your page layout, and click 'Add Widget'.
3. Search for 'Campaign Slider' and click 'Add Widget'.
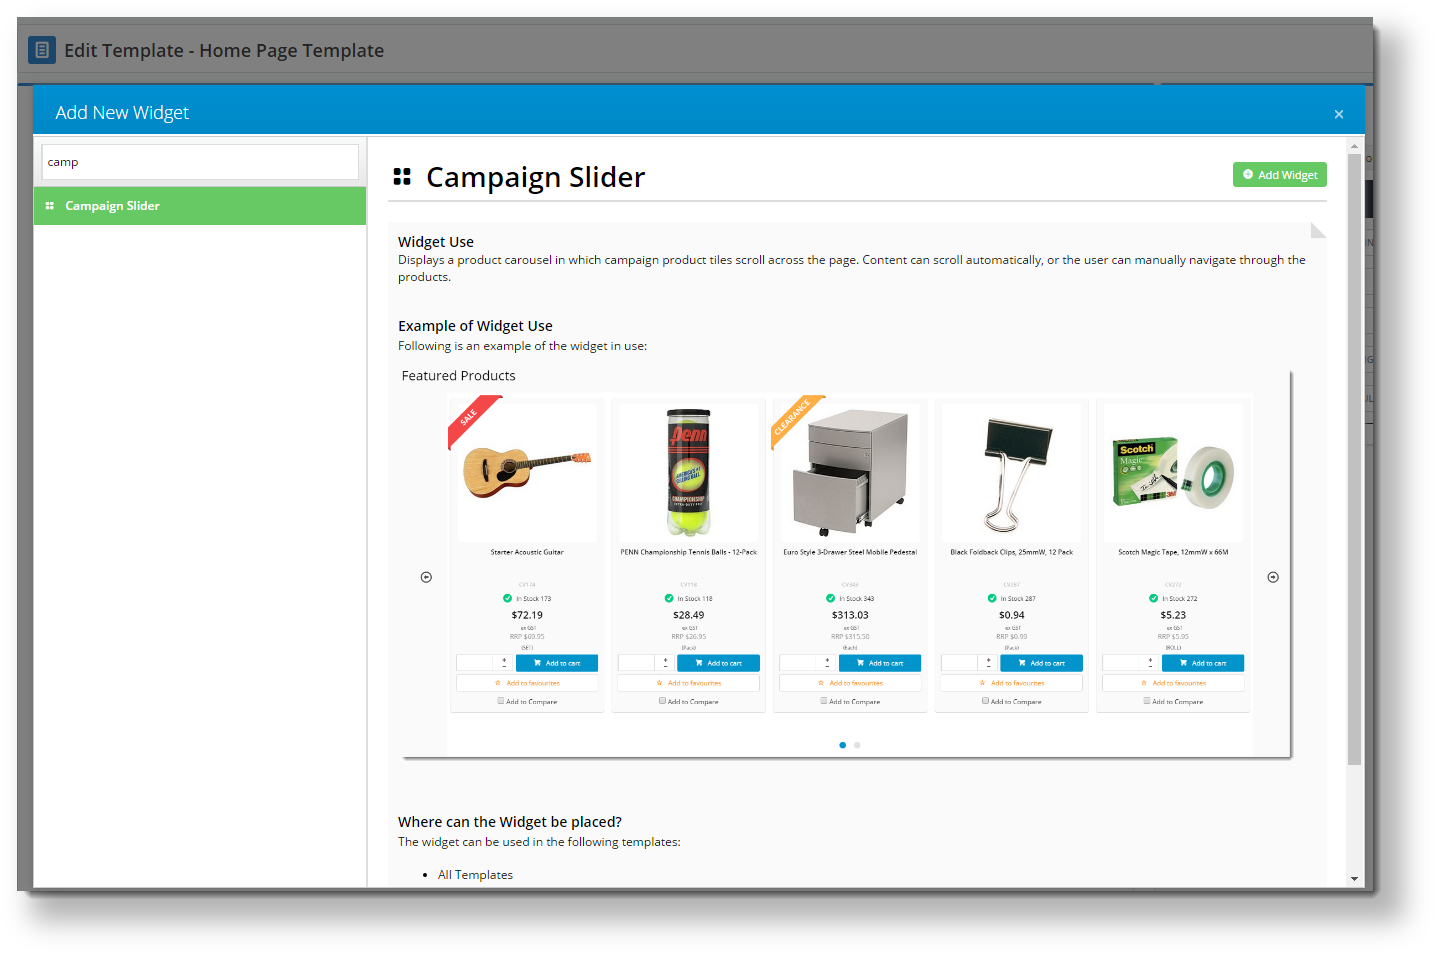
4. Select your campaign from the 'Campaign' drop-down, and configure options as required. If you'd like statistics on your campaign's performance, tick the 'Track Campaign' option.
You can find full widget documentation here - Campaign Slider Widget.

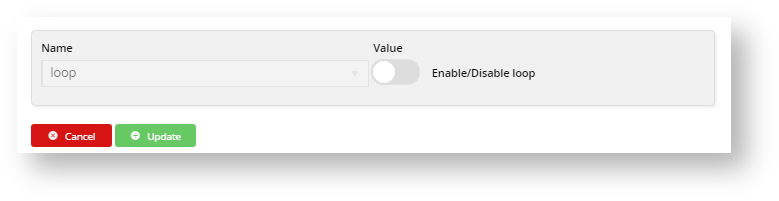
5. The carousel options give you control over the display and functionality of your campaign slider.
6. To change a value, highlight the option and click Edit.
7. Alter the value and click +Update.
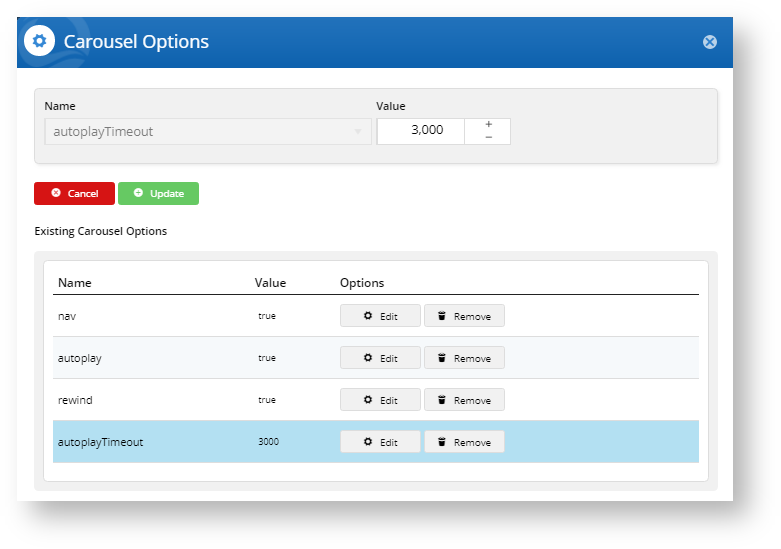
8. You can add more features by clicking the down-arrow and selecting a feature–there are many to choose from.
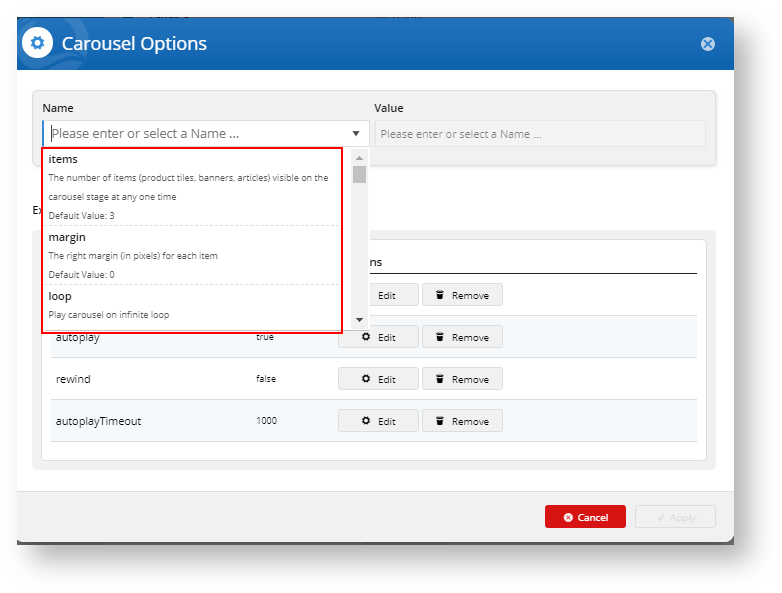
9. You can remove a feature by clicking Remove, or disable it by toggling the Enable/Disable button when you edit the feature.
10. Click 'Save'.
11. Load your website in another browser or incognito tab and check that your campaign is displaying as expected.

...