...
- Store Locator
- My Store
- System SettingsClick & Collect
- Product Availability Logic
- Check Other Stores
- Click & Collect
...
Implementation and Maintenance
Store LocatorAnchor StoreLocator StoreLocator
Before Click & Collect can be implemented, a Store Locator must be populated with valid pickup locations. Refer to this guide for instructions - Pickup Warehouses / Store Locator
...
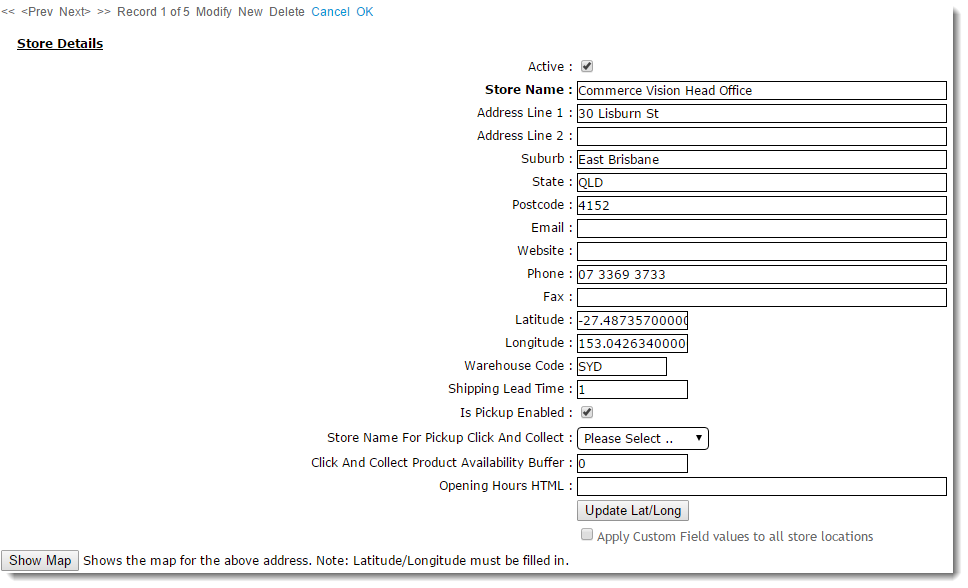
For each location, the following fields are of special importance for Click & Collect:
Is Pickup Enabled - for standard checkout, determines whether the user can select this location to collect their order. Additionally for Click & Collect, determines whether this location can be set as 'My Store' for pickup.
Store Name For Pickup Click And Collect - sets an alternate pickup warehouse for this location (e.g. in some cases, a default warehouse may be ok for delivery, but not suitable for pickup. In this instance, an alternate warehouse is used). Click And Collect Product Availability Buffer - an optional buffer value specific to this warehouse, overriding the value in System Settings.
| Anchor | ||||
|---|---|---|---|---|
|
...
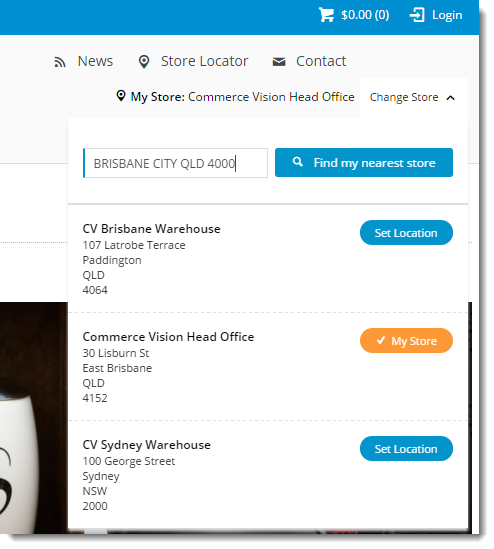
2. My Store
With Click & Collect, the user can set their pickup location ('My Store') at any time during their visit. Setting a preferred store allows the pickup availability to be displayed to the user. If the user changes their pickup store, the availability will be re-calculated and the page will refresh with changes.
Widget placement
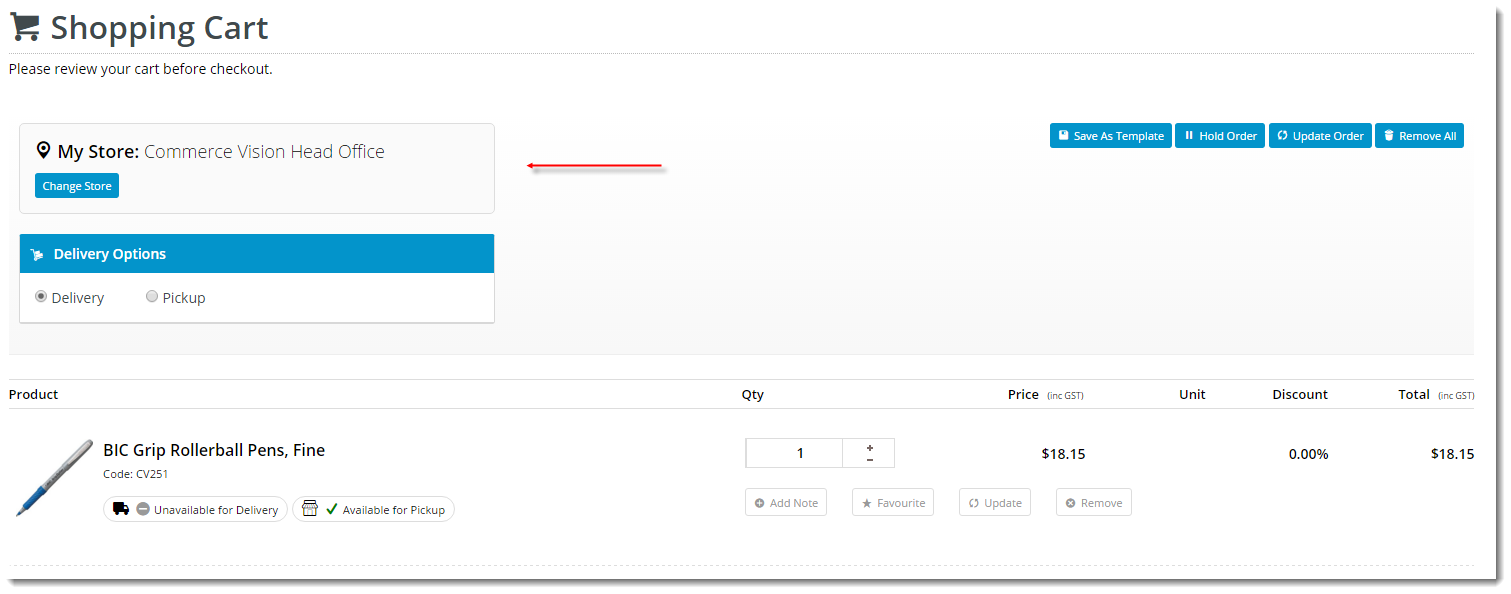
The widget ('Store Availability Locator') widget is generally placed in the Theme Layout template so that it appears in the site's header area, making it accessible to the user during browsing and searching. The widget can also be placed in the Cart template, allowing the user to change pickup locations just before checkout.
Site header (Theme Layout) widget placement Shopping Cart widget placement
| Anchor | ||||
|---|---|---|---|---|
|
...
3. System Settings
There are several system settings to configure for Click & Collect. These can be found in the CMS under 'Settings' --> 'Settings'.
- 'Enable Store Availability Click And Collect' - tick to enable the Click & Collect functionality.
Availability Logic
Anchor
Logic Logic
These Product Availability - the following fields define stock levels for availability calculations:
Click And Collect Delivery Available Qty - if available stock in user's default delivery warehouse ≥ this value (after buffer), the product = 'Available for Delivery'.
- Click And Collect Pickup Available Qty - if available stock in user's pickup warehouse ≥ this value (after buffer), the product = 'Available for Pickup'.
- Click And Collect Pickup Call Qty (Low Stock, Call to Order) - if available stock in user's pickup warehouse is less than the 'Pickup Available Qty' value, but ≥ this value (after buffer), the product = 'Low Stock - Call to Order'.
- Click And Collect Product Availability Buffer - this value is subtracted from the available quantity, for both Delivery and Pickup. The system level buffer is the fallback value, which can be overridden at a warehouse level. Example: PRONTO calculates 10 available for sale, the product buffer of 2 is deducted, so there are 8 available for sale.
Functionality
Info Available stock values for each product are drawn from the ProntoStockWarehouse table. Available stock = 'QtyOnHand' minus 'QtyCommitted' for the specified warehouse.
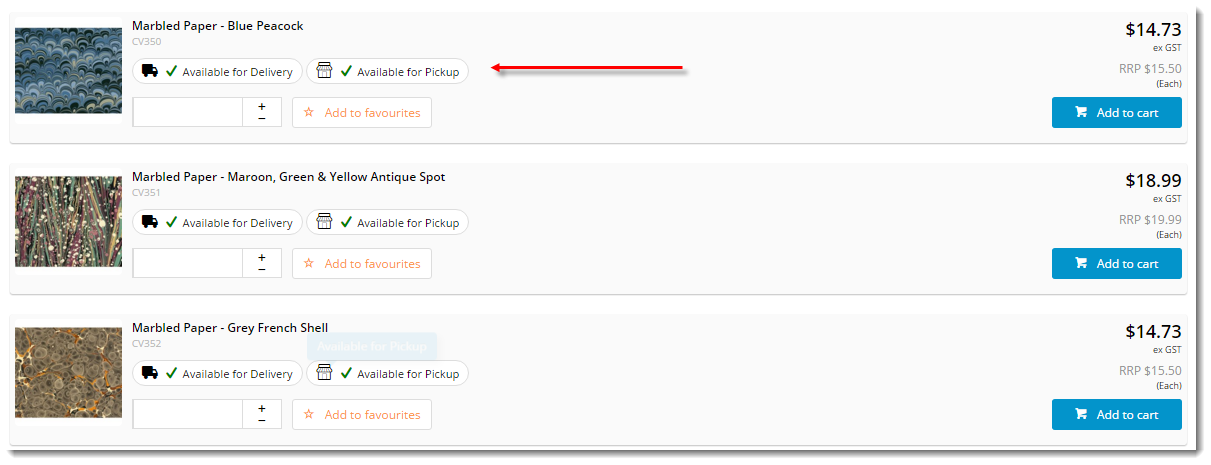
Products in a list displaying availability icons for both Delivery and Pickup
Product availability icons can be displayed on the product list page (i.e. search results, product categories, my favourites page), the product detail page, and the shopping cart.
Products may show a different availability status for delivery vs pickup, as the customer's default warehouse is always used to calculate availability for delivery. A B2B user who switches to another account may see different delivery availability if the new account code has a different default warehouse.Example: PRONTO calculates 10 available for sale, the product buffer of 2 is deducted, so there are 8 available for sale.
Availability calculations will be specific to each site's implementation, but in all cases a product buffer may be employed. This adds a safety net to the availability logic, accounting for stocktake errors, for example. The buffer value is subtracted from the available quantity, for both Delivery and Pickup. The buffer can be set at the system level or by warehouse location override.
Products in a list displaying availability icons for both Delivery and Pickup
- Decide how to handle order restrictions (whether to accept the web order even if it contains products deemed 'unavailable').
YES (Always allow) / NO (Never allow) / DEFAULT (Standard behaviour as per existing business rules).
- Click And Collect Can Order If Deliv Unavailable - the delivery order contains a product which is 'Unavailable for Delivery'
- Click And Collect Can Order If Deliv Spec Ord Item - the delivery order contains a product which is ??????
- Click And Collect Can Order If Deliv Indent Item - the delivery order contains a product classed as 'Indent'
- Click And Collect Can Order if Pickup Low Stock - the pickup order contains a product which is 'Low Stock - Call to Order'
- Click And Collect Can Order If Pickup Unavailable - the pickup order contains a product which is 'Unavailable for Pickup'
- Click And Collect Can Order if Pickup Indent Item - the pickup order contains a product classed as 'Indent'
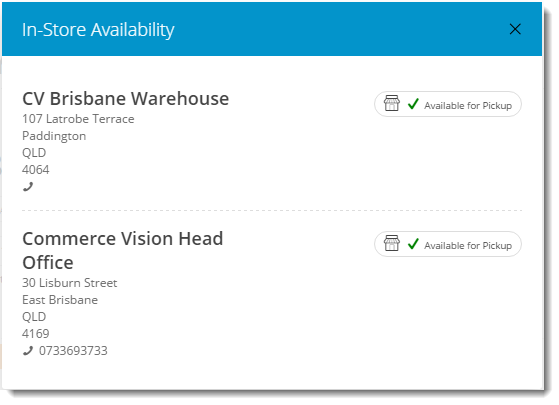
Check Other Stores:
Anchor
CheckOtherS CheckOtherS
- 'Enable Nearby Stores Availability for Products' - tick to enable Check Other Stores functionality
- set the 'Store Location Max Distance for Alternate Stores' (system defaults to 50km if no value is set)
Functionality
On the Product Detail and Cart pages, an additional product button will display (if enabled in System Settings) - 'Check Other Stores'. This button launches a pop-up window showing the pickup availability of the product at stores close to the user's 'My Store' location.Only nearby stores with stock available will appear in this pop-up - if there are no locations within X kilometres (distance configurable in System Settings), a message will display to indicate that no nearby stores have stock available.
- Set the 'Store Avail Click and Collect Deliv Display Mode' (for Delivery availability logic):
- Standard - delivery availability is calculated per the method outlined in Step 2.
- Transfer Zone - delivery availability takes into account nearby warehouses in the same 'transfer zone' group. If stock is present and can be transferred for delivery, the product will display an 'X - X days to delivery' status, depending on core logic vs transfer stock. (Contact Commerce Vision for more detailed information on this option)
- If Transfer Zone used, set the 'Pronto Stock Warehouse Transfer Zone Field' ???? is this used for Standard mode as well??
- Configure Email Settings:
'Order Status for Shipped Pickup Ready' - defines the PRONTO status that will indicate a pickup order is ready to collect.
Warning Don't forget to add this status to the list of 'Order shipped statuses' in the Integrator Advanced Settings pane. See Integrator Settings - Advanced for information.
- 'Order Shipped Pickup Ready Email Template' - defines the email template used when an order has reached Pickup Ready status and the Integrator triggers the 'Pickup Ready' email to the user. The default template is called 'Order Shipped Pickup Ready', which can be edited via 'Content' --> 'Emails'.
- Set the 'Store Location Google Api Maps Uri' to the following: https://maps.googleapis.com/maps/api/js?key=
- Ensure the website has its unique 'Google API Key' populated.

| Anchor | ||||
|---|---|---|---|---|
|
...
4. Messaging
Wording on the following widgets may be customised as required. Widget template locations are noted for each.
...