Overview
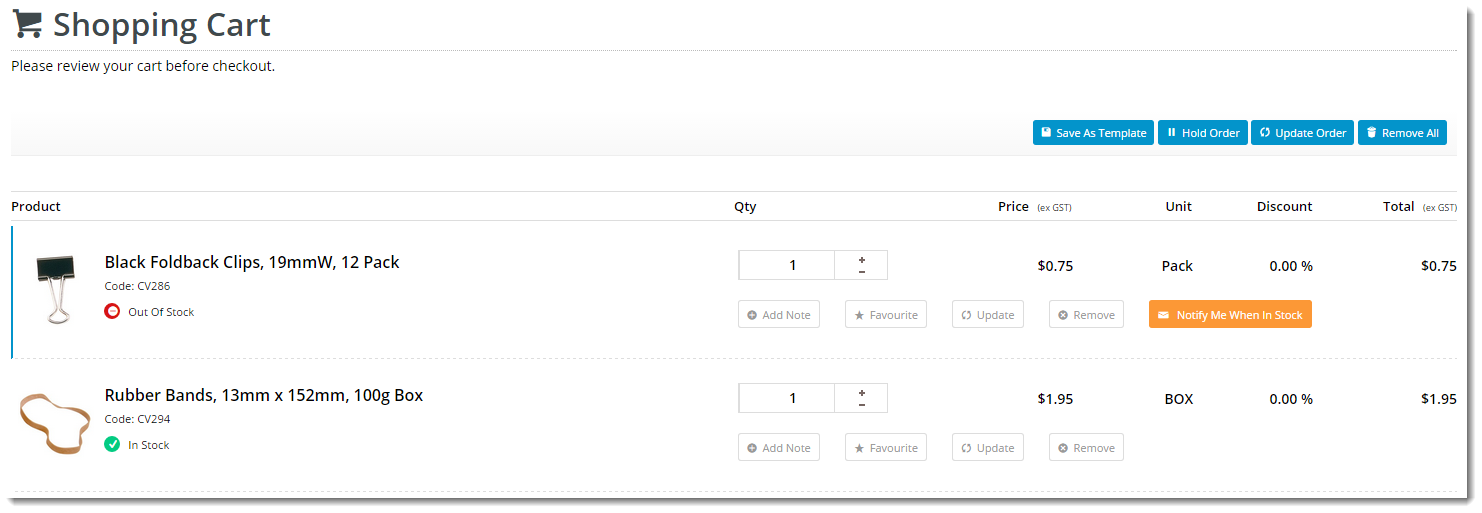
Customer Self Service features 'Notify Me' functionality, whereby users can elect to be emailed when out-of-stock products in their shopping cart come back into stock.When a user clicks the 'Notify Me' button, the unavailable product is automatically removed from the cart and an email address is requested.
A scheduled task runs at regular intervals, checking stock availability against notification requests. When a requested product becomes available, the email to the user is triggered.

This functionality is available from version 3.79 onward.
Step-by-step guide
To enable Back in Stock Notifications, there are 3 components:
- Add the Widgets
- Create & Assign the Email Template
- Create the Scheduled Task
1. Add the Widgets:
Login to the CMS.
Navigate to Layouts --> Templates.
Click the Cart template.
Click 'Add Widget' in any zone (for example Zone Header Right). The feature will behave the same regardless of zone placement.
Select the 'Stock Availability Popup' widget and click 'Add'.
Click 'Edit' to configure options.
Update messages (optional) and click 'Save'.
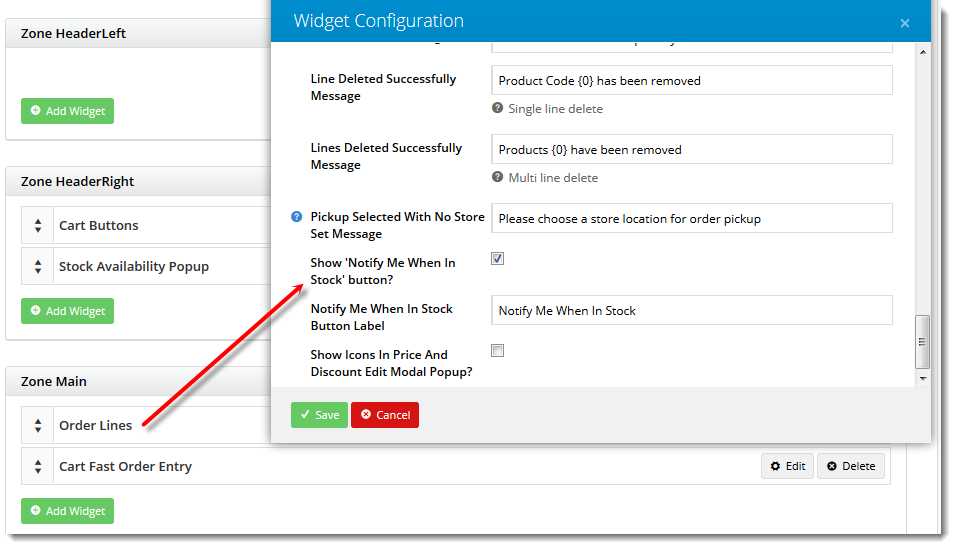
Still in the Cart template, locate the Order Lines widget and click 'Edit'.
Tick the option to 'Show 'Notify Me When In Stock' button'.
Edit the 'Notify Me When In Stock Button Label' (optional) and click 'Save'.


2. Create & Assign the Email Template:
- Navigate to Content --> Content Editor and click 'New'.
- Set the values as follows:
- Template Type - Email Template
- Template Name - StockAvailabilityNotifyEmailTemplate (This must be exact)
- Version - Razor
- Template Description - a description of your choice
- Click the 'Code Editor' tab.
Paste in the email template code contained below (click 'Expand Source' to display).
- Click 'Save & Close'.
- Navigate to Content --> Assign Default Templates.
- Search the page for 'stock' to locate the 'Stock Availability Notify Email Template' field.
- Update this field with the Template Description entered at Step 12 (you may need to click 'Show Others' to search the template list).
- Click 'Update' at the bottom of the page.


3. Create the Scheduled Task and Refresh the Dictionary:
- Navigate to Settings --> Scheduler Maintenance.
- Click 'New' and update the values as follows:
- Begin the task - On a schedule
- Name - Stock Availability
- Active - ticked
- Task - Stock Availability Notify Task
- Schedule - Repeat Period
- Period - X Minutes (this can be set to run however often Stock Availability runs on your site's Integrator).
- Click 'Save'.
- Navigate to Settings --> Dictionary.
- Tick the 'System Control' box and click 'Refresh Cache'.
A confirmation message will display when complete.


Related articles