Overview
This feature needs to be implemented by Commerce Vision.
Each product in the banner has a clickable hotspot over it - usually a small circle. When that area is clicked, the viewer is taken to the product on the same page, where it can be added to cart.
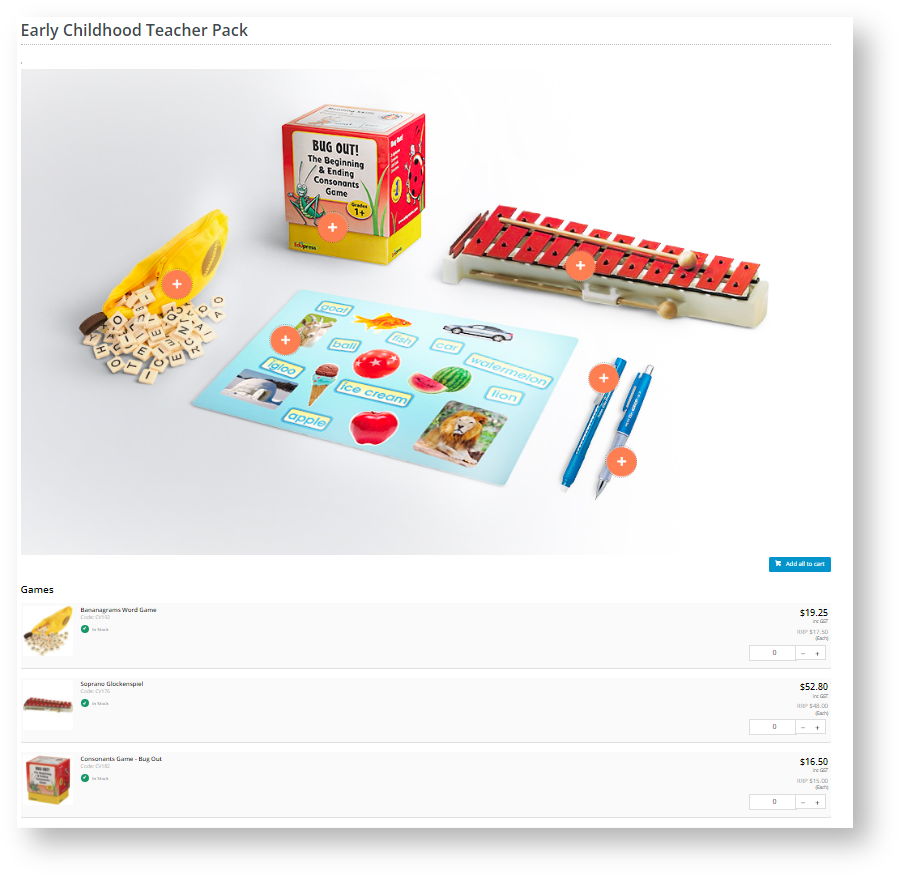
Example:
Here, we have a banner with a spot![]() on each product. A clickable hotspot is mapped onto each spot. A viewer clicks a spot to jump to the product (listed below the banner).
on each product. A clickable hotspot is mapped onto each spot. A viewer clicks a spot to jump to the product (listed below the banner).
On this page:
Step-by-step guide
Before you begin...
Ensure these have been created:
Create a hotspot banner
To create a hotspot banner:
- Go to Products & Categories → Category Maintenance.
- Find the cluster category for this hotspot banner and click Edit. NOTE - If the category has not been flagged as a cluster, you can do that next.

- If this category has not been flagged as a cluster, in Enable Cluster, select Yes.
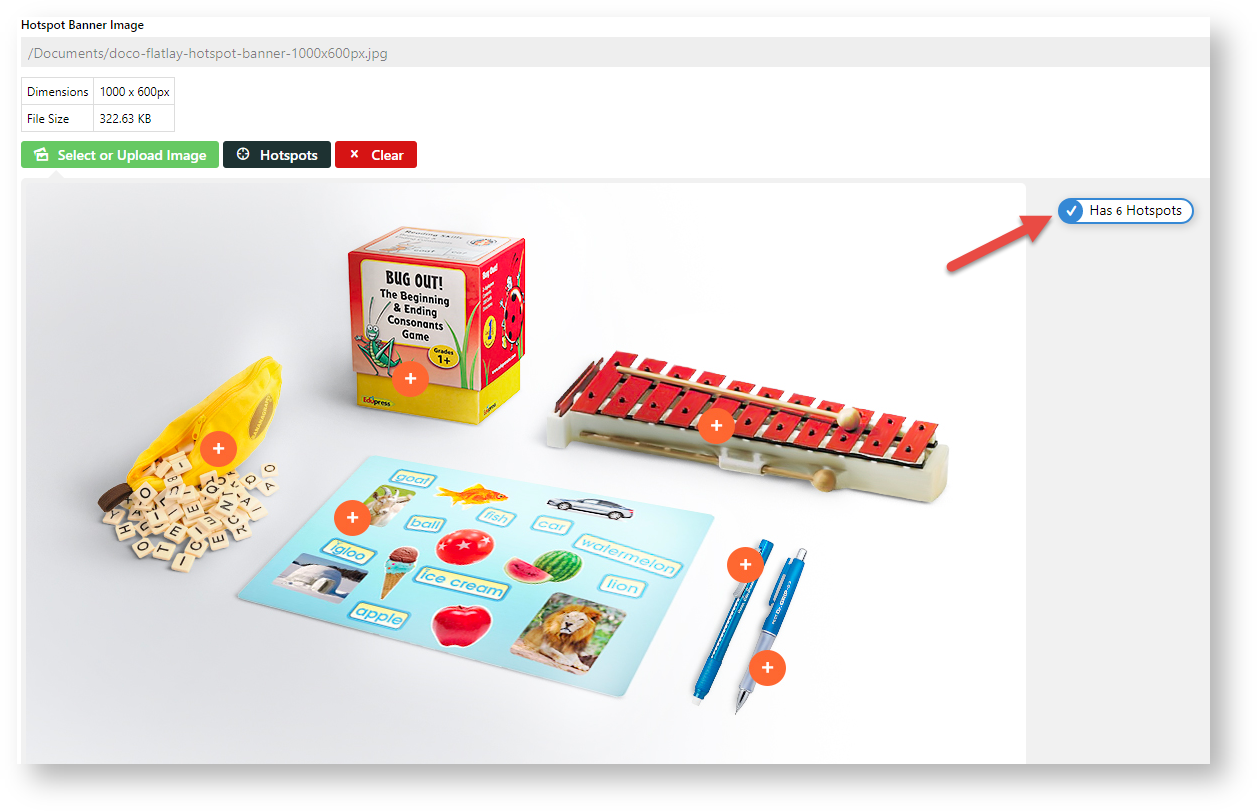
- Scroll down to the Category Hotspot Banner panel.
- Click the Select or Upload Image button.
- Select the banner image. After insertion, the banner pathway, dimensions and file size are displayed.
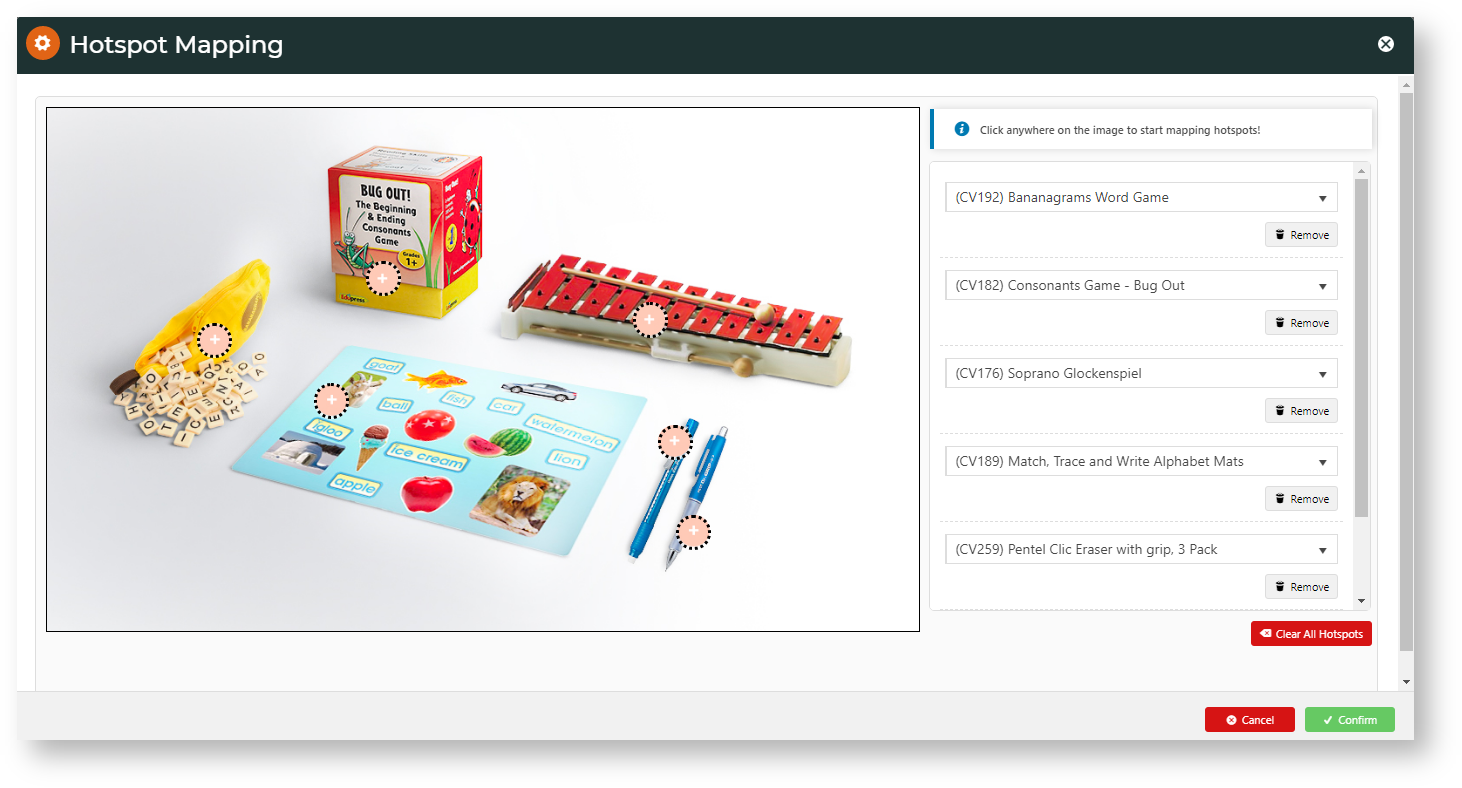
- To add hotspots, click the Hotspots
button.
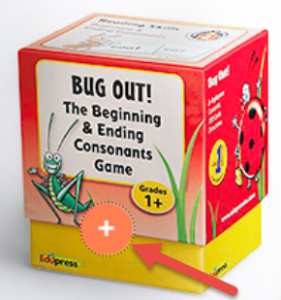
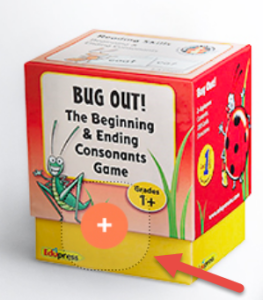
- Position the cross where you want a hotspot and click. The hotspot area is displayed as a revolving circle.
- Use the lookup tool to select the product for the hotspot.
- To add another hotspot, repeat steps 6-7.
- When you have finished adding hotspots, click Confirm.
The number of added hotspots is shown.- To save the hotspot work you have just done, click Save or Save & Exit.
- Refresh the cache.
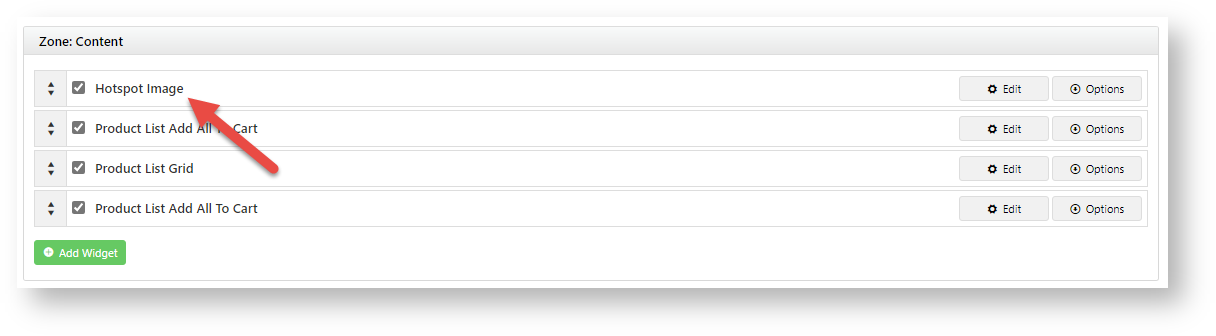
- If this cluster category's page is accessed from the main navigation menu, a link will be displayed there just like other categories. Ensure the Hotspot Image Widget is in the Product List template.


Add/Edit Hotspot Image Widget
The Hotspot Image Widget renders the banner on the page. It should have been added to the Product List template during implementation. If not, you can always add it.
There, you can also change the width of the hotspot area and how far from the top of the screen a product details section is when the hotspot is clicked.
To add/locate the Hotspot Image Widget:
- Go to Content → Pages & Templates.
- Use the Search tool to find the Product List template.
- Click Edit.
- Find the Hotspot Image Widget. If it is not there, use Add Widget to add it in the zone to display.
- To open the widget, click Edit.
To change the width of the clickable area, in Hotspot Width, edit the pixel size. The default size is 40px. Here, it has been changed to 70px.
At the default 40px
(same size as the hotspot circle)
At 70px
(larger than the hotspot circle)
To change the landing position of the selected product from the top of the screen, in Hotspot Scroll Offset From Top, edit the number of pixels from the top. Default: 200px.
At the default 200px from the top of the screen. The hotspot for the highlighted product was selected.
Changed to 500px from the top of the screen.
To save changes, click Save.


Additional Information
Minimum Version Requirements 4.31
Prerequisites --
Self Configurable No
Business Function Products & Categories
BPD Only? Yes
B2B/B2C/Both Both
Third Party Costs n/a
Related help