...

This guide covers the implementation of PayPal Express checkout on BPD websites. Please note that implementation differs slightly for sites using Click & Collect.
...
Step-by-step guide
To enable PayPal Express for your BPD site:
- Login to the CMS.
- Navigate to Settings --> Website Features.
- Click the grey 'minus' icon to enable PayPal Express.
- Verify that the icon changes to a green tick, and an 'Edit' button appears for the feature.
(screenshot here)- Click 'Edit'.
- Enter your xxxx credentials.
(screenshot here)- Enter overrides if required.
(screenshots here)- Update the Product Detail and Cart settings - these determine where the 'Check out with PayPal' button will appear.
- Click 'Save' to save changes and stay on the page, or 'Save and Exit' to save changes and return to the Features index.
Congratulations, PayPal Express is now implemented on your website!
Before beginning, have your PayPal Merchant credentials handy and ensure your CSS is up-to-date for PayPal Express:
- Login to the CMS.
- Navigate to Settings --> Settings.
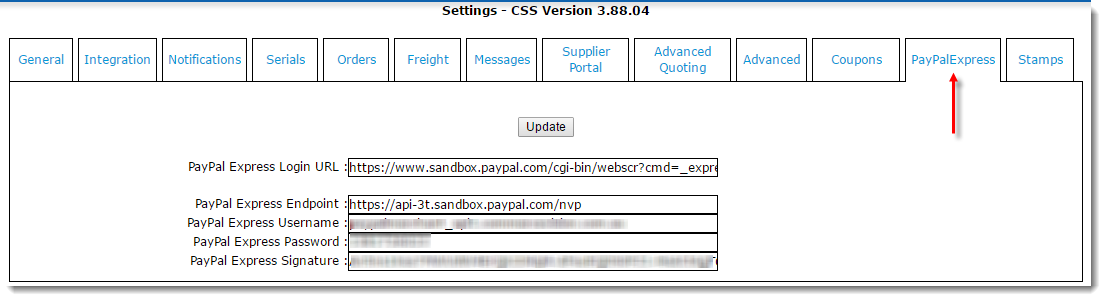
- Select the PayPalExpress tab.
- Populate the fields as follows:
- PayPal Express Login URL = https://www.paypal.com/cgi-bin/webscr?cmd=_express-checkout
- PayPal Express Endpoint = https://api-3t.paypal.com/nvp
- PayPal Express Username = (Your PayPal Merchant username)
- PayPal Express Password = (Your PayPal Merchant password)
- PayPal Express Signature = (Your PayPal Merchant Signature)
- Click 'Update' to save.
| Info |
|---|
For testing on your Stage site, use the sandbox environment credentials. Contact Commerce Vision Support if you require assistance with this |
...
1. Add the PayPal Express button to the Product Detail page.
The PayPal button on the product detail page can behave in one of two ways:
- Option A - add that product to the cart, then redirect to the PayPal site
- Option B - immediately redirect to the PayPal site with the current contents of the cart (e.g. the user must add the product to cart first)
Follow the steps below for your preferred option.
Option A:
...
Option B:
...
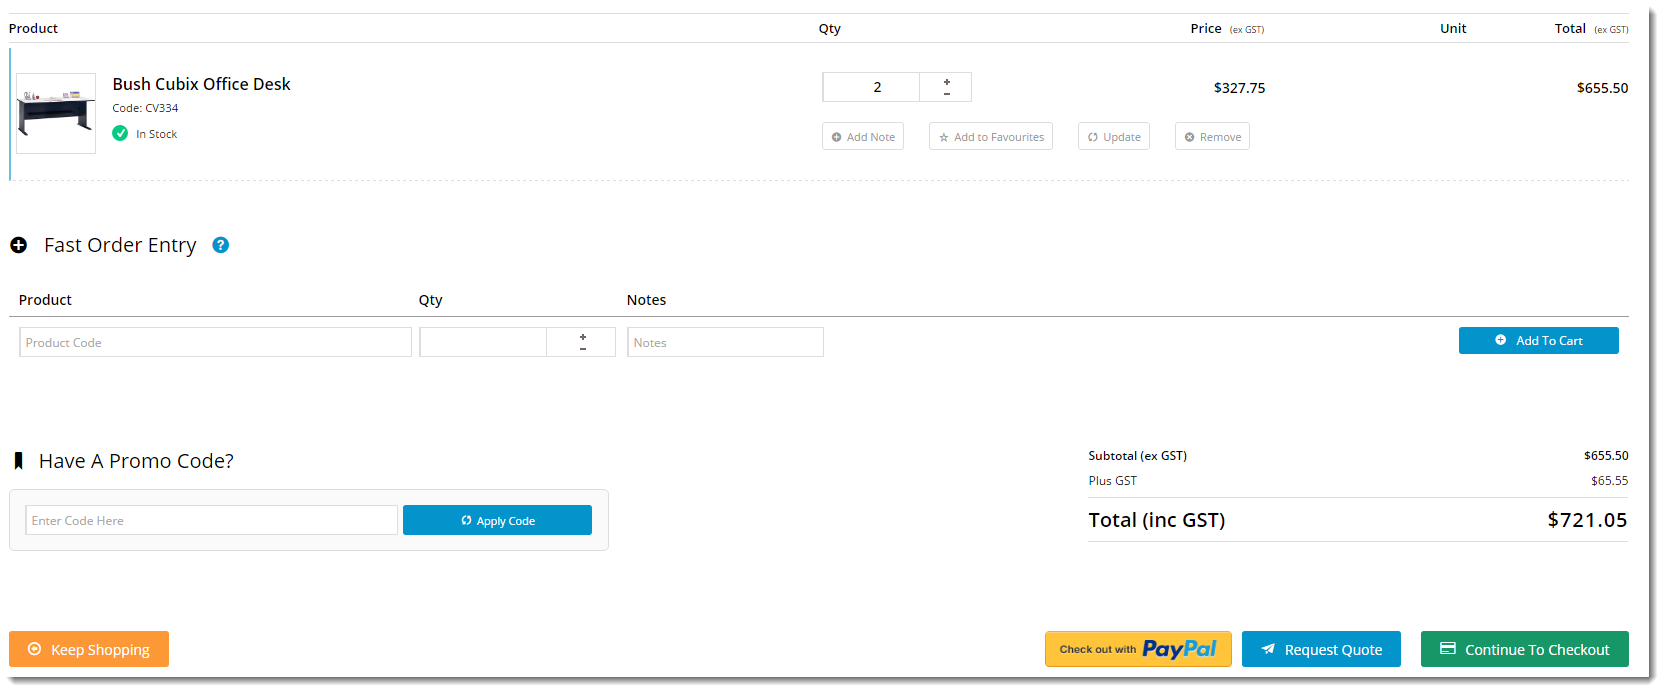
2. Add the PayPal Express button to the Cart page:
- Navigate to Content --> Standard Pages.
- Select the Cart template.
- Add the 'Cart PayPalExpress Button' widget to Zone BottomAfter (or other location consistent with your site's design).
If your site does not use Click & Collect, that's it! PayPal Express is now implemented and ready for use.
If your site is using Click & Collect, continue with implementation below.
Additional Steps (sites using Click & Collect)
For sites using Click & Collect, additional widgets are required. Overlays are used for scenarios where the user has not yet selected a fulfillment method (Delivery vs Pickup). The overlay is similar to a modal window, where the user is prompted to select their delivery option before being redirected to PayPal. A second overlay is shown when the user is actually redirected. Each 'Overlay' widget requires a corresponding widget to provide its content.
| PayPal Express + Click & Collect | Click & Collect Checkout overlay |
|---|---|
 |  |
...
- Overlay
- Cart Delivery Options Store Click And Collect
- Overlay
- PayPal Express Navigation Overlay

...
. |
...
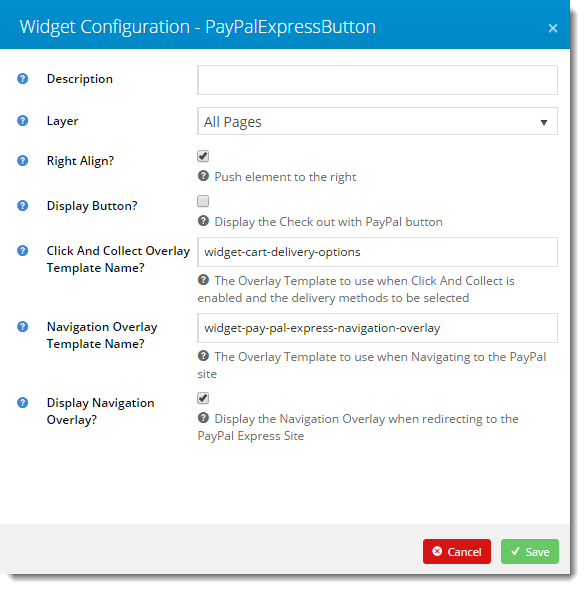
4. Edit settings for the PayPal Express Button widget.
- Click 'Edit' on the PayPalExpressButton widget.
- Enter the same overlay template names you referenced in the Overlay templates earlier:
- Click And Collect Overlay Template Name - widget-cart-delivery-options
- Navigation Overlay Template Name - widget-pay-pal-express-navigation-overlay
- Tick 'Display Navigation Overlay?'.
- Click 'Save'.
...
Related articles
| Content by Label | ||||||||||||||||
|---|---|---|---|---|---|---|---|---|---|---|---|---|---|---|---|---|
|