...
- In the CMS, navigate to Settings → Feature SettingsManagement.
- Edit the Configure the Product Variant feature.
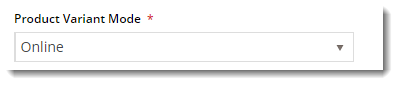
- Switch the Product Variant Mode to 'Online'.
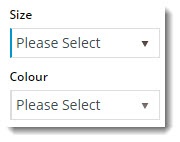
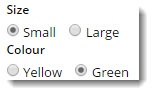
- Select the 'Default Display Type'. This will determine the interface for users when selecting options.
- Dropdown List
- Radio Buttons
- Toggle 'Allow Product Matrix Mode' on/off as required.
- This will allow individual products to be set to matrix display mode, using the Product Attribute Grid Widget.
- Toggle 'Allow Display Type Override' on/off as required.
- This will allow the default display type (that you just set in Step 4) to be overridden on a product-by-product basis.
- Toggle 'Allow Child Products As Note Line' on/off as required.
- The will allow child products to added without a product code. Instead, the selected variants are added as notes against the master product on the order.
- Click 'Save'.
The Product Variant feature has now been configured and is ready to use during product maintenance.
...
- In the CMS, navigate to Settings → Feature SettingsManagement.
- Edit the Configure the Product Variant feature.
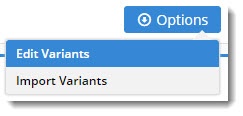
Hover over the 'Options' button and select 'Edit Variants'.
Info Don't see an 'Options' button? Check that the Product Variant Mode is set to 'Online', then hit Save before navigating away.
- Click 'Add' and enter a Variant in the input field. In our example we'll add 'Size' as a variant.
- Click 'Save'. You'll notice the button updates from 'Save' to 'Values'.
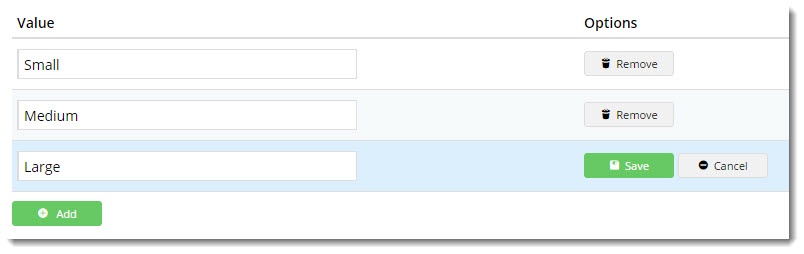
- Click 'Values' and then 'Add' to add a value. Our example values for 'Size' are 'Small', 'Medium', and 'Large'.
- 'Save' and repeat to add another value. Continue until all values have been entered.
- Click 'Back' to exit values maintenance and return to your Variant list.
- You can repeat this process for any other Variants you may require, such as Colour, Capacity, Weight, Length, and so on.


...