...
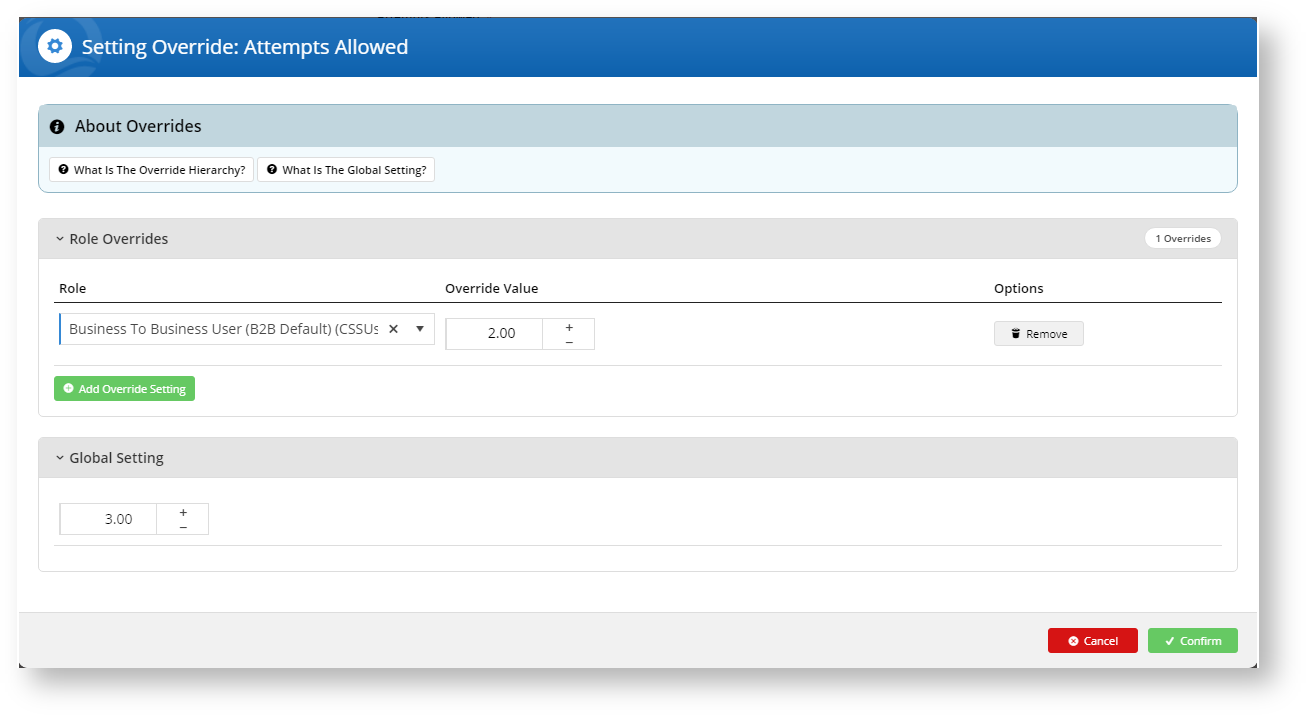
6. For instance, you may want to restrict Business2Business customers two (2) verification attempts and allow everyone else the default value of three (3) attempts.
7. If you want to add different override values for other roles, click the
button and assign a role and an override value.
8. Click Confirm to save your changes.
9. Click Save and Exit to effect your changes.
10. Navigate to Content → Pages & Templates → Checkout
11. Locate the Order Confirmation Page and click Edit
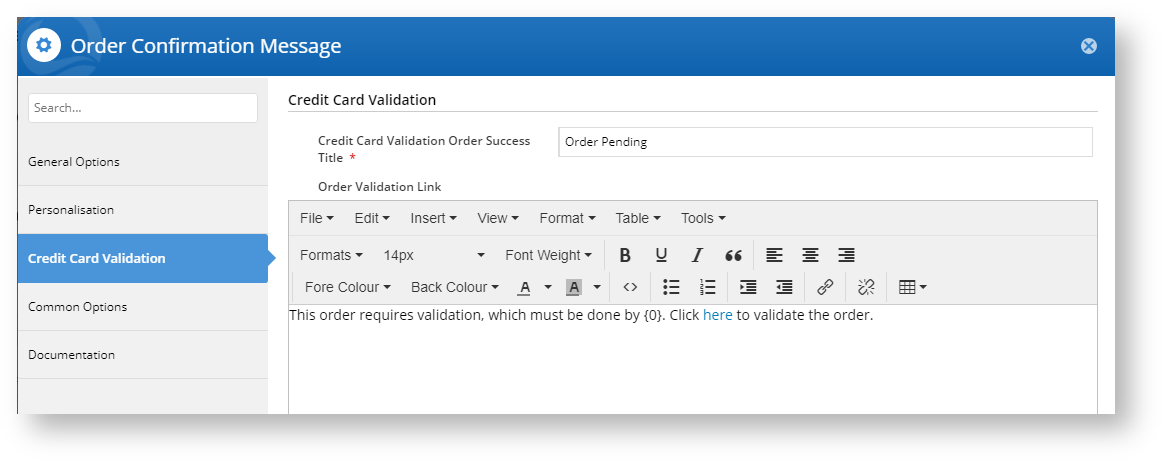
12. Look for the Order Confirmation Message widget and click Edit.
13. You should see an new tab: Credit Card Validation. If you don't, head back to Settings → Feature Management → Payment & Checkout and ensure Credit Card Verification is enabled.
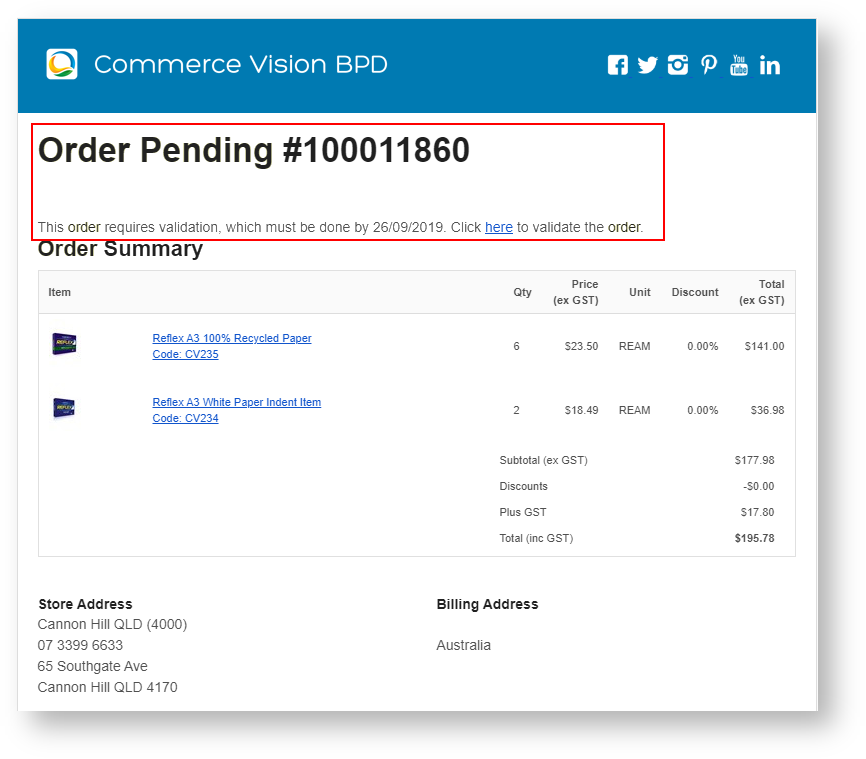
14. Use this widget to configure the heading and message your customer will see when they are required to validate their credit card.
15. Save your changes.
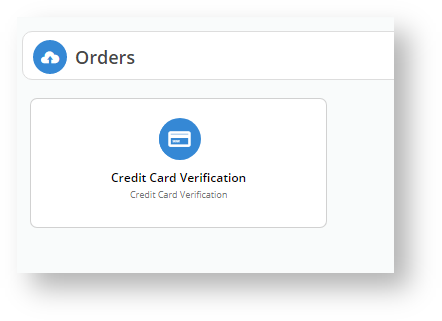
16. You should now see a new option in your CMS: Orders → Credit Card Verification
1117. Any orders waiting for verification will appear in here.
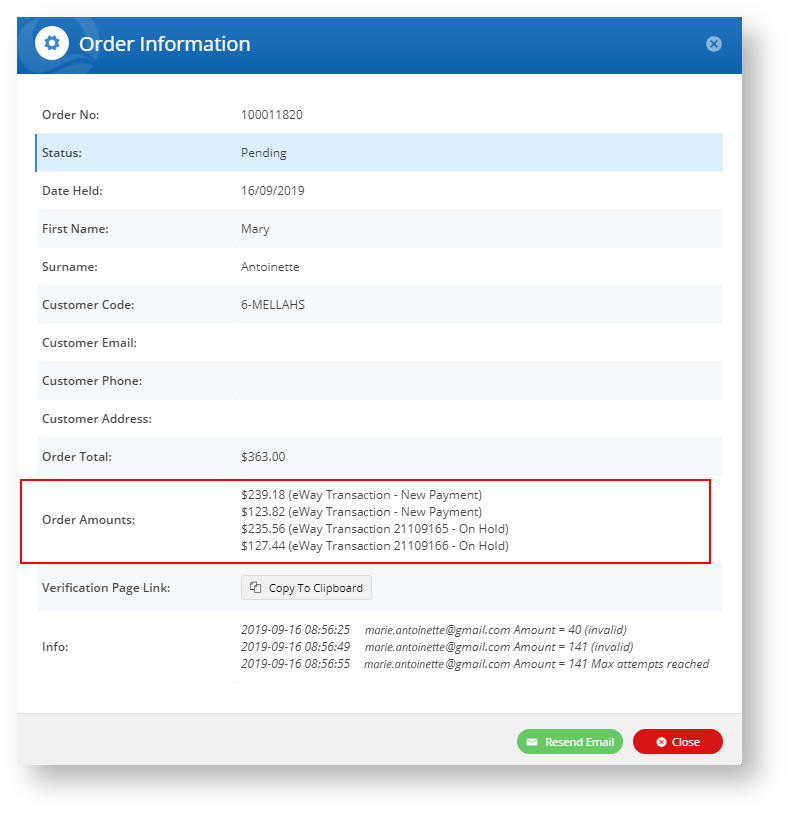
1218. Click on More Info to see the details on the order, including the order split amounts.
1319. If the user fails the first attempt, then eWay
1420. If the customer enquires after their order, you can resend the email to them by clicking Resend Email if they did not receive it.
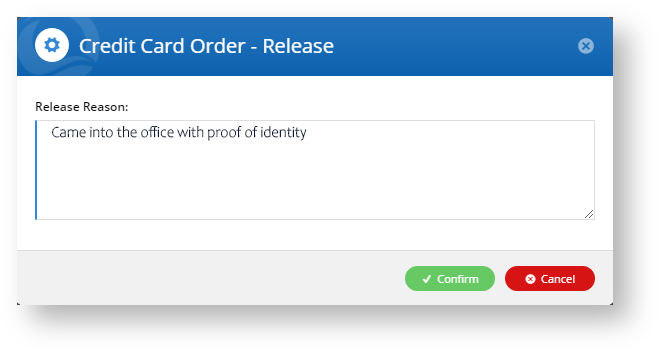
1521. If the customer was unable to validate the credit card via the link, but was able to confirm card ownership, an authorised user can release the order by clicking Release against the pending order.
1622. The system will ask for a release reason. Click Confirm.
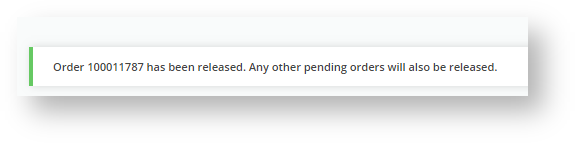
1723. And the order is released. The customer will receive confirmation email notifications.


...