...
...
| icon | false |
|---|---|
| title | Prerequisite |
...
Step-by-step guide
1. Enable and Configure EFT Payments at the System level:
- Login to the CMS.
- Navigate to 'Settings' --> 'Settings'.
- Select the 'Orders' tab.
- Select the 'Credit Cards' tab.
- Tick 'Allow EFT Payment'.
- Tick the 'Hold Bpay & EFT Payment' setting if required.
- Holding EFT payments ensures a Cash Receipt is not created until the payment is released in the 'Release Payments' screen (see How to release EFT and BPAY Payments for instructions).
- Populate EFT Bank Details:
- EFT Bank Name
- EFT Bank BSB
- EFT Bank Account No
- Tick 'Enable EFT for Online Orders' (unless EFT should be accepted for Account Payments only).
- Tick 'Integrate EFT/BPAY Orders Immediately' if required.
- This enables EFT orders to integrate to PRONTO immediately, rather than being held online until the payment is released via 'Release Payments'.
- Click 'Update' to save changes.

2. Add the 'Release Payments' page to the CMS 'Other' menu.
...
| Tip | ||
|---|---|---|
| ||
If the Release Payments page does not appear in your 'Other' menu after following these steps, it may not exist in your Administrator menu (CSSADMIN). You will need to add 'ReleaseCustPayments.aspx' to your Admin menu so the CMS can access it. See Add a New Menu Item for instructions.
|

3. Customise the EFT Payment Email:
- In the CMS, navigate to 'Content' --> 'Emails'.
- Select the 'EFT Payment Detail Email' template.
- Click 'Edit' on the EFT Payment Detail widget.
- Update instruction text and other email content as required. Widget documentation can be found here - EFT Payment Detail Widget.

- Test output using the 'Test Email' button in the template.

Optional Settings
It may be desirable to deny EFT access to certain roles, leaving them with credit card payment options only. Similarly, a particular role can be configured to use different EFT payment details from the system default.
| Warning |
|---|
Keep in mind that Role settings will override the System settings. |
To Update Role Level EFT Settings:
- In the CMS, navigate to 'Users' --> 'Roles'.
- Select the required role via radio button.
- Select the 'Functions' tab.
- Click 'Modify'.
- Update the role-based EFT options as required:
- EFT Role Payment Mode:
- Enable role-based EFT - enables EFT payments for the role, utilising the role-level EFT settings (overriding system settings).
- Deny EFT to users in this Role - excludes users in this role from accessing EFT payment functionality, even if it is enabled at the System level.
- EFT Payment Instructions Template - n/a for BPD sites - leave blank.
- EFT Bank Details Resource Code - the Resource Code for the system resource containing the format string used to render EFT bank details for this role.
- EFT Bank Name
- EFT Bank BSB
- EFT Bank Account No
- Click 'OK' to save.

| Tip |
|---|
Not using BPD and the CMS? Find instructions for our classic sites here - EFT Payments (classic sites). |
...
About PayID & Azupay
PayID is an electronic bank transfer payment option that completes bank-to-bank payments more quickly than standard direct debit, often in real-time. It also avoids the need to give out the payee's bank account details. You might have used the PayID version offered by most banks to pay someone. You log into your bank account and enter the payee's account-linked mobile phone number instead of their bank acount and BSB. Learn more: PayID
Unlike a one-off PayID that links the payee's account by mobile phone number, Azupay PayID ties a bank transfer transaction to a specific order (order/invoice number) placed on your ecommerce store. This means deposits in your bank account do not need to be manually reconciliated against placed orders.
Learn more: Azupay PayID
Azupay & CV ecommerce
Customer experience
In the Payment step during checkout, the shopper selects to pay by PayID.

When your customer selects the Pay with PayID button, the system sends Azupay a payment request.
A popup opens with Azupay-hosted information. This includes a unique single use Azupay PayID just for that specific order.
Info title About the Azupay PayID Azupay PayID is a string of characters that looks like an email address. Its 'username' is randomly generated but the domain name is meaningful to your business. (It can be your business domain name or another domain name given to Azupay.
Here is an example: kew.i55@cvcommerce.com The username 'kew.i55' is randomly generated while 'cvecommerce.com' connects to the business.
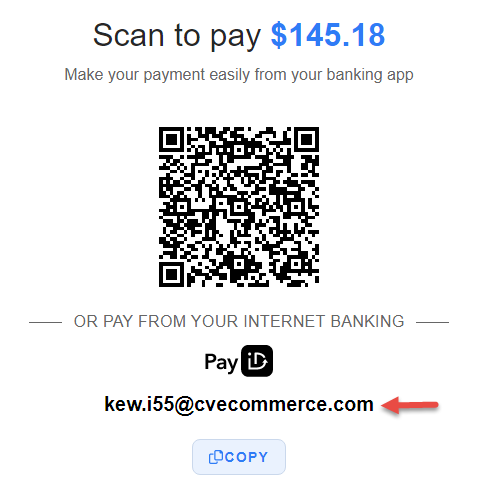
The 'email' PayID is really for the customer's use. It is linked to the Client Transaction ID, a reference for that particular payment request. If the customer pays for the order using this PayID instance, the transaction is recorded against the Client Transaction ID. This information is available in your Azupay account dashboard.
- With their order still in checkout with the Azupay popup open, your customer can make the bank transfer by:
- copying the PayID and opening another tab or browser to log into their bank account on the same device, OR
- scanning the QR code into their mobile device and logging into their bank account there.
- In their bank account, they select to pay by PayID. They enter the unique PayID and the order amount and confirm payment. (NOTE - The amount must be accurate or payment will be rejected.)
- Azupay receives payment confirmation from the payer's bank and sends a payment update to the CV ecommerce platform.
- On receipt of a 'COMPLETED' payment status, the popup automatically closes and the order confirmation page is displayed.
- The customer receives a PayID payment successful email and the order is subject to your usual order progression procedures.
Receiving Azupay Payment Updates
The system is pre-integrated to use the Azupay API to request/receive data or else a webhook to receive payment updates. See: Azupay API Referene
Step-by-step guide
Enable Azupay PayID
- In the CMS, go to Settings → Settings → Feature Management → Payment & Checkout → EFT, BPAY & PayID Payments.
- Click Configure.
- In the EFT, BPAY and PayID Payment Settings page, click on the Azupay tab.
- Toggle ON Enable/Disable PayID payment on your site. TIP - Use the Override system to enable PayID for a restricted set of users.
- In Payment, set to Orders Only.
- In Mode, set to Sandbox if testing or Production for PayID to be live.
- In Azupay Webhook End Point, enter the following: /api/AzupayWebHookHandler
- Depending on what was entered in step 6, go to Production Settings or Sandbox Settings.
Enter the Settings for either Production or Sandbox. NOTE - These details come from Azupay.
- Client ID
- API Secret Key
- API Distributable Key
- URL - NOTE - Sandbox URL is: https://api-uat.azupay.com.au/v1
Warning
title Production API Secret Key The Production API Secret Key must be stored and handled carefully. Azupay recommends that the key be visible only to authorised users in your organisation. The Secret Key can be used to make outbound payments to any Australian bank account.
- (optional) In Payment Description, enter a description that will be included in transaction details of payments customers make. NOTE - Your business name and the order number automatically populates.
In Order PayID Expiry, enter how long (in minutes) a generated PayID is active before it is deactivated.
Info
- A minimum of 1440 minutes (24 hours) should be entered. This ensures the PayID remains valid should there be delays in payment processing. For example, payment response may be delayed due to security checks by the customer's bank. Azupay automatically deregisters a PayID after 48 hours of no response.
- Regardless of the PayID Expiry entered here, the CV ecommerce platform will request PayID deactivation if the user's session ends without a response from Azupay.
- Once deactivated, a PayID cannot be used for the payment.
- Save the settings. At the top of the page, click Save.
- To test the settings entered can successfully communicate with Azupay, click Test Settings.


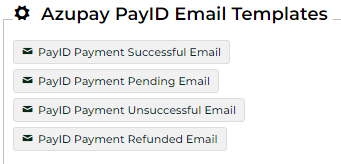
Edit Email Templates and Settings (optional)
PayID payment notifications are automatically sent to customers who paid by PayID and their payment is in a specific status.
- PayID Payment Successful - Payment is confirmed by Azupay as 'completed'; a pending payment has been changed from 'pending' or 'waiting' to 'completed' manually in Release Payments.
- PayID Payment Pending - The customer has clicked the 'Confirm Payment' button in the Azupay modal during checkout BUT Azupay has not verified payment is 'completed'.
- PayID Payment Unsuccessful - A pending PayID payment never received a 'completed' status from Azupay and the PayID has been deregistered; the payment has been changed to unsuccessful manually in Release Payments.
- PayID Payment Refunded - When a PayID payment needs to be refunded and you log into the Azupay portal to process these refund, a notification is passed through from Azupay and your site sends through this email to the end user indicating the refund has been processed
You can access each email template from this page by clicking on each template.
General Email Settings
- Default Payment Email Subject - This adds a phrase that appears in the Subject line of all PayID emails except the refund email. Default: PayID Payment for {0}
{0} - placeholder for Sales Order Number- Default Payment Refunder Email Subject - This adds a phrase that appears in the Subject line of the refund PayID email. Default: PayID Refund for {0}
{0} - placeholder for Sales Order Number- BCC Emails to Internal Recipients (optional)
- Toggle ON Send PayID Emails to Internal Recipients
- Type in an email address, then press Enter. TIP - Multiple email addresses can be added.
- To save these settings, at the top of the page, click Save.
Manually Release or Cancel PayID Orders
For most payments, the automated PayID payment flow will work as expected. Payments are either completed or failed, and pending orders are updated. Order status will change automatically based on payment status. On the rare occasion where a PayID payment needs to be manually done, use the Release Payments feature. A payment can be approved or rejected. Approving a payment will release an order that is on hold. Rejecting a payment will cancel the order. NOTE - Payments for integrated orders cannot be changed using Release Payments.
| Minimum Version Requirements |
| |||||
|---|---|---|---|---|---|---|
| Prerequisites |
| |||||
| Self Configurable |
| |||||
| Business Function |
| |||||
| BPD Only? |
| |||||
| B2B/B2C/Both |
| |||||
| Third Party Costs |
|
Related Resources
| Content by Label | |||
|---|---|---|---|
|
...
|
...
|
| Content by Label | ||||||||||||||||||
|---|---|---|---|---|---|---|---|---|---|---|---|---|---|---|---|---|---|---|
|
...
|