...
| Info | ||
|---|---|---|
| ||
Before continuing, you'll need to be running version 3.9596+ and have the 'Third Party Login' feature enabled in the CMS. Contact us to switch this on for you. |
...
1. Create a Client ID
To enable Google Sign-In, you'll need a Google API Console project & Client ID.
...
- Go to https://console.developers.google.com/project/_/apiui/apis/library and login to your Google account.
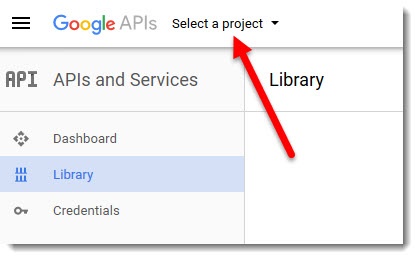
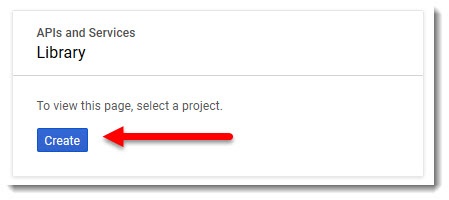
- Select your API project from the dropdown, or create a new one.
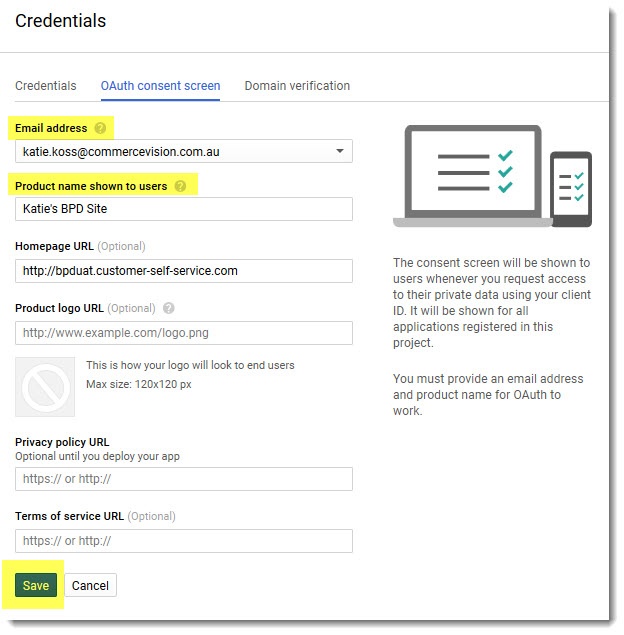
or- Select the Credentials menu, and the OAuth consent screen tab.
- Select the email address, enter your product (website) name, and Save. You can populate optional fields now too, if you choose.
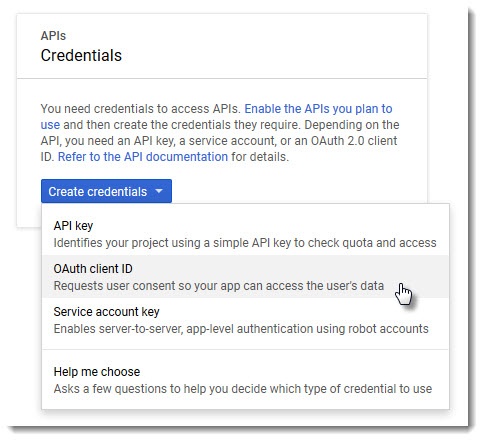
- From the Create credentials dropdown, select OAuth client ID.
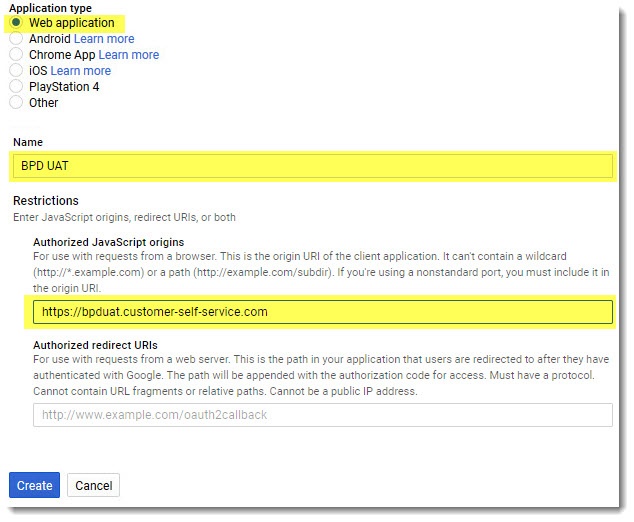
Select Web application and enter your site name and JavaScript origins.
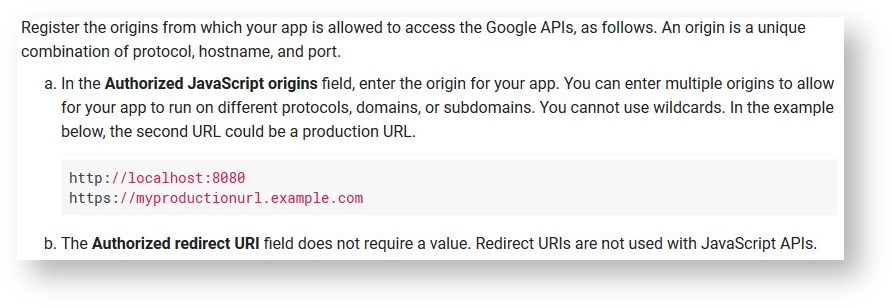
Tip Google advises as follows regarding JavaScript origins:
- Click Create, and you now have a Client ID! Copy this down somewhere.
2. Configure Google Sign-In
Now it's time to set up your website.
- In the CMS, navigate to Settings → Feature Settings.
- Edit the Third Party Login feature.
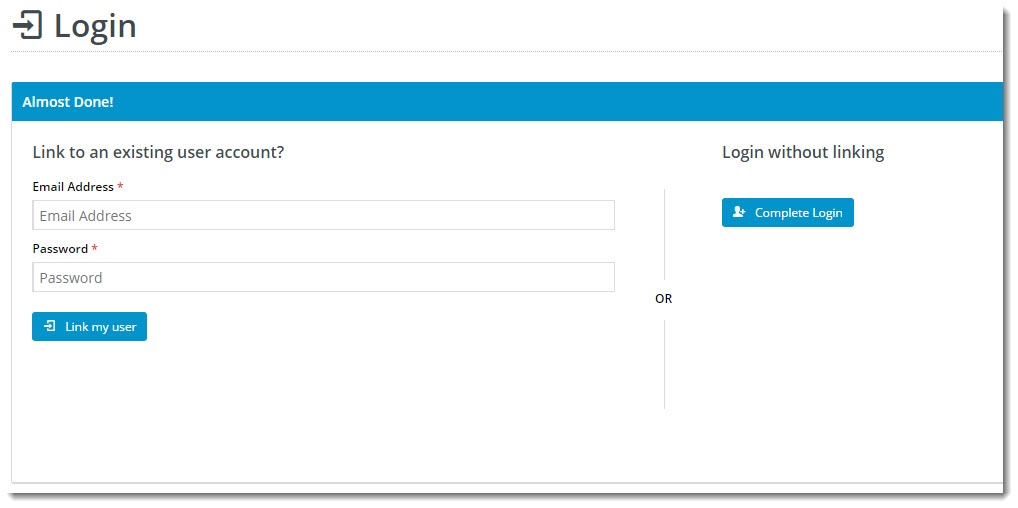
Toggle the Registration Page and Allow Linking options on/off as required. These are explained in the table below.
Option Description Use Registration Page Displays additional registration fields to the user after they've logged in to Google. You can use this to request more info from your customer before they click Login.
This screen is only shown on first login.
Allow Linking To Existing Users Allows a user to login with Google, then link that login to an existing account on your site (if they have one).
This retains all of the user's order history, favourites, etc, with the benefit of a quick Google sign-in.This screen is only shown on first login.
- Enter your Client ID from Google into the Sign-In Client ID field.
- Enter the following in the Token Info Endpoint field: https://www.googleapis.com/oauth2/v3/tokeninfo?id_token={0}
- Enable Google Sign-In with the toggle, then Save!
3. Optional Customisations
Don't like the button text on the Registration page? Wish the login pop-up didn't use the phrase "social network"? No worries - you can customise this via the widgets!
...
Google Sign-In is a great way to get your customers logged in and shopping with you faster. And your users will no doubt appreciate not having to remember yet another password!
| Content by Label | ||||||||||
|---|---|---|---|---|---|---|---|---|---|---|
|
...
