...
| Info | ||||
|---|---|---|---|---|
| ||||
|
Overview
| Excerpt |
|---|
B2B Registration allows a trade (wholesale or business) |
...
...
...
Registration Process
...
Default B2B user registration process:
...

1. When your website is enabled for B2B user registration, there
...
is a link for
...
B2B registration in the Login
...
popup.
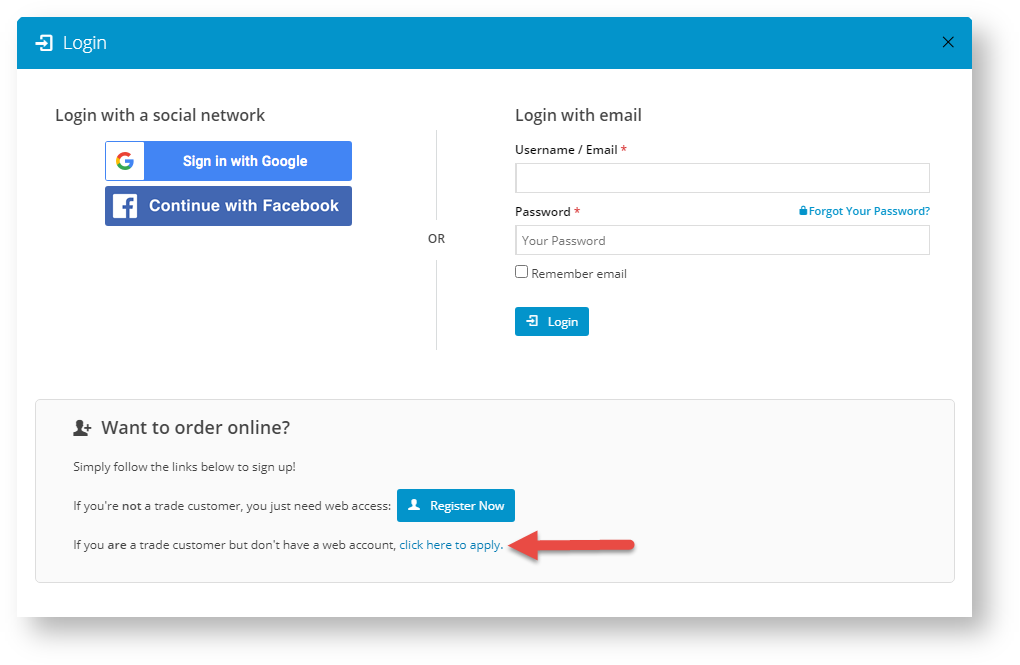
2. The
...
visitor fills in a form and
...
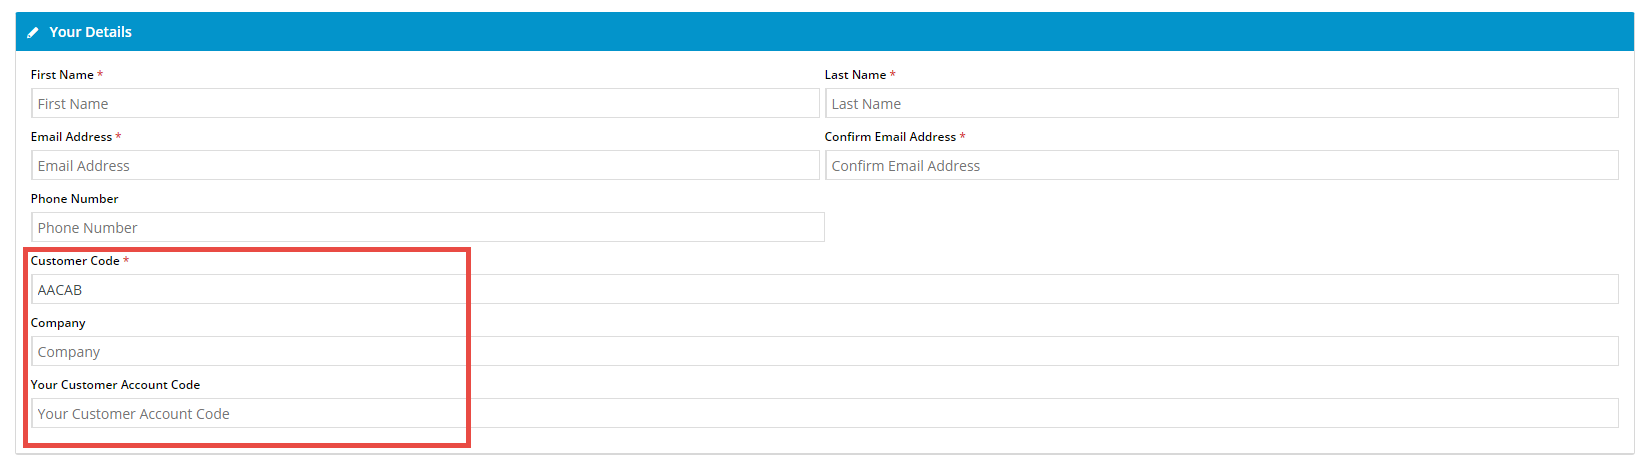
includes:
- Contact Name
- Customer Code (NOTE - If this field is not mandatory, the new user is created against the default customer code. This is usually the public B2C customer. It can be changed manually.)
- Company
- Password
- Customer Account Code
| Info |
|---|
...
Extra fields |
...
can be added to the B2B Registration page |
...
. Contact Commerce Vision Support for assistance. |
3. Depending on settings, the
...
new user is either immediately registered and can log in to their account
...
, or if User Approval is enabled, they must wait until
...
their registration has been reviewed and approved by
...
an Account Administrator.
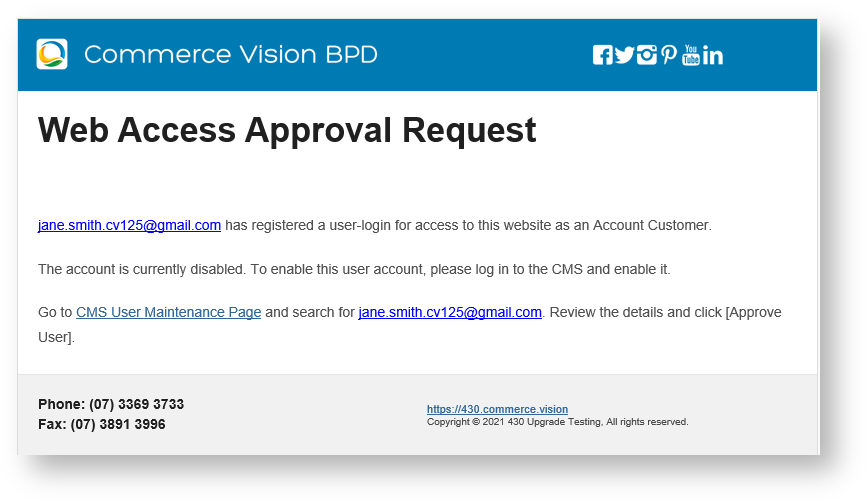
4. If User Approval (Auto Part Registration) is enabled, the
...
Account Administrator is alerted that a Customer has registered for trade access. The user
...
is notified that their registration is subject to approval.
5. If the user is approved, they
...
receive an email
...
stating their registration is approved and they can
...
now login.
Add user approval step
Enable user approval
If Auto Part Registration is enabled, a
...
'review and approve' step for Admin is added so a new customer user application can be checked. The user exists but they cannot log onto your site yet. In the user's Edit User page, the Disable User Account is toggled ON.
![]()
To add this user approval step to the registration process:
- In the CMS,
...
- go to Settings → Settings → Feature Management → User.
- Toggle ON Auto Part Registration.
If this Customer uses a process of multiple approvers, toggle ON Tiered Approval in B2B Registration.
Info This option allows different approvers (i.e. tiers) instead of just a single approver. This means approval can be directed to the more appropriate person, e.g a rep manager for a particular customer, or a state / territory manager for a particular location. With this setting on, if the registering user does not have a provide a CustomerCode, or if they do and that Customer record does not have a Rep User associated it with it, then it will fall back to the standard Auto Part Registration approver.

Approve a user
If user approval is enabled, the
...
internal notification recipient receives an email that a B2B user has registered.
NOTE -
...
Email content is rendered by the B2B Registration Approval Required Widget.
- To access it: go to Content → Content → Emails → B2B Registration Approval Required Email →
...
- B2B Registration Approval Required Email Template
- (CMS Administrators only) Settings → Settings → Feature Management → Users → Auto Part Registration → Auto Part Registration Feature Settings → B2B Registration Approval Required Email Template button.
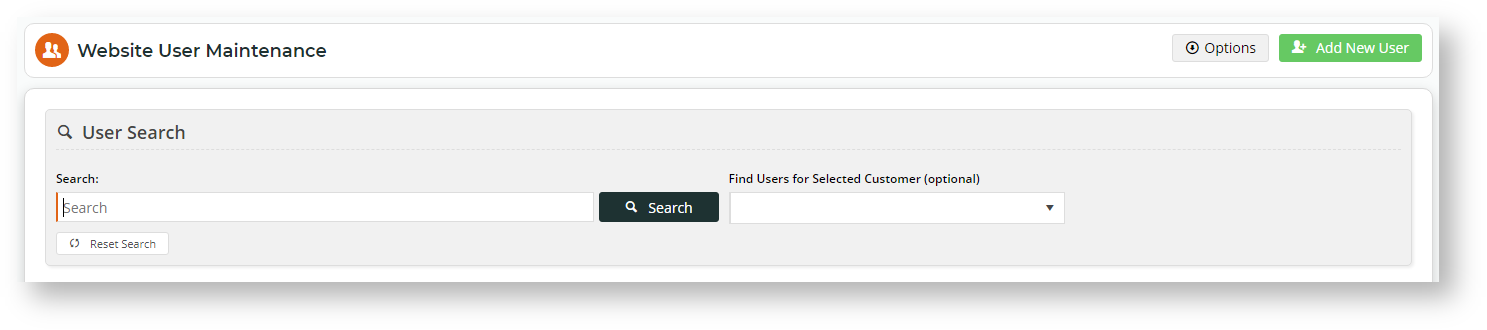
Administrators can approve a new B2B user registration.
To approve a user:
- In the CMS,
...
- go to Users → Website Users.
- Use the User Search tool
...
- . You can search by email address (from the email notification).
- Approve user - select (a) or (b):
- To approve the user without reviewing details, click the Approve User button.
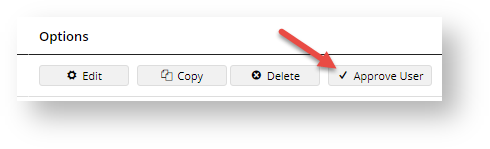
...
- ser. Change any details if required. TIP - You may need to change the User's Role, Customer Account, and budget thresholds (Order, Requisition and Approval
...
- limits).
To save, click Save &
...
Approve. The user
...
's account is enabled and they will receive the welcome email.
Info In the user's Edit User page, the Disable User Account toggle is automatically turned off.
| Anchor | ||||
|---|---|---|---|---|
|
For 4.37+ only.
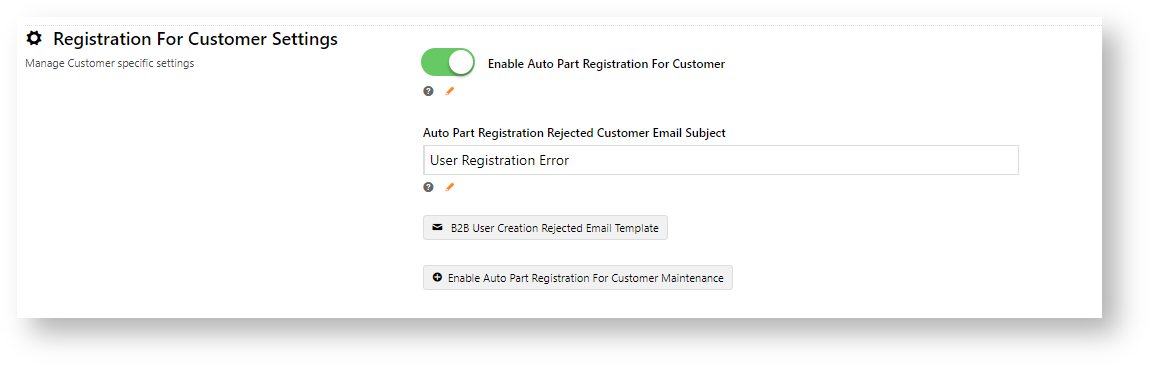
This option prevents registrations in some customer accounts. The email address entered during registration will receive notification of the unsuccessful registration. This email can be cc'ed to your nominated internal email address as well.
To disable a Customer Code from user registrations:
- In Auto Part Registraton settings, ensure Enable Auto Approve Registration is toggled ON.
- Scroll down to Registration for Customer Settings.
- Toggle ON Enable Auto Part Registration for Customer.
- To change the rejected email subject, edit Auto Part Registration Rejected Customer Email Subject. Default: User Registration Error
- (Optional) To edit the rejected email template, click B2B User Creation Rejected Email Template. See: B2B Rejected Registration Email
TIP - This template can also be accessed via Content → Emails → Users → B2B Rejected Registration Email- Click Save or Save & Exit.
Create a Users to Approve Report
Don't want to scroll through your emails or website users to find users to approve? Create a simple report that displays all users to approve. Learn more: Create Users to Approve Report
Disable Registration for a Customer
By default, all customers are enabled for auto part registration if this feature is on. You can disable or re-enable a customer.
- Click the Enable Auto Part Registration for Customer Maintenance button.
- Use the Search tool to find the customer.
\
- To prevent user registration to this customer account, click Disable.
- The Success message confirms change in status. The Disable button is now greyed.


Edit Unsuccessful Registration Email Template
To edit the email message sent when a customer account is disabled:
- Click the B2B Registration Rejected Customer Email button.
- Scroll down to B2B Registration Rejected Customer Email Content Widget and click Edit. See: B2B Registration Rejected Customer Email Content Widget

Additional Information
Minimum Version Requirements |
| |||||
|---|---|---|---|---|---|---|
| Prerequisites |
| |||||
| Self Configurable |
| |||||
| Business Function |
| |||||
| BPD Only? |
| |||||
| B2B/B2C/Both |
| |||||
| Third Party Costs |
|
Related Resources
| Content by Label | ||||||||||||||||||
|---|---|---|---|---|---|---|---|---|---|---|---|---|---|---|---|---|---|---|
|
| Content by Label | ||||||||||
|---|---|---|---|---|---|---|---|---|---|---|
|
| Content by Label | ||||||||
|---|---|---|---|---|---|---|---|---|
|