...
While B2C users generally self-register on the website, B2B users are often set up by the eCommerce Team (or they may partially self-register and await approval).

Step-by-step guides
| Table of Contents | ||||||
|---|---|---|---|---|---|---|
|
Creating a new user
- In the CMS, navigate to Users → Website Users.
- Click 'Add New User'.
Enter User Details as follows:
Field Description Email Address (or Login Id) The user's Login ID, usually their email address. Send New User Created Email Tick this option to send a welcome email to the new user, which also contains a link for them to reset their password.
Note - this option will ONLY appear if the password entry mode is set to 'Send Password Reset Email' in Settings → Feature Settings → User Accounts.
First Name The user's first name. Surname The user's last name. Contact Phone The user's contact phone number. Initial Role The user's initial role upon login. Select from the options in the dropdown list. Assign Multiple Roles Click to add alternate roles for the user. A 'Roles' section will expand, allowing you to click 'Assign New Role' and select the alternate via dropdown. Repeat as needed. Default Customer Account The Customer Code the user will default to. Disable User Account Tick this option to deactivate (but not delete) the user. If a user account is disabled, the user will be unable to login to the site. Account Administrator Tick this option to grant the user access to User Maintenance (if present on the menu). This will allow the user to create other users, assigning roles and customer codes that they have access to themselves. Change Password Enter the user's password.
Note - the two Change Password fields will ONLY appear if the password entry mode is set to 'Enter Password' in Settings → Feature Management → User → User Accounts.
Confirm Change Password Re-enter the user's password to confirm.
Click 'Save & Exit'.


Copying an existing user
You can copy an existing user, to create a new user with the same details in 'default account code', 'initial role', 'customer codes' and 'associated approval limits'. (These can be changed if needed.) All you have to do is add the new user's email address and contact information.
- In the CMS, navigate to Users → Website Users.
- Use Search for the user you want to copy.
- Click the Copy button for the user.
- In the 'Add User' page, add and edit details of the new user.
- To save the changes, click the Save & Exit button.

Adding multiple accounts to a B2B user
In the CMS, navigate to Users → Website Users.
Search for and edit the required user.
Click 'Add New Account'.
Enter Customer Details as follows:
Field Description Customer Code The additional account the user will have access to. Order Limit The maximum order value this user can submit on this account (provided their requisition limit is of equal or higher value). Requisition Limit The maximum order value this user can request for approval on this account. Approval Limit The maximum order value this user can approve on this account. Delete? Check this box to remove the account from this user.

Adding multiple accounts to a User
- In the CMS, navigate to Users → Website Users.
- Search for and edit the required user.
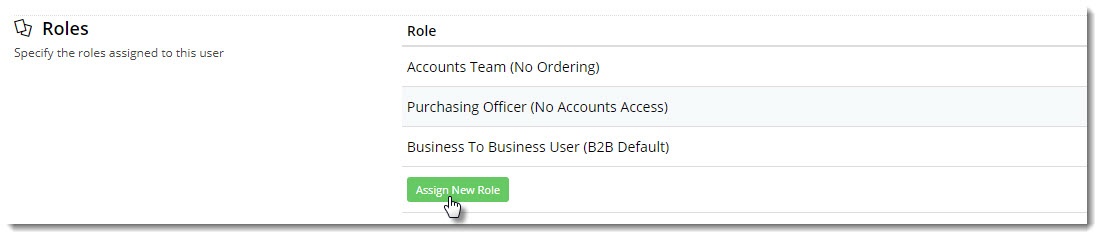
- If the user currently has just one role, you'll see an 'Assign Multiple Roles' button - click that.
- If they have multiple roles already, go to the Roles section and click 'Assign New Role'.
- Select the required role from the dropdown and click Save & Exit.

Approving a B2B User
In part-registration scenarios, a B2B user applies for a login via the website's 'Apply for Access' form. The eCommerce Team then reviews and approves the application.
This process of B2B partial registration is also sometimes referred to as 'Auto Part Registration'.
- In the CMS, navigate to Users → Website Users.
- Search for the user you wish to approve, either by name, email address, or customer code.
- You'll notice an 'Approve User' button next to the Edit and Delete options for the user.
- To approve the user without reviewing details, click 'Approve User'. This will approve the user and trigger the welcome email to be sent.
- To review the user's details before approving, click 'Edit'.
- The user details page will load - check and correct user information as required.

- Assign additional roles and customer accounts if required.
- When you are ready to approve the user, click 'Save & Approve'. This will approve the user and trigger the welcome email to be sent.

Resetting a user's password
The process of resetting a user's password depends on the mode in use on your site. You can check by navigating to Settings → Feature Management → User, and Configure the User Accounts feature.
...
- Navigate to Users → Website Users.
- Search for the required user and click 'Edit'.
- Enter a new password in the 'Change Password' field.
- Re-enter the password in the 'Confirm Change Password' field.

- Click 'Save' or 'Save & Exit'.
| Excerpt |
|---|
Deleting a user's accountAn administrator can remove a user's account in the CMS. The system will check if the user has active orders.
|


Related help
| Content by Label | ||||||||||
|---|---|---|---|---|---|---|---|---|---|---|
|