Step-by-step guide
Create a new user
- In the CMS, navigate to Users → Website Users.
- Click the Add New User button (top right corner).
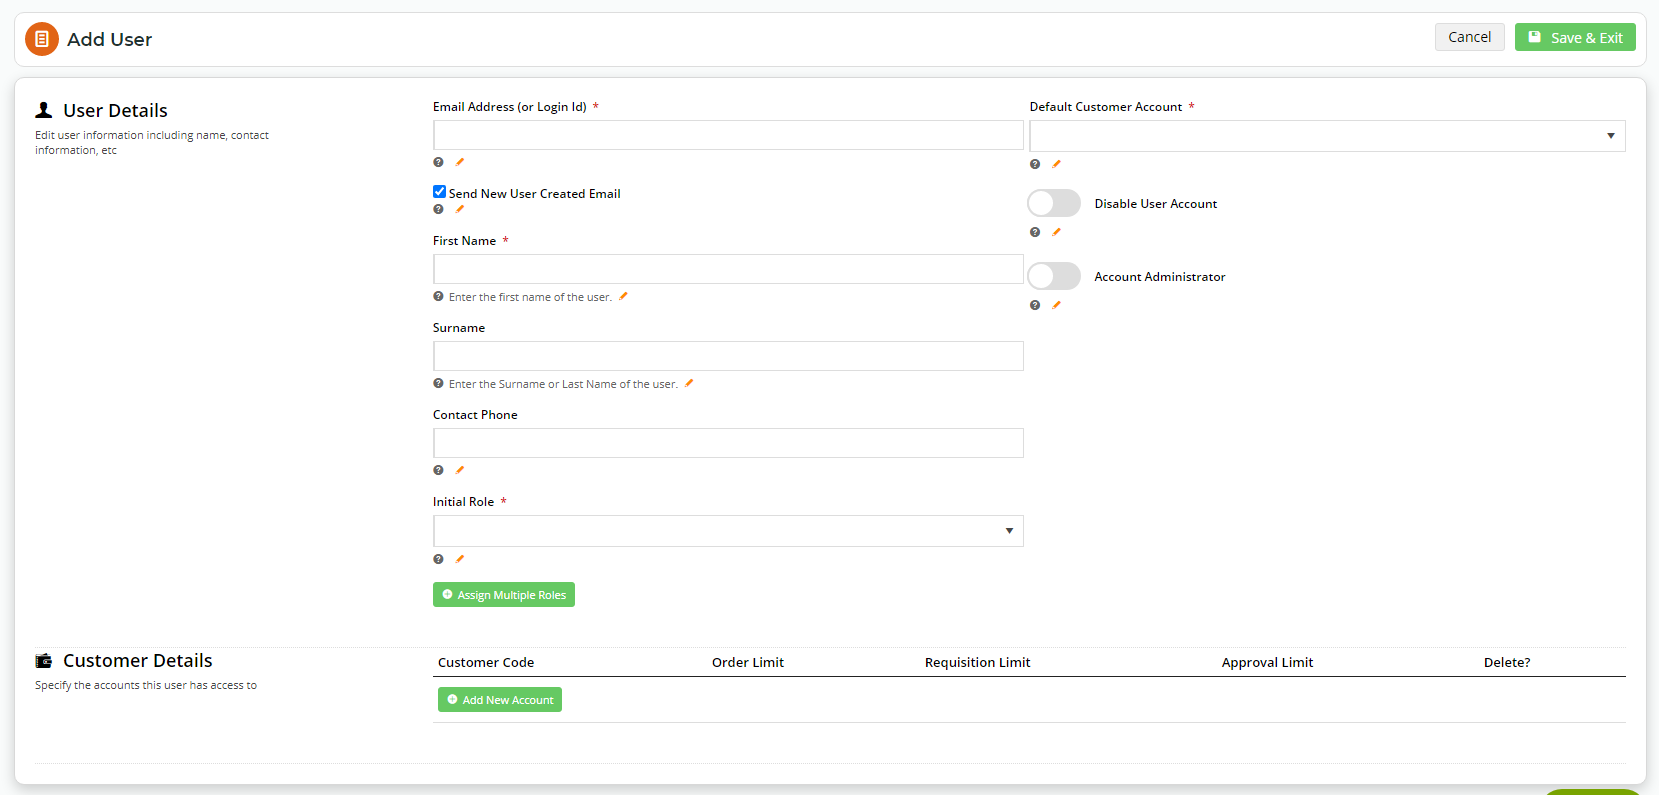
In the User Details section, enter the new user's details:
Field Description Email Address (or Login Id) The user's Login ID, usually their email address. Notify Email Address (Displays only if Login ID is not an email address)
If a login ID is not an email address, a Notify Email Address field automatically displays and an email address must be entered.
Send New User Created Email
Default: ticked. When ticked, a welcome email is sent to the new user. The email contains a link to reset their password.
NOTE - This option ONLY appears if the password entry mode is selected in 'Send Password Reset Email' (Settings → Feature Settings → User Accounts).
First Name The user's first name. Surname The user's last name. Contact Phone The user's contact phone number. Initial Role The user's initial Role upon login. Select from the dropdown list. (For details about what a Role does, see the Roles help page.) Assign Multiple Roles If this user has more than one Role, click to add an another role. Then click 'Assign New Role' and select from the dropdown list. Repeat as needed.
TIP - When the user is logged into their account, they can easily switch to each Role.
Default Customer Account Select the Customer Code from the dropdown list.
Every registered user must have a default Customer account. A 'Customer' is typically a business but there should at least be one Customer Code to be used for an individual B2C user.
Notification Rep Codes (4.37.16+) The rep code of the rep to email when new quotes are requested from buyers (only visible when quotes is enabled)
Disable User Account Default: OFF. Toggle ON to deactivate (but not delete) the user. If a user account is disabled, the user will not be able to log into the site. Account Administrator Default: OFF. Toggle ON to grant the user access to User Maintenance (if present on the menu). This will allow the user to create other users, and assign roles and customer codes in accounts they have access to themselves.
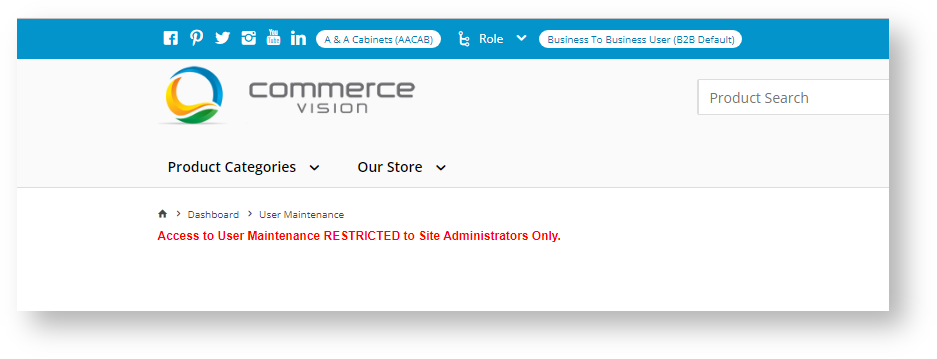
If this is disabled for a user, they will not be able to access User Maintenance.
Change Password and Confirm Change Password Enter the user's password and re-enter to confirm it is correct.
Don't see the Change Password fields?
The two Change Password fields will ONLY appear if the password entry mode is set to 'Enter Password' in Settings → Feature Management → User → User Accounts.
Customer Details These fields display only after a new user has been created. Order Limit The maximum order value the user can submit on this account (provided their requisition limit is of equal or higher value). Requisition Limit The maximum order value the user can request for approval on this account. Approval Limit The maximum order value this user can approve on this account. This applies if the Customer uses order approvals. User Cost Centres These fields apply to Cost Centres for the B2B Customer. Cost centres are used to control and follow a company budget. Not all Customers use Cost Centres.
To save this user, click Save & Exit.
Copy an existing user
To create a new user with the same details in 'default account code', 'initial role', 'customer codes' and 'associated approval limits' as an existing user, that user can be copied. (These details can be edited if needed.)
- In the CMS, navigate to Users → Website Users.
- Use Search to find the user you want to copy.
- Click the Copy button for the user.
- In the 'Add User' page, add and edit details of the new user.
- To save the changes, click the Save & Exit button.
Add additional Customer account to a B2B user
Apart from the user's default Customer account, the User can be linked to additional Customer accounts.
- In the CMS, navigate to Users → Website Users.
Use Search to find the user and then click Edit.
Click Add New Account.
Enter Customer Details as follows:
Field
Description Customer Code The additional Customer account the user will have access to. Order Limit The maximum order value this user can submit on this account (provided their requisition limit is of equal or higher value). Requisition Limit The maximum order value this user can request for approval on this account. Approval Limit The maximum order value this user can approve on this account. Budget (Displays only if User Budgets is active.) See User Budget help. To save your changes, click Save & Exit.
Add additional Roles for a User
- In the CMS, navigate to Users → Website Users.
- Use Search to find the required user and then click Edit.
- Click the Assign Multiple Roles button.
- If they have multiple roles already, go to the Roles section and click Assign New Role.
- Select the required role from the dropdown list.
- To save your changes, click Save & Exit.
Approve a B2B User
If Auto Part Registration is enabled, a B2B user who registers for a login on your website will need to be reviewed and approved by the eCommerce Team. Until then, the user is partially registered. This means the user exists in the system but cannot login to your website.
- In the CMS, navigate to Users → Website Users.
- User Search to find the user you wish to approve, either by name, email address, or customer code.
- To approve the user without reviewing details, click the Approve User button. This will approve the user and trigger the welcome email to be sent.
- To review the user's details before approving, click Edit.
- The user's details page will load. Check and correct user information as required. You can edit any of these details and assign additional Roles and Customer accounts if required.
- To approve the user, click the Save & Approve button at the top of the screen. This will approve the user and trigger the welcome email to be sent.
Reset a User's Password
The process of resetting a user's password depends on the mode active on your site. You can check the mode by navigating to the User Accounts feature: Settings → Feature Management → User, then click Configure.
(i) 'Send Password Reset Email' mode:
- Navigate to Users → Website Users.
- Use Search to find the required user and then click Edit.
- Hover on the Options button and select Reset Password.
- In the popup dialog box, click OK to confirm the request.
- If the request is successful, a popup confirmation message will display to inform you that a password reset email has been sent.
(ii) 'Enter Password' mode:
- Navigate to Users → Website Users.
- Use Search to find the required user and then click Edit.
- In the Change Password and Confirm Change Password fields, enter and re-enter the new password.
- To save the changes, click Save & Exit.
Delete a User's Account
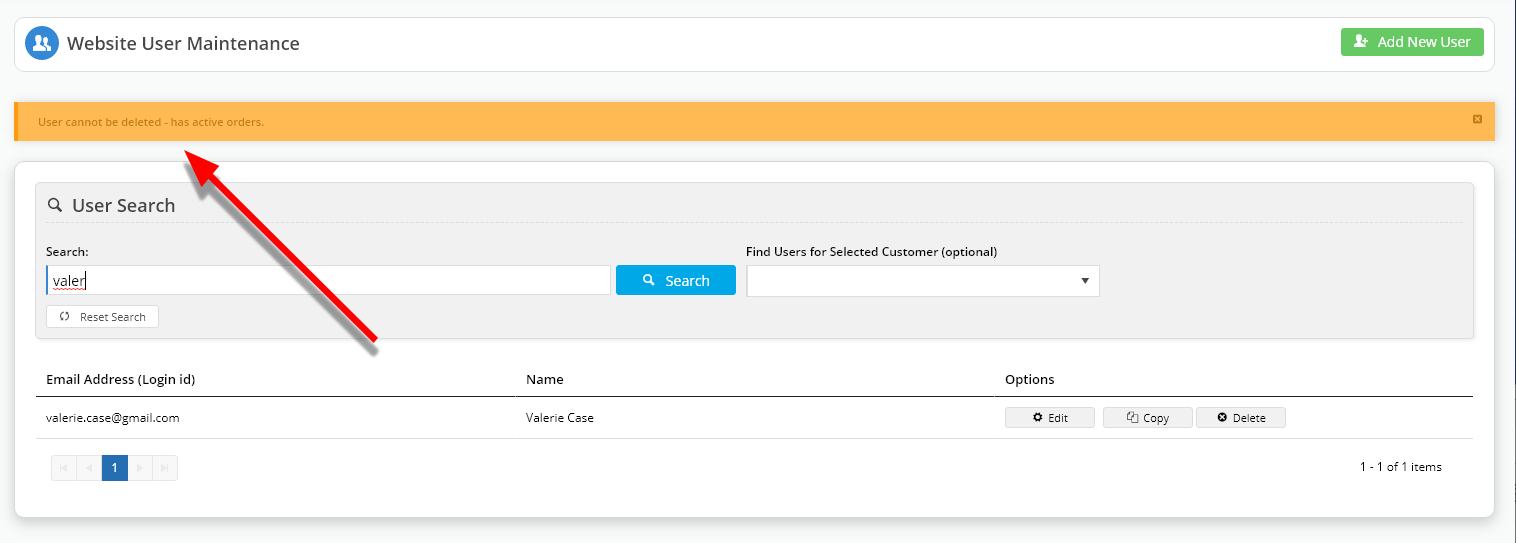
An Administrator can remove a user's account. If the user has active orders, the user cannot be deleted.
1. Go to E-Commece → Users → Website Users.
2. Use Search to find the user and click Delete.
3. You will asked to confirm your deletion request. Click OK.
4If the user has active orders, then they cannot be deleted until these orders have been finalised.
Related Resources


