Overview
| Excerpt |
|---|
|
The Report Generator feature permits Role-defined groups of users to re-run (generate) certain reports themselves. |
...
| Info |
|---|
|
- Report design is an Admin level function. During this process, Admin can assign a Report Group for the report, make it active and available for Subscription. (See Create a Report for more help.)
- In Report Settings (on the Report Design page), the following fields are relevant:
- Report Group: name of the report group this report belongs to for the purpose of Report Generator
- Is Active: 'Yes' allows the report to be flagged as in current use. Note - 'inactive' reports in a Report Group set for Report Generator can still be found and generated by the User. If an inactive report should not be accessible, re-assign it to a Report Group not available for Report Generator.
- Available to Subscribe: (optional) 'Yes' allows the report to use the Subscription feature
- Report Description: meaningful description of the report (e.g., use, purpose and content) displayed in the Report Generator screen to provide Users with helpful information about the report
- PDF Output Template: (optional) name of prepared PDF template for this generated report. If used, the template must have been created and available for use; if left blank, the default CSV file is used.
- Email Subject: Subject heading for email sent with attached report (if Subscription is enabled)
|
Step-by-step guide for Admin
During the Report Design stage, a report is assigned a Report Group. When configuring Report Generator, you decide the following:
- which group(s) of Users (all or by Role) have access to Report Generator.
- which group(s) of Users (all or by Role) have access to Report Subscription. (Note - This additional functionality can be disabled but if used, permissions for Roles should be coordinated with those in Report Generator.)
- which Report Groups are accessible by which group(s) of Users (all or by Role). (Note - Permissions for Roles should be coordinated with those in Report Generator.)
Report Generator can be enabled globally (for all Users) or restricted to specific Roles using the Override feature. If a User has access to Report Generator, when logged into the website, the Report Generator function appears in the Dashboard menu.
...
| Warning |
|---|
|
Since reports may contain confidential data, it is strongly suggested that Report Generator configurations are tested in Stage before sending it to 'Live'. |
The Report Generator widget allows you to customise labels and text displayed in headings and fields in the Report Generator screen on your website. To access the widget,
- In the CMS, go to Content → Pages & Templates and find the Report Generator Template.
- Click Edit for the Report Generator widget.

- Edit the fields as you required. See Report Generator Widget help for more details.
Step-by-step guide for Users
Generate a report
If you have access to the Report Generator, it will appear as a menu item in your Dashboard.
...
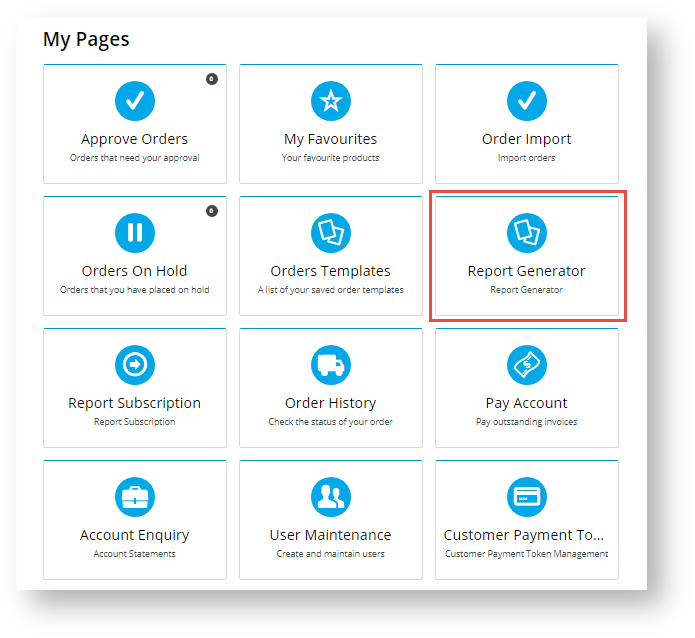
- Log in to your website and click Dashboard.
- On your Dashboard, scroll down to the 'My Pages' section and click Report Generator.
- By default, the Reports list displays all active reports you have access to. (Active reports are those marked as current by Admin.) Find the report you wish to generate. You can search by name or scroll down the list. If you want to find an inactive report, tick the 'Show Inactive Reports' checkbox and click the Search button.
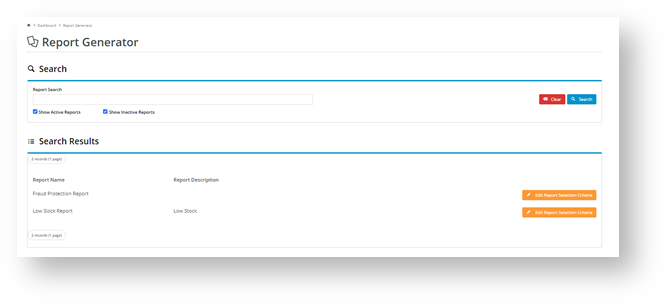
- For the report you want, click the Edit Selection Report Criteria button. The Report Selection Criteria section is displayed.

- In Report Name, edit the name so it is more meaningful for your purposes and easy to identify. Otherwise, the original name will default.
- The Search section contains the report's fields. Note - The availability of 'Search', 'Group By' and 'Sort By' fields for customisation will be different, depending on how each report has been designed. If options are available, select order preferences for how you want the report's data to display.
- To generate the report, click the Generate button. The report will be downloaded to your computer as a CSV file unless the PDF option has been set up for the report.
- Open the file to view it.
- (optional) If this functionality is available to you and the original report, once the report is generated, the Subscribe button appears. This allows you want to schedule the generated report to be updated and emailed to you and/or other recipients on a daily, weekly or monthly basis. To add a subscription, click Subscribe. You will be taken to the Subscription screen. See Report Subscription help for details.

- If you did not select to subscribe (Step 9), click Close when you have finished with the 'Report Generator' facility.
| Multiexcerpt |
|---|
| hidden | true |
|---|
| MultiExcerptName | Additional Info |
|---|
|
| -- |
...
| Minimum Version Requirements |
| Multiexcerpt |
|---|
| MultiExcerptName | Minimum Version Requirements |
|---|
| 4.23 |
|
|---|
| Prerequisites | |
|---|
| Self Configurable |
| Multiexcerpt |
|---|
| MultiExcerptName | Self Configurable |
|---|
| No |
|
|---|
| Business Function |
| Multiexcerpt |
|---|
| MultiExcerptName | Business Function |
|---|
| Reporting |
|
|---|
| BPD Only? | |
|---|
| B2B/B2C/Both |
| Multiexcerpt |
|---|
| MultiExcerptName | B2B/B2C/Both |
|---|
| Both |
|
|---|
| Ballpark Hours From CV (if opting for CV to complete self config component) |
| Multiexcerpt |
|---|
| MultiExcerptName | Ballpark Hours From CV (if opting for CV to complete self config component) |
|---|
| Contact Commerce Vision |
|
|---|
| Ballpark Hours From CV (in addition to any self config required) |
| Multiexcerpt |
|---|
| MultiExcerptName | Ballpark Hours From CV (in addition to any self config required) |
|---|
| Contact Commerce Vision |
|
|---|
| Third Party Costs |
| Multiexcerpt |
|---|
| MultiExcerptName | Third Party Costs |
|---|
| n/a
|
|
|---|
| CMS Category |
| Multiexcerpt |
|---|
| MultiExcerptName | CMS Category |
|---|
| Reporting |
|
|---|
| Content by Label |
|---|
| showLabels | false |
|---|
| showSpace | false |
|---|
| excludeCurrent | true |
|---|
| cql | label = "reporting" |
|---|
|
...