...
- In the CMS, navigate to Products & Categories → Product Maintenance.
- Search for the required product and click Edit.
- At the bottom of the maintenance page, you'll find a section labelled 'Master Product'.

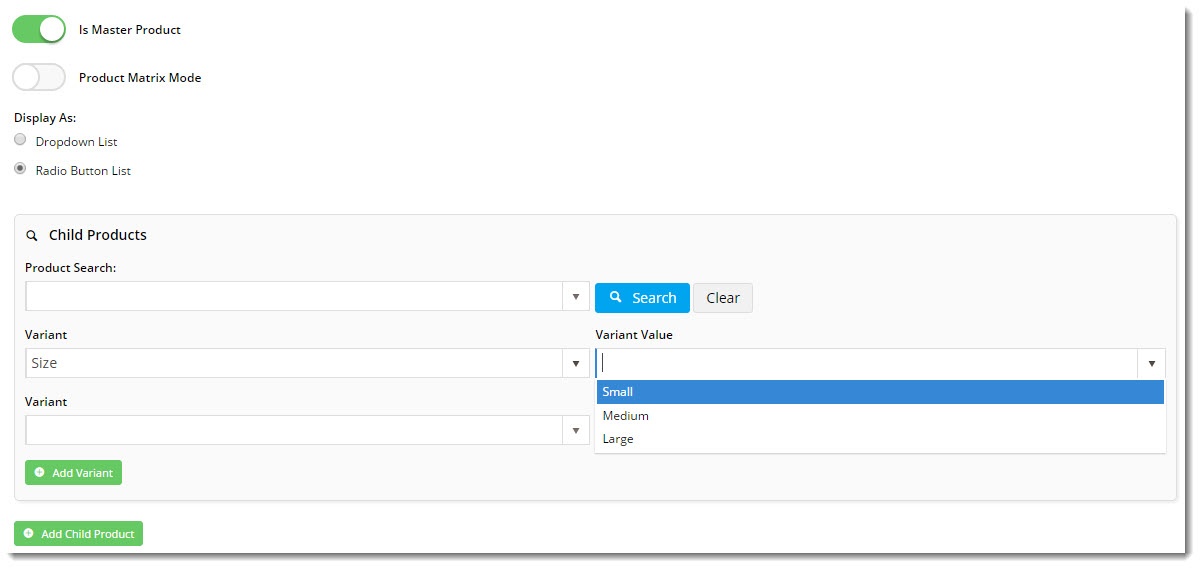
- Toggle 'On Is Master Product' on on. The Child Products section with additional maintenance fields will appear.
- To add the first child, either search for the product code to be used as the child SKU, or leave blank to use the master code for pricing. Note - you can only leave this blank if 'If Allow Display Type Override is enabled but Allow Display Type Override at Variant Value is disabled, the Display As dropdown appears. This allows the default variant values display mode to be overridden for just this product. NOTE - if Allow Display Type Override at Variant Value is enabled, the default display mode can be overridden for each variant when the first child product is added.
In the Child Products panel, add the Child Products. You can either link another product by searching and selecting it in the Product Search field, or leave this blank and just add Variant values. NOTE - if you're just using Variant values, the Master Product code will always be used for pricing and Allow Child Products As Note Line
' ismust be enabled in Feature Settings.
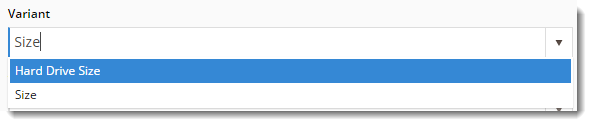
Enter the Variant name in the first Variant box. The dropdown list will be populated as you type, with data if these were added earlier (see section 2 above).
Select the correct option from the list, or simply enter a new one.
Next, enter the Variant Value in the corresponding box
Info
title The first Child Product The attributes of the first Child Product entered will determine how all other Child products have to be entered.
- If the first Child product is another product, then all other products must be a linked product and not just certain product variant values.
- All other Child products must follow the variants used for the first Child product.
- From the Variant dropdown, select the variant name.
- If Allow Display Type Override at Variant Value is enabled, then the Display As dropdown appears. This allows you to override the default display mode for this variant by selecting another mode if required.
- In Variant Value, select a value or type in a new one for this Child product. The dropdown list will be populated from with values in the lookup table and any there were those previously entered here.
- If there is another variant and value applicable to this productChild Product, enter it in the next line, repeating steps 7 -9.
- If there is a third variant dimension availablerequired, click the Add Variant button.
- Once all variants have been entered, click Add Child Product.
- If this child product If a Child Product is to be the default variant displayed in the Product List and Master Product Details pagespage, click 'select its Set as Default Child' to on button.
- REMEMBER - save to save any work done to the Master Product section. Click Save at the top of the maintenance page.


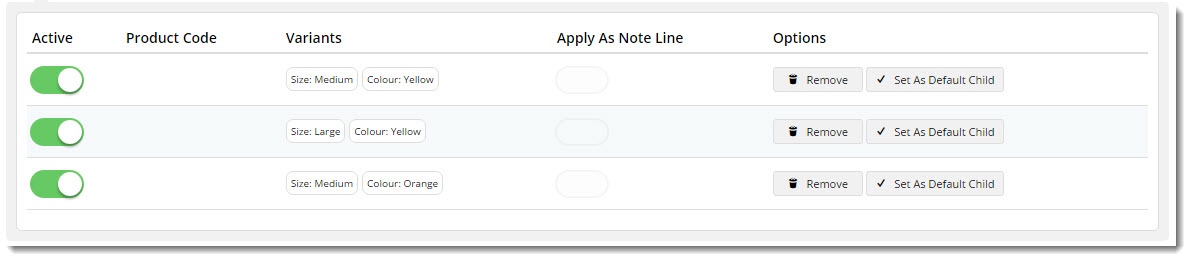
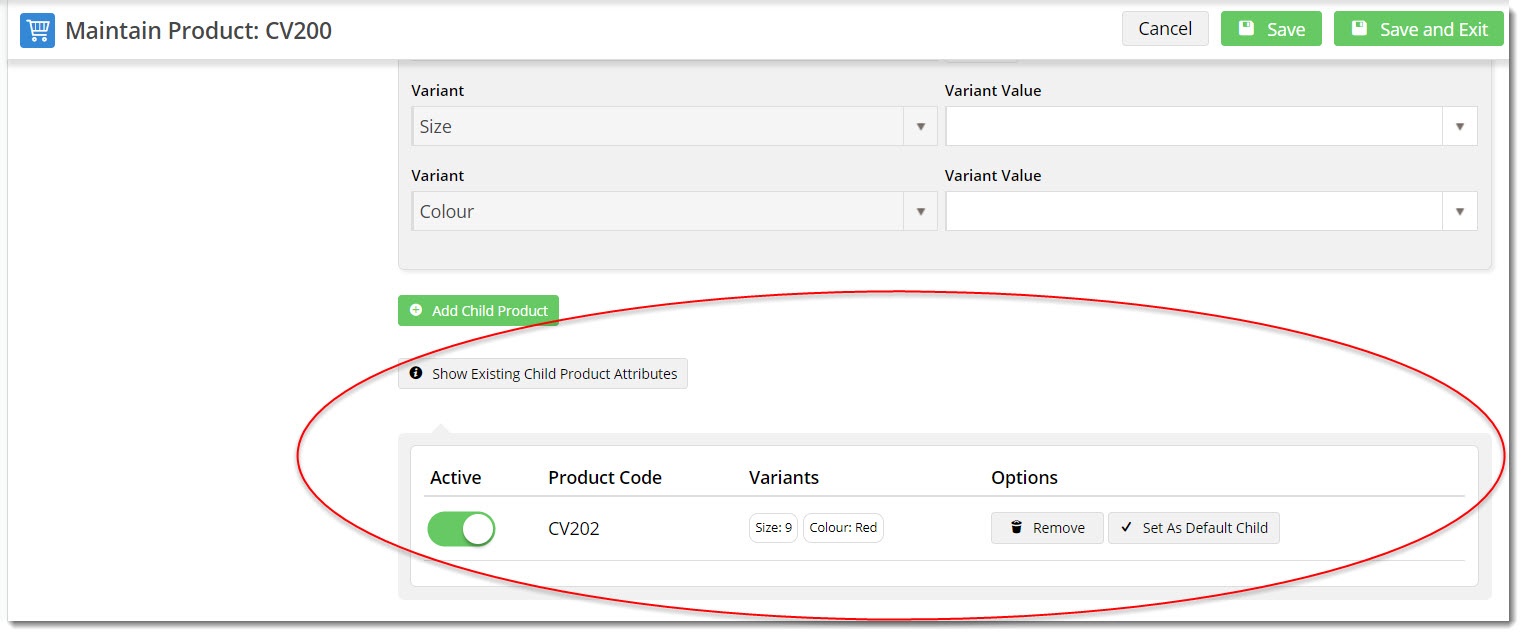
The child product(s) will now be listed below in 'Show Existing Child Product Attributes', along with options to make it active/inactive, remove it remove it or set it as the default child product.
| Info |
|---|
When a product is a child, a message appears on the top of its Product Maintenance page, to alert users that the product is a variant. Its Master product(s) are also listed. You can click on the Master Product name to access its Product Maintenance page.
|

...
Make a child product active/inactive
A child product can be marked 'inactive' but remain . This stops website users from seeing it but it remains saved as a child of the Master product. For example, a particular variant might become temporarily unavailable so you do not want your customers to see this variant for the time being.
- If you are already in the 'Master Product' section for the Master product, go to step 4 here. Otherwise, navigate to Products & Categories → Product Maintenance, find the master product Master Product and click Edit.
- Scroll down to the 'Master Product' section.
- Click 'Show Existing Child Product Attributes'.
- Toggle off 'OFF Active' for that child product. You can toggle this ON at any time to make the Child product 'Active' on again at any time.
- Click Save at the top of the page.
...
Remove a
...
Child product from a Master product
Removing a child Child product deletes it permanently as a variant of a from the Master product.
- If you are already in the 'Master Product' section for the Master product, go to step 4 here. Otherwise, navigate to Products & Categories → Product Maintenance, find the master product and click Edit.
- Scroll down to the 'Master Product' section.
- Click 'Show Existing Child Product Attributes'.
- Click Remove for the child Child product.
- Click Save at the top of the page.
...
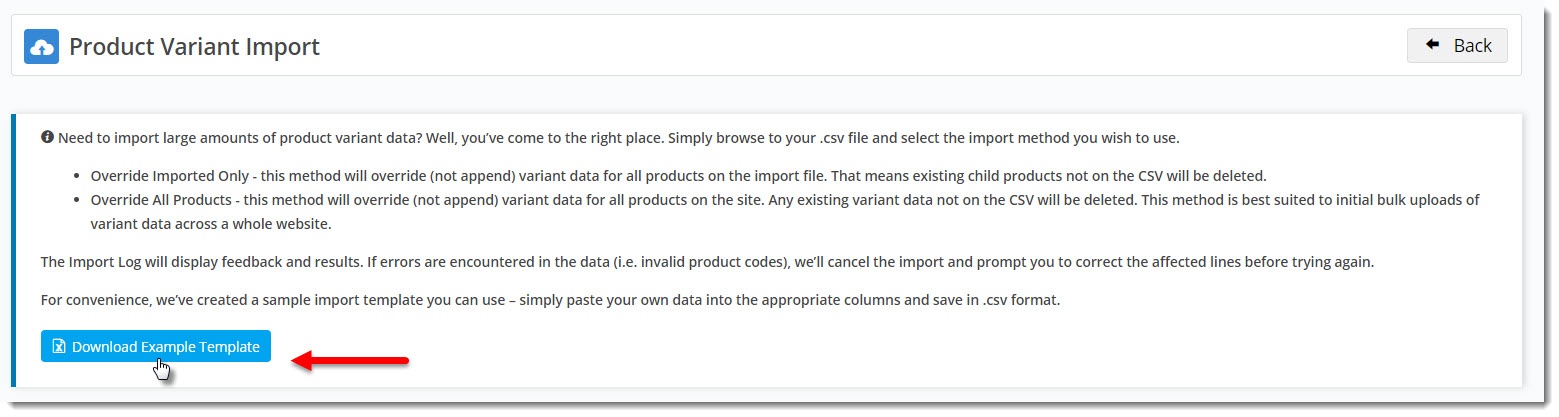
Import Product Variants
To perform a bulk upload of product variant variants data, you can use the import function.
- Navigate to Settings → Feature Settings and Edit the → Products & Categories.
- Click Configure the Product Variant feature.
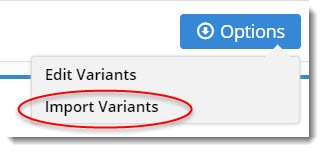
- Select Options → At the top of the page, hover over the Options button, then select Import Variants.
- If you If you would like a the CSV file template to work with, click Download Example Template. IMPORTANT - the columns included in the template will change depending on options selected in Feature Settings. Ensure the template used matches the Product Variant Settings.
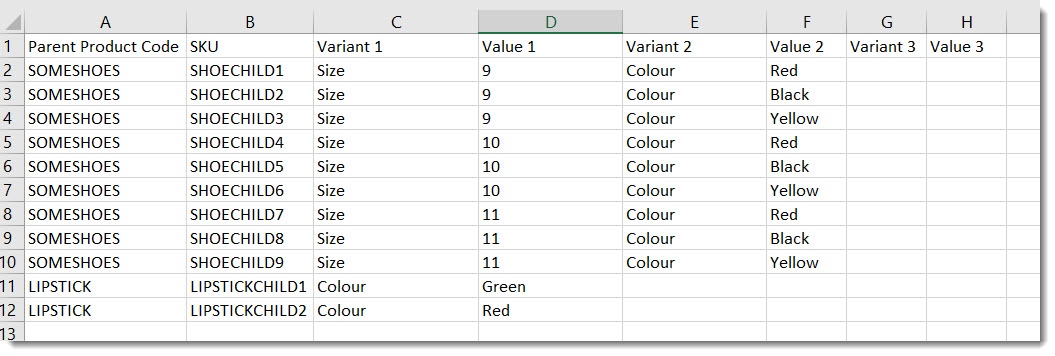
- Paste your data into the spreadsheet, re-entering the master product ('Parent Product Code') once for every variant combination available.
- Save the file somewhere locally as .csv format.
- Select your Import Type from the dropdown:
a. Override Imported Only - all master products in the spreadsheet will have their variant data replaced with what's in your spreadsheet. No other products will be affected.
b. Override All Products - the product data in in the spreadsheet will become the COMPLETE product variant data for your site. Current variants not in the spreadsheet will be deleted.- Click 'Select files...' to browse to your saved .csv file.
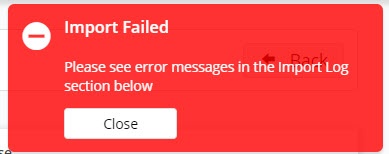
- The import will process and a notification will advise whether the import was successful. If errors occurred, fix the data and try again.
- To verify a successful import, navigate to Product Maintenance and search for one of the master products on your .csv file.
- Check the variant data to ensure it matches up with what you've just imported.

...