...
- Navigate to Settings → Payment & Checkout → Braintree Payment.
- If the Available in CMS toggle is not enabled, toggle it ON.
- Click Configure.
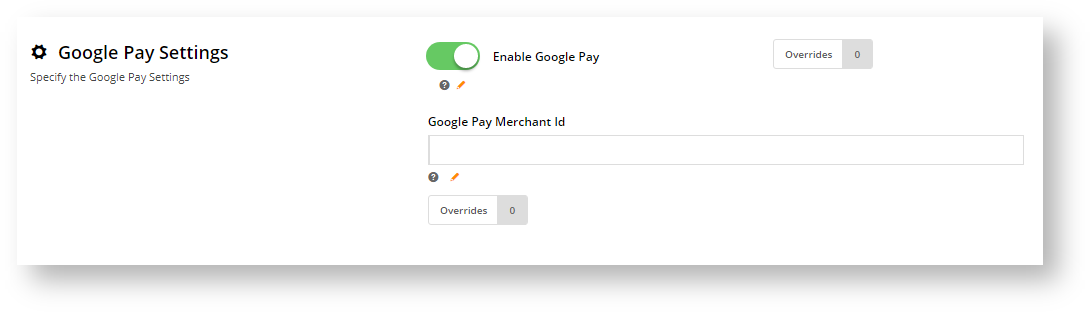
- Scroll down to Google Pay Settings.
- Toggle ON Enable Google Pay.
- In Google Pay Merchant ID, enter your Google Merchant ID from your Google Merchant Centre account. TIP - if you are testing in Sandbox, this can be left blank.
- To save your settings, click Save.
Info
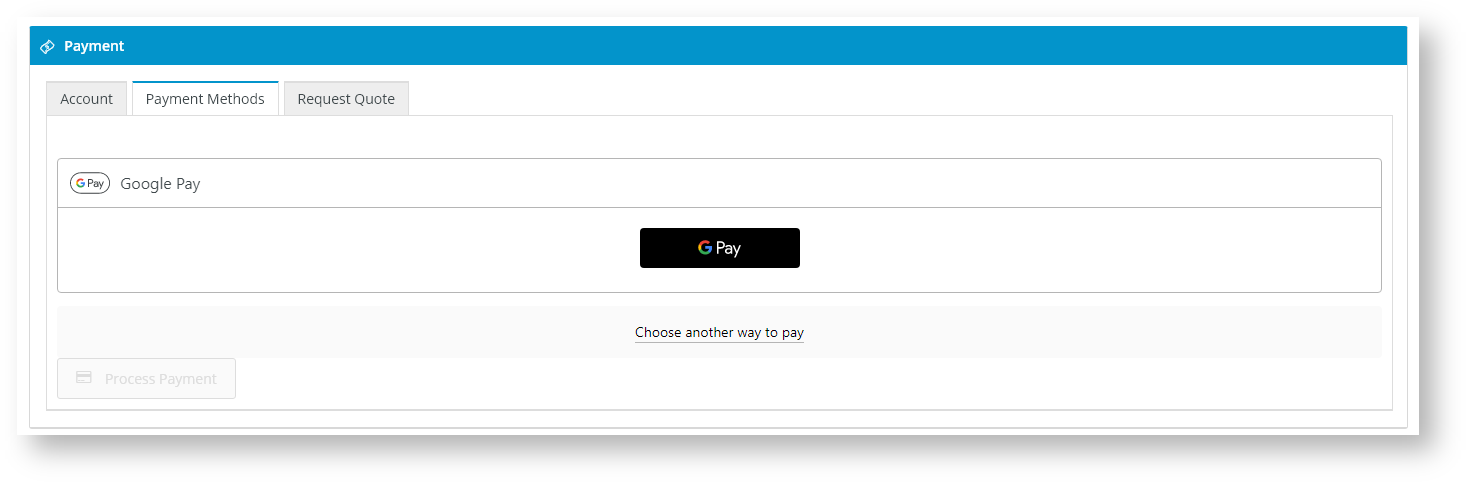
title When Google Pay is enabled on your site... In the Payments panel during checkout, 'Google Pay' displays as an option under Payment Methods.
The User clicks on Google Pay and a Google Pay button is displayed.
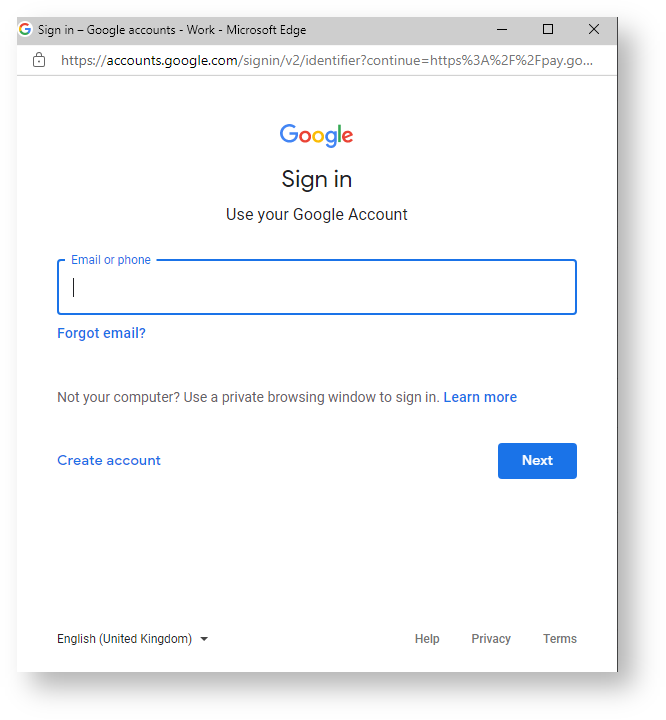
The User clicks the Google Pay button to login to their Google account.
Once logged in, the secure Google Pay popup is displayed. The User selects an existing payment option or enters a new credit card.
Once saved, the User is returned to the Payment panel on your website with the Google Pay option selected. The User clicks Process Payment to complete payment for the order.


Additional Information
| Multiexcerpt | ||||
|---|---|---|---|---|
| ||||
| Minimum Version Requirements |
| |||||
|---|---|---|---|---|---|---|
| Prerequisites |
| |||||
| Self Configurable |
| |||||
| Business Function |
| |||||
| BPD Only? |
| |||||
| B2B/B2C/Both |
| |||||
| Ballpark Hours From CV (if opting for CV to complete self config component) |
| |||||
| Ballpark Hours From CV (in addition to any self config required) |
| |||||
| Third Party Costs |
| |||||
| CMS Category |
|
Related help
| Content by Label | ||||||||
|---|---|---|---|---|---|---|---|---|
|
...