Using surcharges or token management?
The Commerce Vision platform's credit card surcharge facility and token management feature have been integrated into Braintree Payments. If Braintree Payments is enabled, it will be used for saving a Customer credit card. This tokenised card can be used for future payment of account invoices.
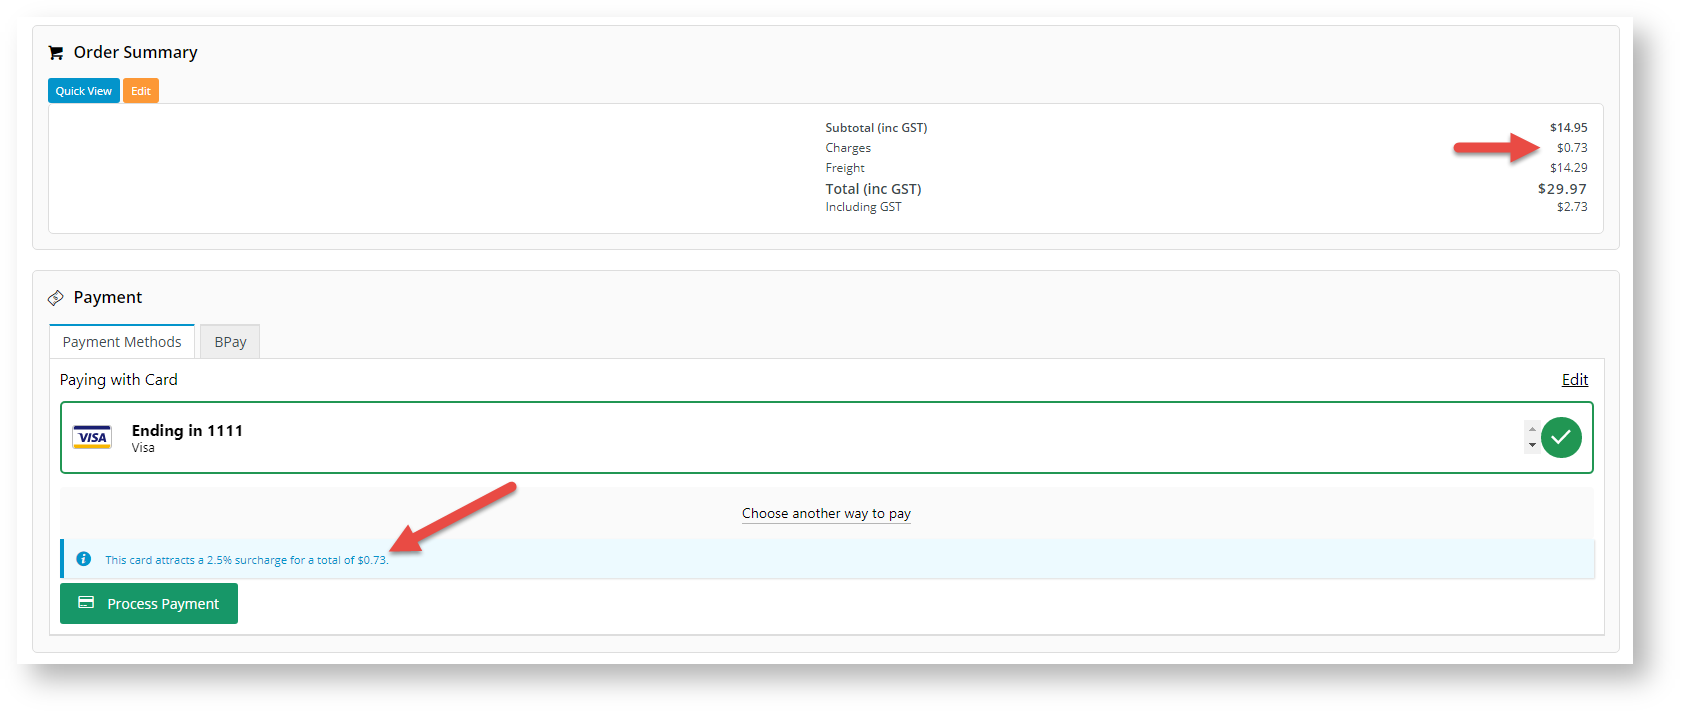
- If any surcharge applies to an order, it will automatically be calculated, displayed and added to the total during checkout.
Step by Step Guide
1. Configure General Settings
- You will need your Sandbox or Production credentials (API keys and Merchant ID) for this step. You can retrieve these from your Braintree Sandbox or Production accounts.
- If the Overrides option is displayed next to a setting, instead of being switched on and off for all users, it can be configured against specific Users, Roles or Customers.
To configure Braintree Payment Settings:
- Navigate to Settings → Payment & Checkout → Braintree Payment.
- If the Available in CMS toggle is not enabled, toggle it ON.
- Click Configure.
- In Braintree Payment Settings, configure General Settings.
- To enable Braintree for all Users on your site, toggle ON Enable Braintree Payment. TIP - Leave this global toggle off and add Role Overrides to only offer Braintree to specific roles, e.g., B2C customers.
- If your site will use Braintree Payments only for credit card and/or PayPal transactions, toggle on Show Braintree Payment Options Only. This will disable other credit card gateways and turn off the separate PayPal feature.
- Select the appropriate option from the Credit Card Capture Funds drop down list. The options are:
Option Meaning Authorise & Capture Take the payment as part of the process. i.e for account payments Authorise Only Authorise the payment but don't capture the funds for the payment yet Authorise Only & Integrate Authorise the payment, don't capture the funds for the payment yet AND on integration ALSO integrate the Authorisation Token Authorise & Token & Integrate Authorise the payment, don't capture the funds for the payment yet AND on integration ALSO integrate the Authorisation Token AND Customer Token Token & Integrate On integration integrate the Authorisation Token AND Customer Token Authorise & Token, then Integrate on Pick-Up Authorise the payment, don't capture the funds for the payment yet AND on integration ALSO integrate the Authorisation Token AND Customer Token, when item is picked up. Capture & Optional Token When an order is done using credit card with 'Remember Card Details' checked, susequent payments can also be done using the stored card details. In Mode, select 'Sandbox' if testing the Stage site, or 'Production' if the live site.
The sandbox is an entirely separate environment from your production account. Your sandbox login information, merchant ID, and API keys will be different. Nothing created in the Sandbox (e.g. processing options, recurring billing settings) will transfer to Production.
- Enter credentials for either 'Sandbox' or 'Production'. You will need the following from your Braintree account:
- Merchant ID - this is the default ID used to verify the account. If your business has several Merchant Account IDs and you want to specify one of them, enter it in the Merchant Account ID field instead of here.
- Public Key
- Private Key
- Merchant Account ID - leave blank if the 'Merchant ID' is to be used.To allow Users to delete a saved (vaulted) payment, toggle ON Allow Vault Management. When this setting is enabled, in the Payments panel during checkout, there is an Edit link on the top right side.
When the User clicks on Edit, the delete icon displays next to each payment. The User can click on it to remove the saved payment.
If the toggle is OFF, the Edit link is not displayed. To delete a vaulted payment, Users will need to contact your customer service and have the saved payment deleted in your Braintree account.- If the vaulted payment is to be preselected during checkout, toggle ON Preselect Vaulted Payment Method. The preselected payment is foregrounded and has a tick next to it. If this toggle is OFF, the last entered payment will be preselected.
If the nominated default payment option (set in the Braintree account) is to be displayed at the top of the list, toggle ON Show Default Payment Method First.
To flag as default
To make a payment option default, in your Braintree account, go to the Vault and find the User. Click on the payment option and click Edit. Tick the Default Payment Method for Customer? checkbox.
2. Configure payment options
The next step is to configure the payment options your site offers. Each one can be enabled or disabled at any time. Note that options enabled here must also be turned on in your Braintree account.
Your Braintree account will allow you to automatically offer credit card payments. To include PayPal, Google Pay or Apple Pay, your business must also have accounts with each respective provider.
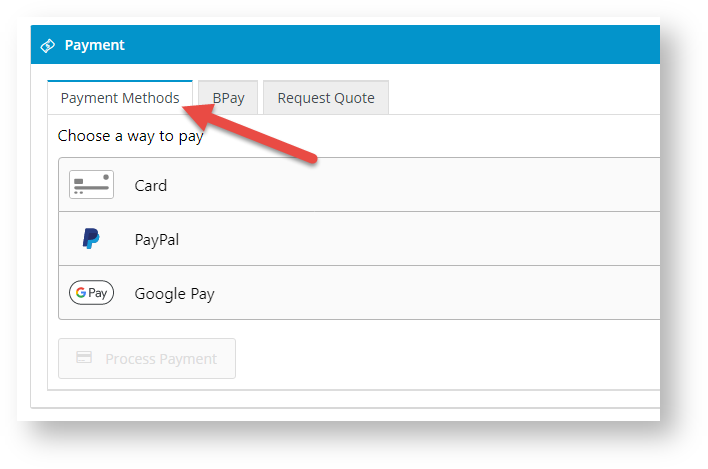
All enabled Braintree payment methods will display under a common Payment Methods tab during checkout. TIP - You can change the tab name 'Payment Methods' in the Checkout Payments Options Widget. PayPal Express and Pay in 4 buttons can also be added to the product and cart pages.
See the step-by-step guide for each payment method:
Credit Card Settings
Configure Braintree Credit Card Settings
PayPal Settings
Configure Braintree PayPal Settings
Google Pay Settings
Configure Braintree Google Pay Settings
Apple Pay Settings
3. Fraud Protection Settings for Order Payment
3DS2 is available for use with the Braintree payment gateway, but typically requires some coordination with Braintree to ensure your settlement bank leveraged by your Braintree account is set to Omnipay instead of NAB (default). If you're hoping to use 3DS2, reach out to Braintree and ensure your account's underlying settlement bank is set to Omnipay.
Braintree Payments has three fraud protection modes, and one must be selected. Information provided here is limited to setting up an option for your website. Details about fraud protection options are available from the Braintree website. (NOTE - Advanced and Kount are options that incur additional fees.) In addition, 3D Secure, which provides an extra layer of security by prompting a User to authenticate card ownership by entering a PIN, can be enabled.
- In Braintree Payment Settings, scroll down to the Fraud Protection Settings for Order Payment section.
- In Fraud Protection Mode, select Basic, Advanced or Kount. NOTE - The mode enabled her must be the same as the mode enabled in your Braintree account.
Basic - all fraud protection is handled by Braintree and no further configuration is required here.- (For 'Advanced' or 'Knout' only.) In Treat Decision 'Not Evaluated' As, select 'Review' or 'Approve'.
Review: the transaction with this status is treated as suspicious and put on hold subject to further verification
Approve: the transaction with this status is treated as a successful one and the order is released.- (For 'Knout' only.) In Treat Decision 'Escalate' As, select 'Review' or 'Approve'.
Review: the transaction with this status is treated as suspicious and put on hold subject to further verification
Approve: the transaction with this status is treated as a successful one and the order is releasedTo use 3D Secure, toggle ON Enable 3D Secure. NOTE - This feature adds another layer of security for payments that use credit cards, including Google Pay. It is applicable only to cardholders who have enrolled in 3D Secure with their issuer.
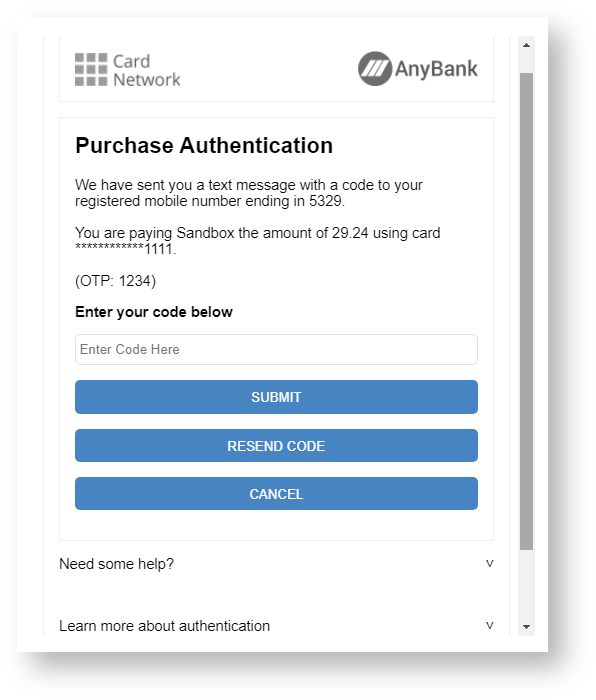
Example of 3D Secure popup:
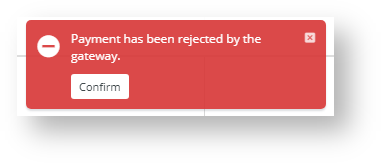
If the credit card payment passes 3D Secure, the order will be completed. If the payment is rejected by 3D Secure, the User will see a 'Rejected by Gateway' popup error message on your site:
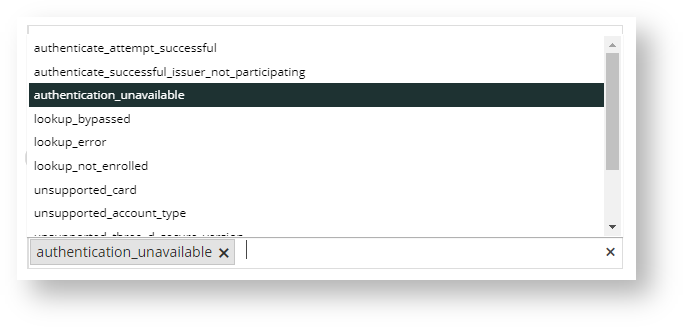
This status is also recorded in the Braintree account.- (For use with 3D Secure only). The 3D Secure Review Status List provides all 3D Secure statuses that will not reject the order if 3D is not required. it allows you to put such orders on hold for further verification. For instance, 'authenticate_attempt_successful' means that the card brand passed the attempt because the issuer's authentication server was unavailable. You can add one or more such statuses. NOTE - For a list of what each of the statuses mean, refer to the Braintree website.
Click on the list, then click to select all required statuses. These statuses will populate the field.
For cards that cannot be authenticated and the status is on this list, payment will not be processed and the User will see this message:
Additional Information
| Minimum Version Requirements |
|
|---|---|
| Prerequisites |
|
| Self Configurable |
|
| Business Function |
|
| BPD Only? |
|
| B2B/B2C/Both |
|
| Third Party Costs |
|
Related help
