This guide shows you how to implement this functionality on your own BPD website.
Step-by-step guide
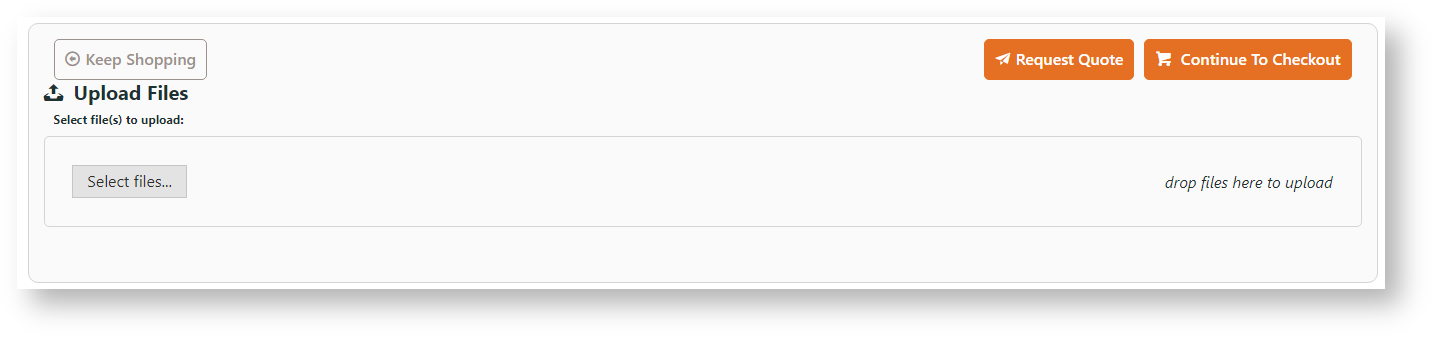
Add upload document facility in Cart
First, add the widget to the Cart template:
- In the CMS, navigate to Content → Pages & Templates → Checkout.
- Select the Cart template.
- Locate where you want the Upload Files facility to be in the layout and click 'Add Widget'.
- Search for Order Documents and click 'Add Widget'.
- Edit the widget to customise document file types accepted. See: Order Documents Widget.
- Click Save.
- Refresh your shopping cart in another browser (or incognito window) to verify the File Uploader now displays.

Next, add the Order Documents Widget to the Order Lines Information template. This will determined if the document is included in the Order Placed email as well as the user's Order History.
- In the CMS, navigate to Content → Pages & Templates → Checkout.
- Find the Order Lines Info template.
- Click Add Widget.
- Search for Order Documents and click Add Widget.
- Edit the widget to customise options. See: Order Documents Widget.
- Click Save.
- The link to the user's document will now appear on the Order Placed email, as well as in the user's Order History when the order details are being viewed.


Add upload payment document for order submission
First, add the widget to the Checkout template:
- In the CMS, navigate to Content → Pages & Templates → Checkout.
- Select the Checkout template.
- Locate the Checkout Payment Options Widget. In the same zone, click Add Widget.
- Search for Order Documents and click Add Widget.
- Edit the widget to customise document file types accepted. See: Order Documents Widget.
- Move the Order Documents Widget so that it is above the Checkout Payment Options Widget.

Next, edit the Checkout Payment Options Widget.
- Click Edit for the Checkout Payment Options Widget.
- Click the Order Documents tab.
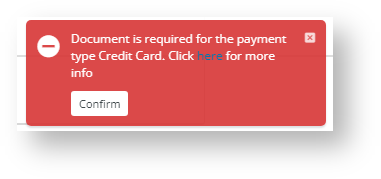
- In Payment Types Requiring Order Documents, add each payment type a document must be uploaded for order submission.
- To display a message to alert the user a document is required, toggle ON Display Order Document Message.
- If required, edit the Order Document Message. This message displays in the alert to the user that a document must be uploaded, and on the warning message when a customer tries to submit an order without an uploaded document. NOTE - The default message contains a placeholder for the payment type.
- Click Save.

Additional Information
| Minimum Version Requirements |
|
|---|---|
| Prerequisites |
|
| Self Configurable |
|
| Business Function |
|
| BPD Only? |
|
| B2B/B2C/Both |
|
| Third Party Costs |
|
Related help