FAQ
Customer Experience
NOTE - Order tracking is available to a user only if enabled at the user's Role level. The functionality is generally enabled for B2B customers but can be made available to any user group.
(1) Your customer accesses Order Tracking on the Dashboard menu when logged in. The menu item is usually called 'Track Orders' or 'Order History' but can be different depending on what your business wants to label it.
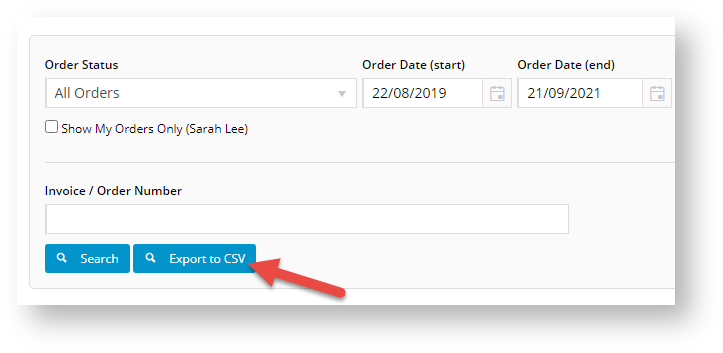
(2) The user can search for a specific order by entering the invoice number or enter a search criteria to find one or more matching orders.
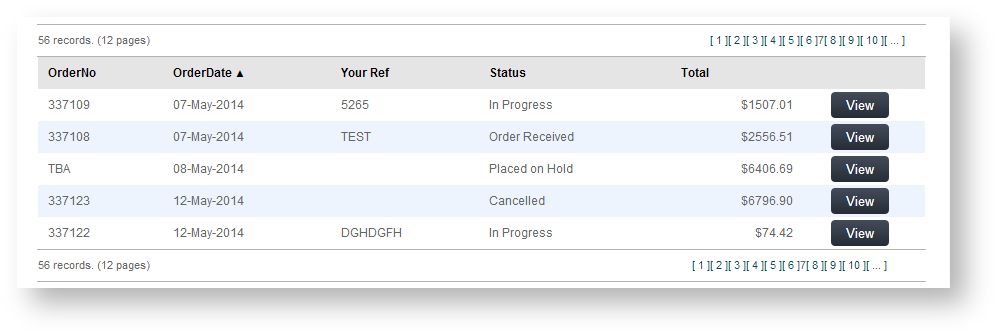
(3) All found orders are listed, each with basic details such as current order status, order date, and order total. (Display options are edited in the Track Order Widget.)
Add Export to CSV
If you want to allow your customers to download search results to a CSV file, in the Track Order Widget, enable the Show Export to CSV toggle. .
The user can click View to see an order's details. If the order has been completed, the Invoice Reprint button will be available.
In the order details page, the user can view the order, copy items to their cart and print the order.
For Customer accounts with Approvals enabled
If an Advanced Order Approver by User and Account option with re-assign approver has been set up for a Customer account, the user will be able to re-assign to another available approver in Order Tracking. The log of actions relating to the approval, e.g., approver changed, approval time stamp, are also displayed.
Orders pending approval can be searched for in Order Tracking.
- In the Order Status field, select 'Orders Requiring Approval'.
- Enter any start/end dates to limit the search.
- Click Search.
- Click View for any found 'pending order'.
- In the Approval Status panel, you can re-assign the approver if there is another valid approver.
Step-by-step guide
Enable Order Tracking
NOTE - Order Tracking is usually already added and enabled by Commerce Vision for your site. However, if the page has been removed and you want to re-add, here is how to do it.
To enable Order Tracking:
- Login to your website as an Administrator.
- Navigate to Content → Menu Editor (/zMenus.aspx).
- Select the required Menu Code.
- Click Parent Items.
- Select the required Menu Item Code.
- Click Menu Items.
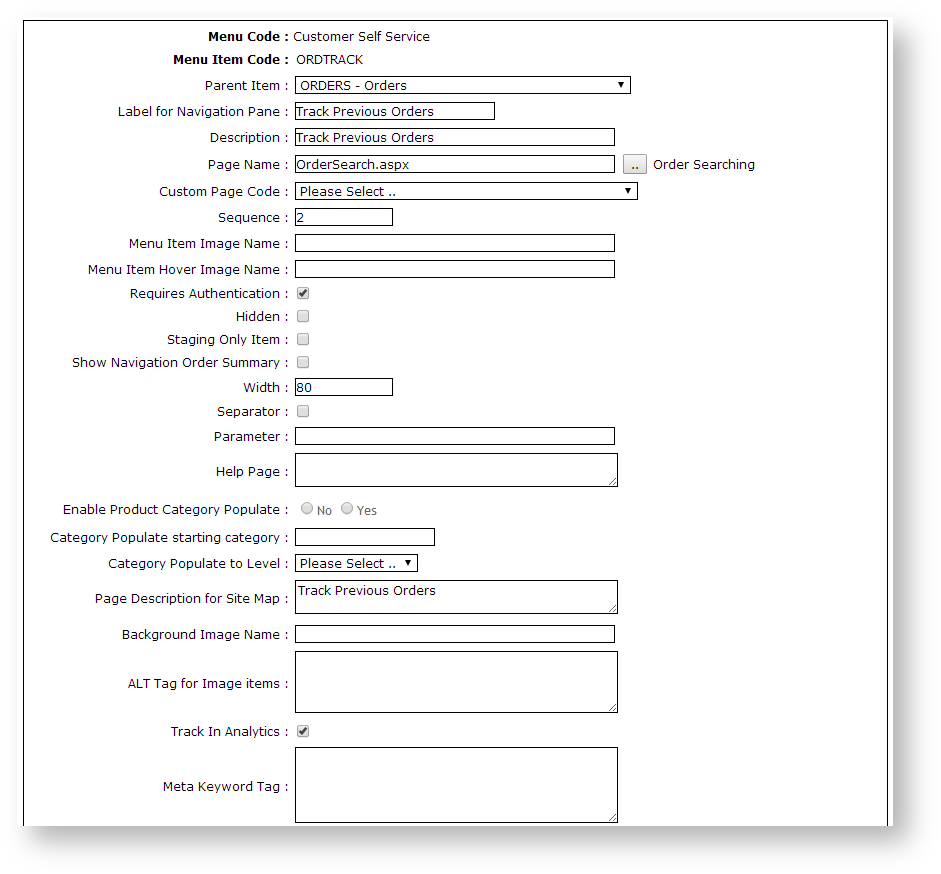
- Add OrderSearch.aspx as a new menu item. See Adding a new menu item for further details.
- Enter the label name and details for the menu item as well as where it will be located in the User's navigation menu. The label usually used is 'Order Tracking' or 'Order History'.
Update Order Tracking Settings
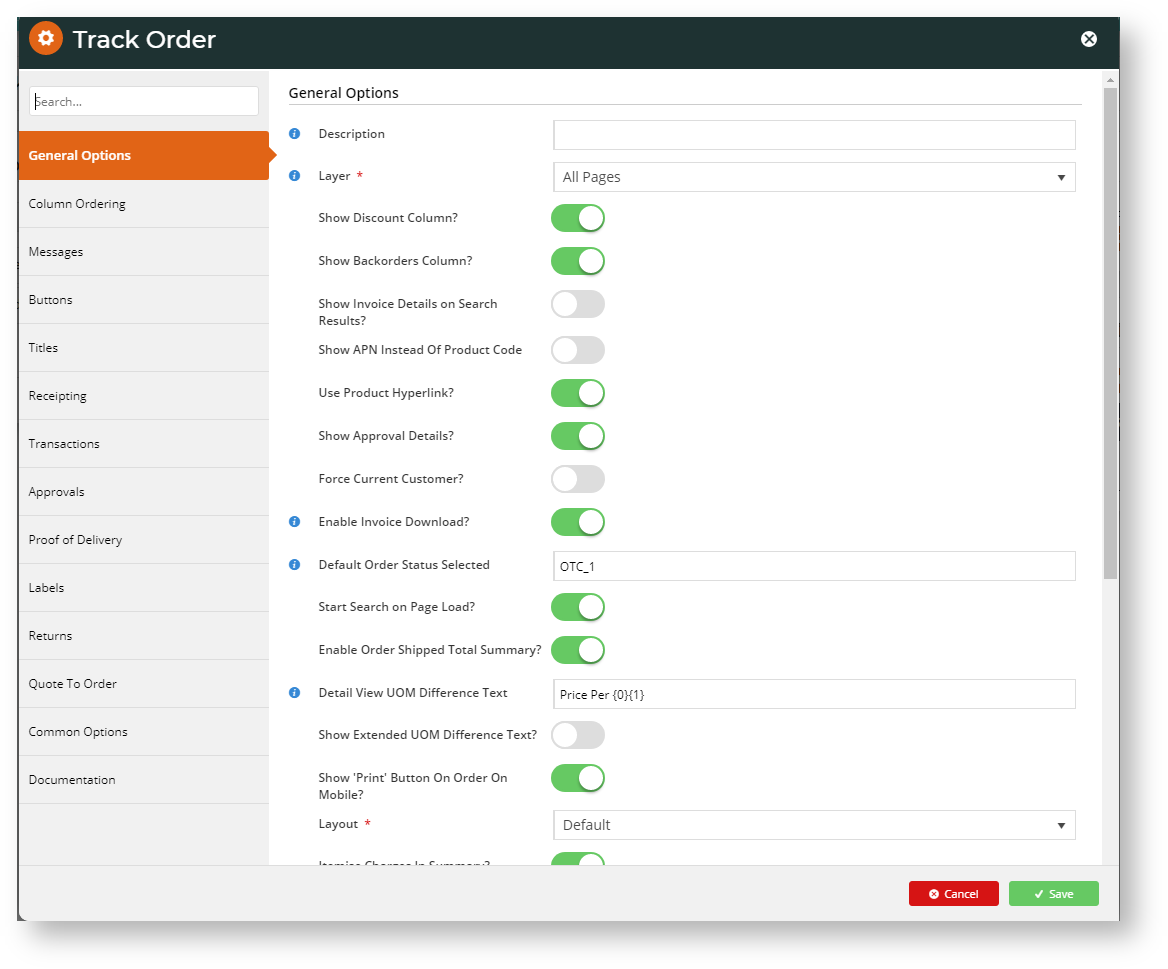
Options and settings for the Order Tracking page are configured in the Track Order Widget. Enable and disable settings and functions, edit texts for labels, buttons and fields for:
- Search order tool
- search results display (via columns)
- order details page
To edit the Track Order Widget:
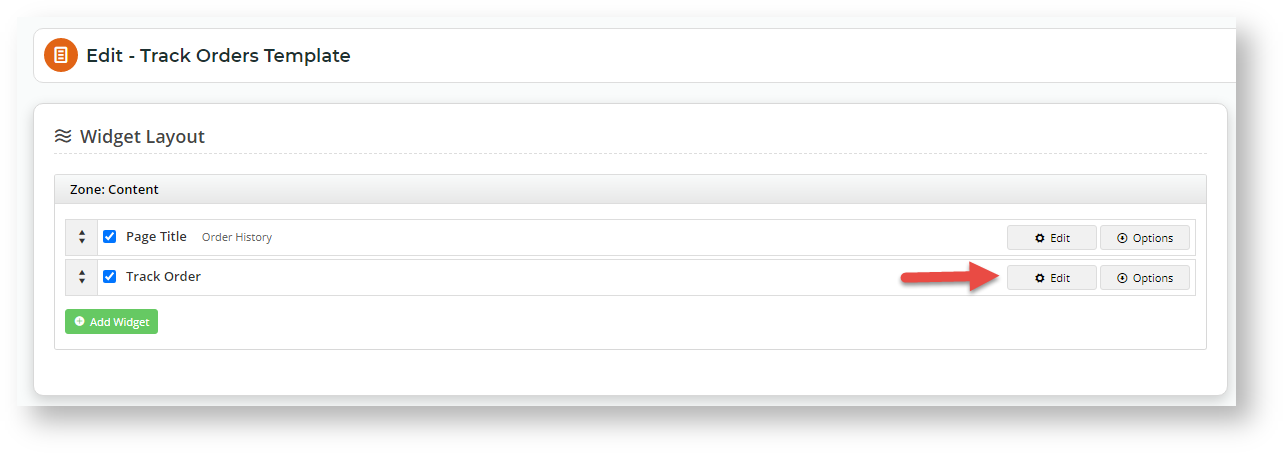
- In the CMS, go to Content → Pages & Templates.
- Use the Search tool to find the 'Track Orders' template.
- Click Edit.
- Find the Track Order Widget and click Edit.
Edit the settings as required. See: Track Order Widget. (NOTE - Some options have minimum version requirements.)
Additional Information
With order tracking enabled, it's possible to customise the order status descriptions that users see. Refer to How to customise Order Status descriptions for further information.Order status descriptions and search filter options can be customised.
| Minimum Version Requirements |
|
|---|---|
| Prerequisites |
|
| Self Configurable |
|
| Business Function |
|
| BPD Only? |
|
| B2B/B2C/Both |
|
| Third Party Costs | n/a |
Related help


