Our search facility improvements will now display richer results and allow customers more control over the sorting of those results.
How does it work?
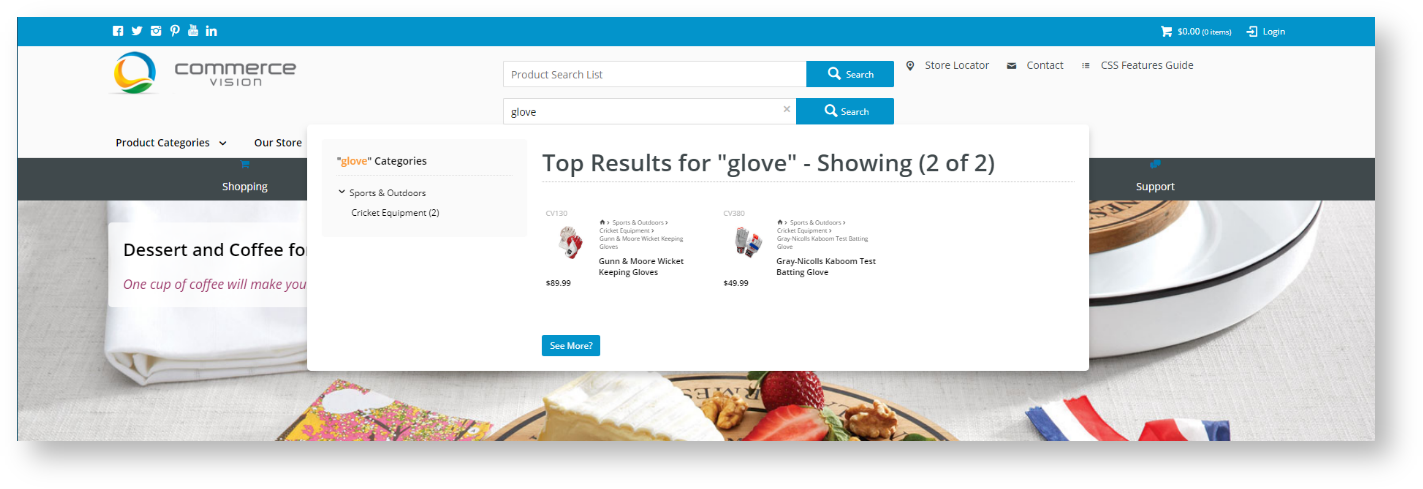
As the customer types in their text into the Search field, rather than seeing a simple drop-down list of product names, the enhanced search aids in their discovery by displaying additional rich content such as product images, titles, and codes (configurable in CMS). You can restrict the number of products that show in the results drop-down window, and if the customer does not see what they need in that list, then they can press Enter or click "View All" to go to the Search Results page where they can see more comprehensive results and filter on category and manufacturer.
Step-by-step guide
Open CMS
Navigate to Content → Pages & Templates

3. Click on Theme Layout
4. Select Theme Layout to Edit
5. Locate the Product Search widget in your Theme Layout Template. In our example, it is in Zone: HeaderColumn2.
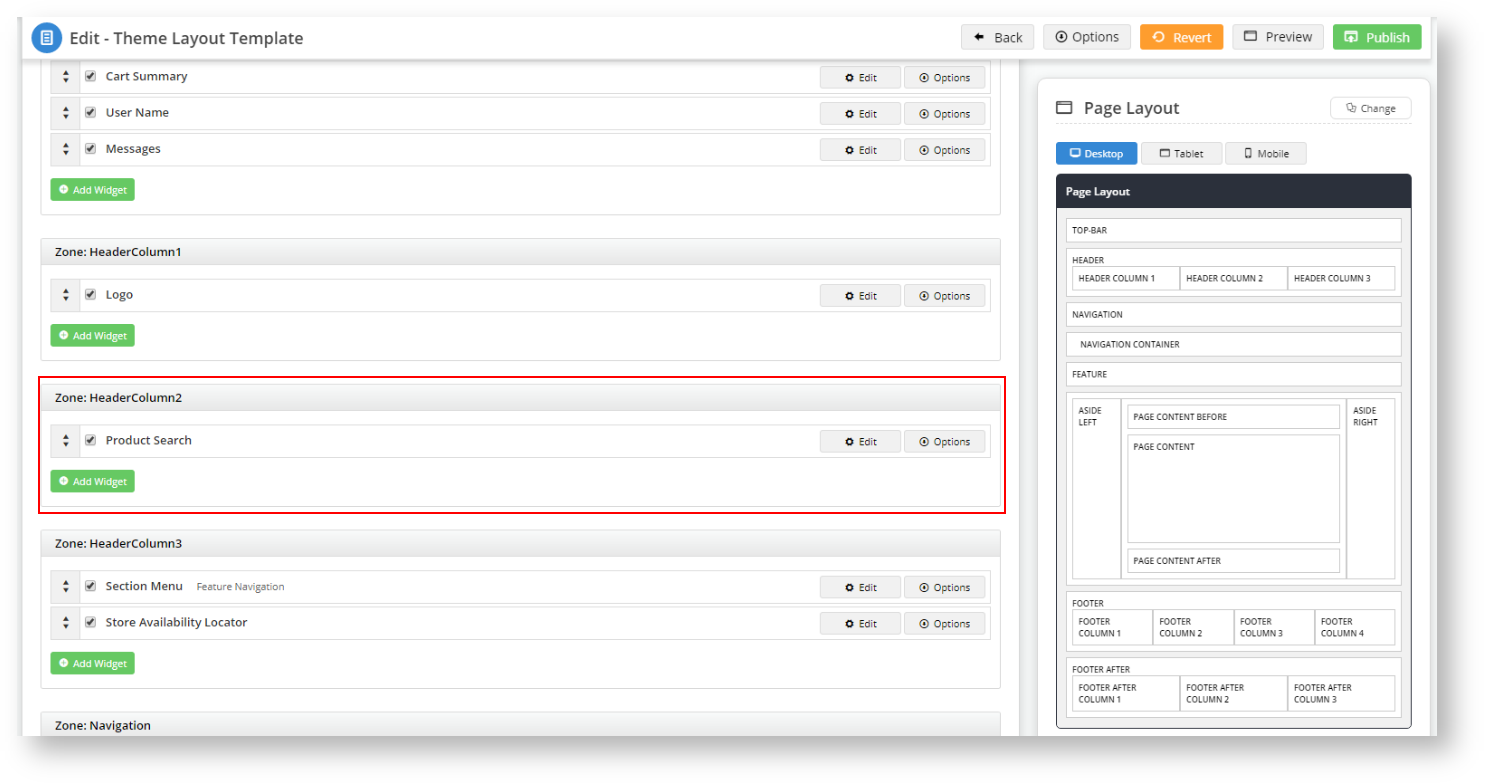
6. Let's add the Search with Preview widget to the same zone as the Product Search widget by clicking on
7. From the pop-up window, search for the Product Search with Preview widget. Make sure it is highlighted, then click

8. In the widget window, you can change the Search Placeholder text to display a meaningful prompt, so your customers know what to expect when they start typing in text. In this example, our prompt is “Product Search with Preview”.
9. You can also change the number of products the search facility will display as your customer is typing in their text by changing the Number of products to display. The default (and maximum) is 9.

10. Click Save to add the new Product Search with Preview widget to your theme layout.
11. Effect the change to your CSS by clicking
at the top-right of the page.
12. Navigate to Content → Pages & Templates → Products.
13. Verify that you have Product Search with Preview List Item Template and Product Search with Preview Template in the list.
14. Click on Product Search with Preview Template. You should see four widgets in the layout:
- Product Search with Preview Product Category List
- Product Search with Preview List Title
- Product Search with Preview List Grid
- Product Search with Preview Show All Button.
You can customise the search return message in the first three widgets by clicking their title or their respective Edit button.
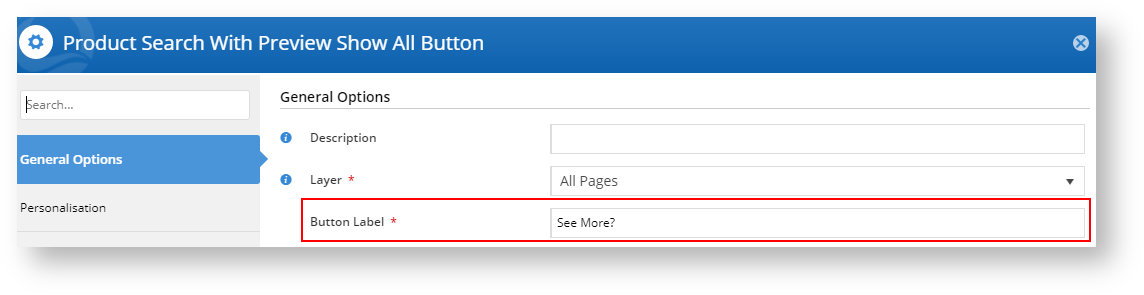
15. You can customise the message that the system displays when it lists product results as the customer is typing text into the search field; the default is View All. In our example, we will use See More?
16. Effect the change to your CSS by clicking
17. Navigate back to the Content → Pages & Templates → Products page.
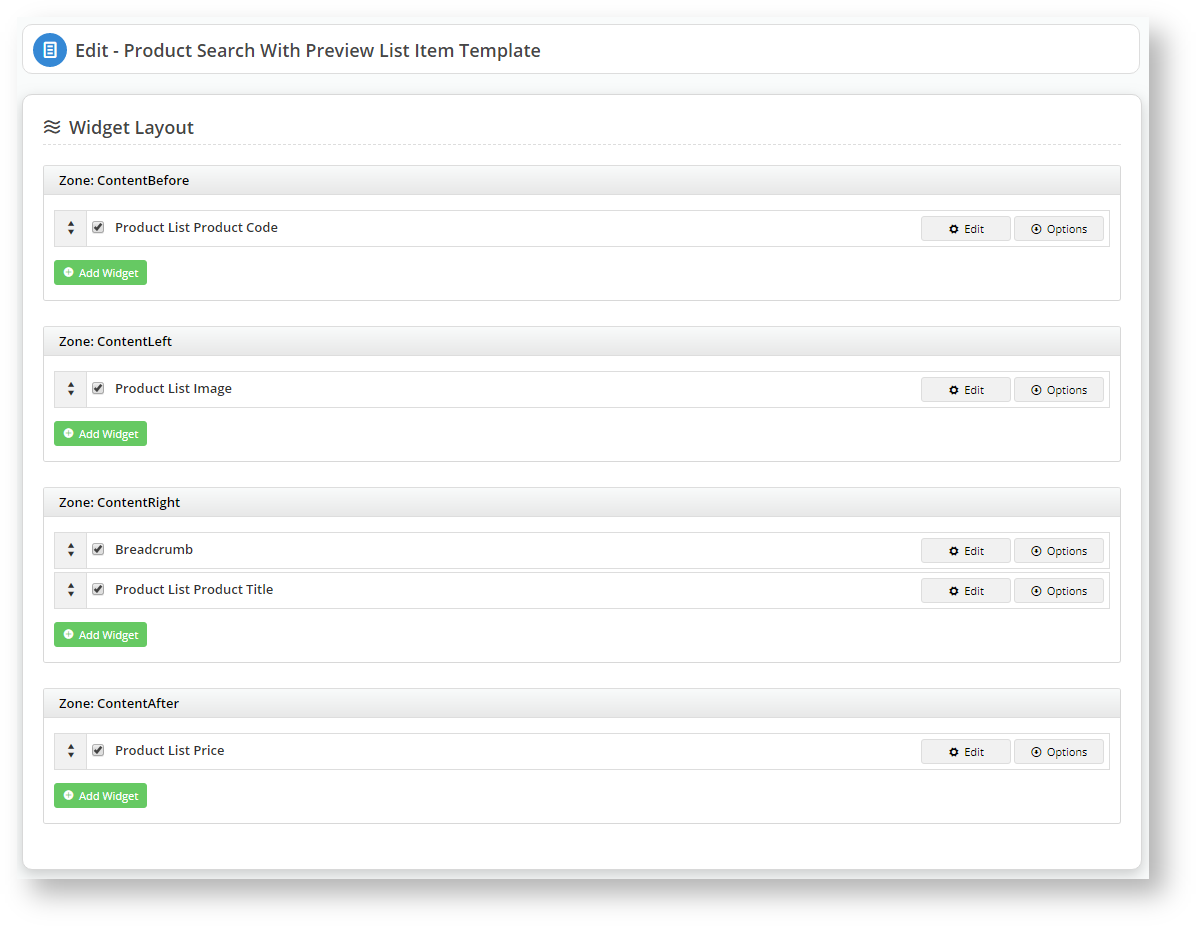
18. Let's review the Product Search with Preview List Item Template content and customise if required.
19. No option in the Product Search with Preview List Item Template widget layout list requires changing to facilitate the new product search with preview functionality.
However, you may want to tailor messages or button prompts to match your brand’s voice and tone.20. Effect the change to your CSS by clicking
21. Go to your website and verify that the Product Search with Preview and Filtering functionality works as expected:
a. You should see your Product Search with Preview button underneath your Product Search prompt.
b. You don't have to have both search facilities implemented; choose which one you and your customers prefer.
c. In the Product List search (we have ours configured to only show the product name), type in a search text, such as “glove”, and note the results' list.
d. Type the same term, glove, into the new Product Search with Preview field, and note the difference in the returned search results.
e. Press ENTER or click your prompt
in our example, and the system will take you to the Search Results page.
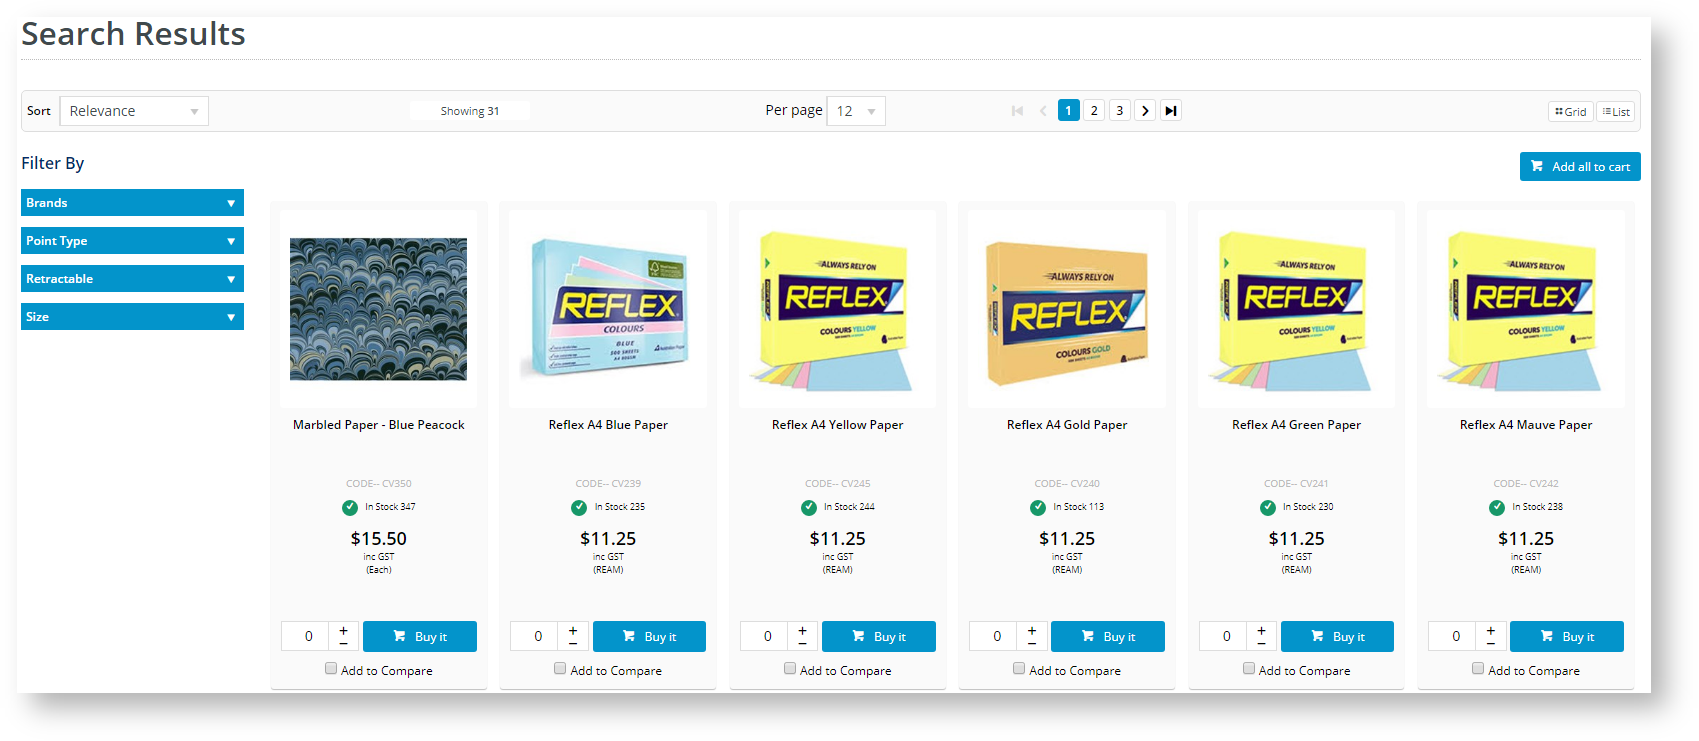
f. Click the Filter By button and review the Brands by which you can filter your search results. Do the same with categories if you classify your products by category.
g. The previous views were in Grid mode. Click List to view in List mode.
h. You can also sort your search results by Relevance or (reverse-) alphabetically by brand, description, or product-code.
22. If you view Search Results in List mode, note that the next Product Search With Preview search will display the results in the drop down in LIST format rather than GRID.
a. Type a search term into the Product Search With Preview search box
b. Click the "View All" prompt and press Enter to view all the search results.
c. When the results come up, click List to display the results in List view


d. Now return to the Product Search With Preview search box and type in a new search term. The resultant drop down list is in List view.

23. Experiment with the customisation parameters under each of the Product Search with Preview widgets covered in this knowledge base to see what works best for your site.
Additional Information
| Minimum Version Requirements | 4.13.00 |
|---|---|
| Prerequisites | -- |
| Self Configurable | Yes |
| Business Function | Searching |
| BPD Only? | Yes |
| B2B/B2C/Both | Both |
| Ballpark Hours From CV (if opting for CV to complete self config component) | Contact CV Support |
| Ballpark Hours From CV (in addition to any self config required) | Contact CV Support |
| Third Party Costs | n/a |
| CMS Category | Pages & Templates |
Related articles