Customer User Budgets allow admin staff to set up and maintain budget limits against individual Customer users for a defined period. It is useful for those Customers who may want to allocate an amount per Customer user for the purchase of certain items on your site, e.g., uniforms. User budgets override any default Customer level budget settings that may have been configured. A user will not be able to submit an order if the amount will breach their allocated budget in the set period or their budget period has expired.
Step-by-step guide
1. Enable and Configure Customer Budgets for Users
- In the CMS, navigate to Settings → Feature Management → Payment & Checkout.
- Toggle on Customer Budgets, then click Configure.
- In the 'Customer Budgets Management Settings' screen, toggle on Enable Customer Budgets.
- Toggle on Enable Customer Budgets for User.
- If you want a Customer user with no individual budget limit set to default to an unlimited budget, toggle on Treat Undefined Budget Amount as Unlimited Budget. If this toggle is off, any Customer level budget set will serve as the limit for undefined users on this Customer account.
- To save your configurations, click Save or Save & Exit.

2. Set and Maintain User Budgets
Once Customer User Budgets is enabled, budget limits can be set against users (against their email addresses) on the Customer account. There are two ways of doing this: (i) set a budget for a single user in their Edit User screen, and (ii) bulk import budgets for multiple users.
i. Set a Budget for a single user
To manually set a budget for one user,
- Navigate to Users → Website Users.
- Use the User Search tool to find a particular user.
- Click Edit for the User.
- In the Customer Details section, click the Budget button for the Customer Account you want to add the budget limit to. (Note - there may only be one Customer account.)

- In the 'User Budget Management' popup, enter budget limit details. Budgets are set to a period defined here. Once the period has finished, the system will reset the budget (until it is deleted).
Budget Amount: Allocated budget amount for the period
Used Budget: (Display field only.) Amount from the set budget used up in the period is automatically calculated from online orders made by the user.
Budget Period: select from the dropdown list
Budget Period End Date: End date for the first period. The Budget will be reset after this date. check
Notification Email: User's email address if budget notification emails ('budget remaining' and 'budget expiring soon') are to be scheduled
Warning Email Frequency: How frequently 'budget expiring soon' emails are to be sent- To save this budget, click the Update Budget button.

ii. Bulk Import (and Export) User Budgets
To use the bulk import function to set budgets for multiple users, a valid CSV file must be prepared first.

- The first row should contain the field headers that are required:
CustomerCode, EmailAddress, BudgetAmount, BudgetPeriod, BudgetPeriodEndDate, NotificationEmailAddress, EmailFrequency - Email Address: % can be entered?
- BudgetPeriod and EmailFrequency fields have special codes that must be used:
BudgetPeriod: Y=Annually, HY=Biannually, M=Monthly, Q=Quarterly, F=Fortnightly, W=Weekly
EmailFrequency: Y=Annually, HY=Biannually, M=Monthly, Q=Quarterly, F=Fortnightly, W=Weekly, D=Daily
BudgetPeriodEndDate format: mm/dd/yy
Looking for a copy of the CSV file?
The template CSV file is available for download in the 'User Import Function' screen (see below).
To set or update budgets for multiple users,
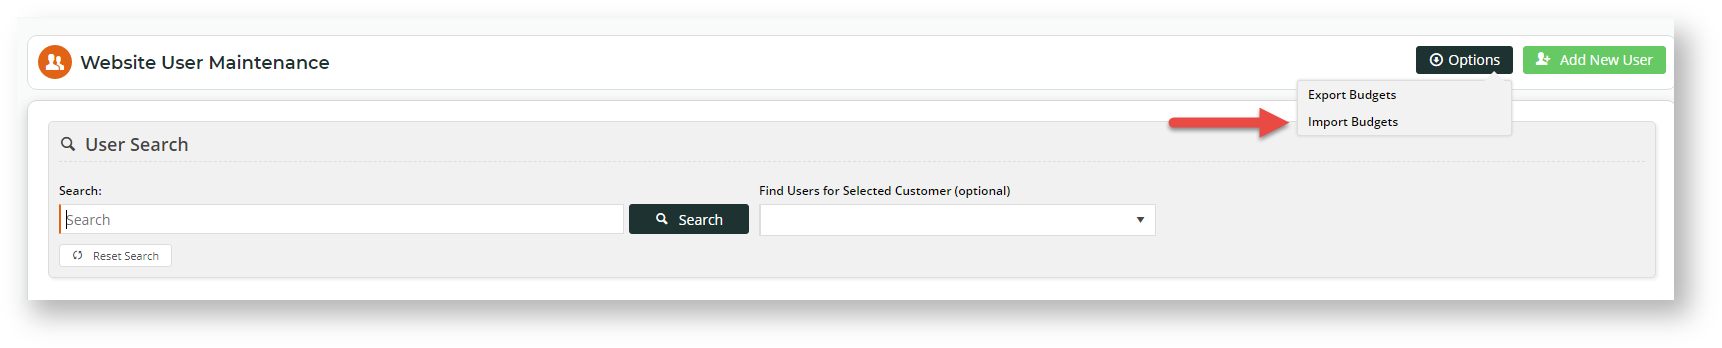
- Navigate to Users → Website Users.
- Hover over Options at the top right corner of the screen to display the 'Export' and 'Import' budget functions. retest
- To access the 'User Import Function' screen, click Import Budgets.
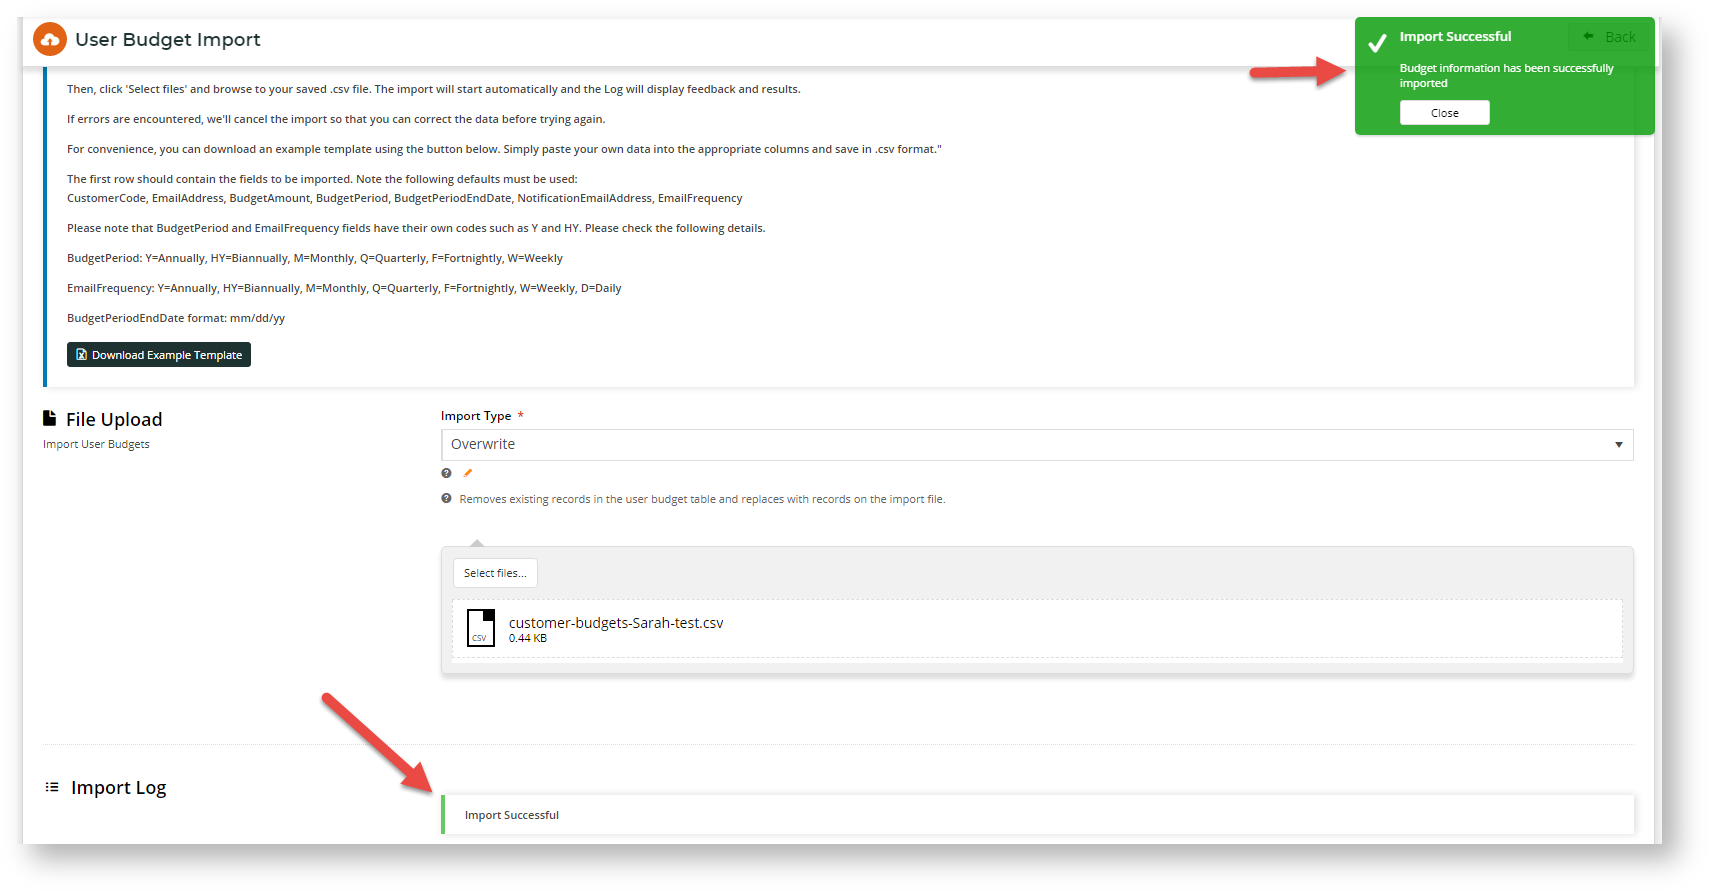
- In the File Upload section, for Import Type, select either Append or Overwrite.
Append: only users with no existing budgets will be added
Overwrite: adds budgets to users that do not have budgets set up and overwrites any pre-existing budgets- Click Select Files and upload the prepared CSV file. The system will automatically import the file.
- If there is an error notification message 'Import Failed', check the Import Log for specific issues with the upload. Otherwise, you will see the 'Import Successful' message.

3. Delete a User Budget
- Navigate to Users → Website Users.
- Use the User Search tool to find a particular user.
- Click Edit for the user.
- In the Customer Details section, click the Budget button for the Customer Account you want to add the budget limit to. (Note - there may only be one Customer account.)
- In the 'User Budget Management' popup, click the Delete Budget button at the bottom. Budget details will be deleted from the fields and you will see a popup message confirming success.

4. Schedule Budget Notification Emails to Users
Budget Remaining and Budget Expiry emails can be scheduled to be sent periodically to users. The default Budget Remaining email provides information about the user's budget details, for instance, the amounts used and remaining. What is included in the message can be customised in the Budget Remaining Message widget.
The default Budget Expiry Warning email alerts the user that their budget period is expiring soon, and includes details about the amounts used and remaining. What is included in the message can be customised in the Budget Expiry Warning widget.
Scheduling notification emails are website functions available to the administrator. If your site already has Customer Budget Emails scheduled, the users will receive budget notifications. If not, you can set it up.
To schedule Budget notification emails,
- Login to your website.
- Go to Settings → Scheduler Maintenance.
- Select New.
- In the
Related help