Schedule to publish a single widget
To schedule the publishing of one widget:
Go to the template with the widget, make changes to the widget, and save.
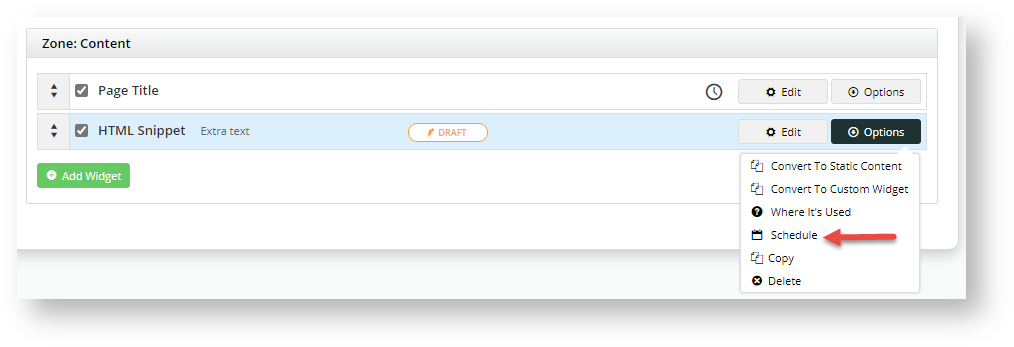
Hover over Options, then select Schedule.
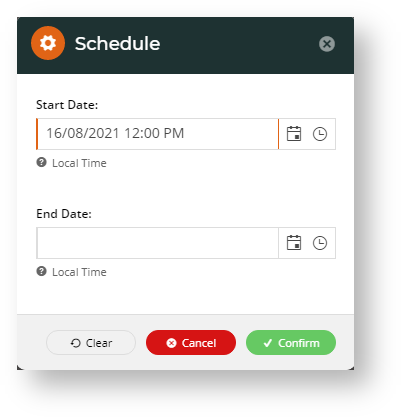
- In the Schedule popup, define the period changes are effective from and end (if applicable). Enter the start publish date/time, or end date/time, or both.
- Click Confirm.
- The widget's Schedule icon is either green ('active') or red ('inactive'). Active - changes are active on website as current date/time is in the period defined. Inactive - changes are not live on website as current date/time is outside defined period. NOTE - If no end date/time is set, published status depends on whether the current date/time is before or after the start date/time set. If no start date/time is set, published status depends on whether the current date/time is before or after the end date/time.

Schedule to publish all draft widgets on a page
Page Preview needs to be switched on for your site.
In Page Preview mode, you can also schedule all widgets on the page to publish in one go. NOTE - If this is a new page on your website and you schedule all widgets to publish at a later date/time, the page will be live but display no content until then.
To schedule the publishing of all draft widgets on a page:
In the template, make changes to all widgets as needed and save the changes.
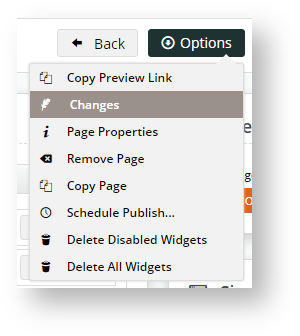
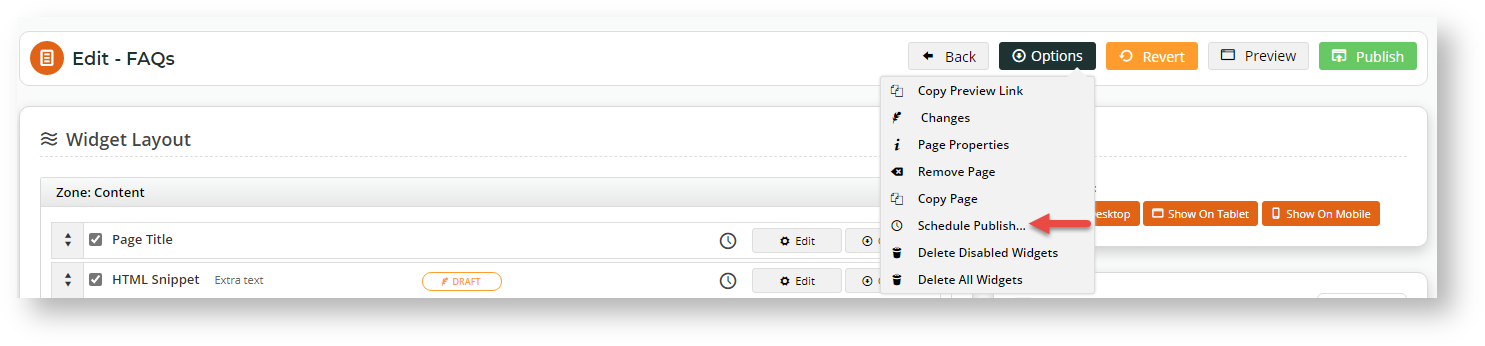
To see a summary of changes for this page, scroll to the top of the page, hover over Options and select Changes.
To schedule publishing of all widgets, on the top of the page, hover over Options, then select Schedule Publishing....
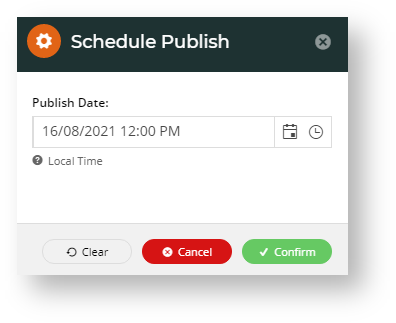
- In the Schedule Publish popup, enter the date and time using the calendar and clock icons.
- To save the schedule, click Confirm.
- Notice the Schedule icon on the top right corner of the page.

That's it! The changes made to the widgets will now go live on the date and time set. No further action needed.
Cancel a scheduled publish
To cancel a scheduled publish,
- Hover over Options and select Schedule.
- In the Schedule popup, click Clear.
- ,Click Confirm.
Additional Information
Scheduling can be coordinated with the Page Preview feature.
| Minimum Version Requirements |
|
|---|---|
| Prerequisites |
|
| Self Configurable |
|
| Business Function |
|
| BPD Only? |
|
| B2B/B2C/Both |
|
| Third Party Costs |
|
Related help